Deployment iSCAPE Station V1
Components
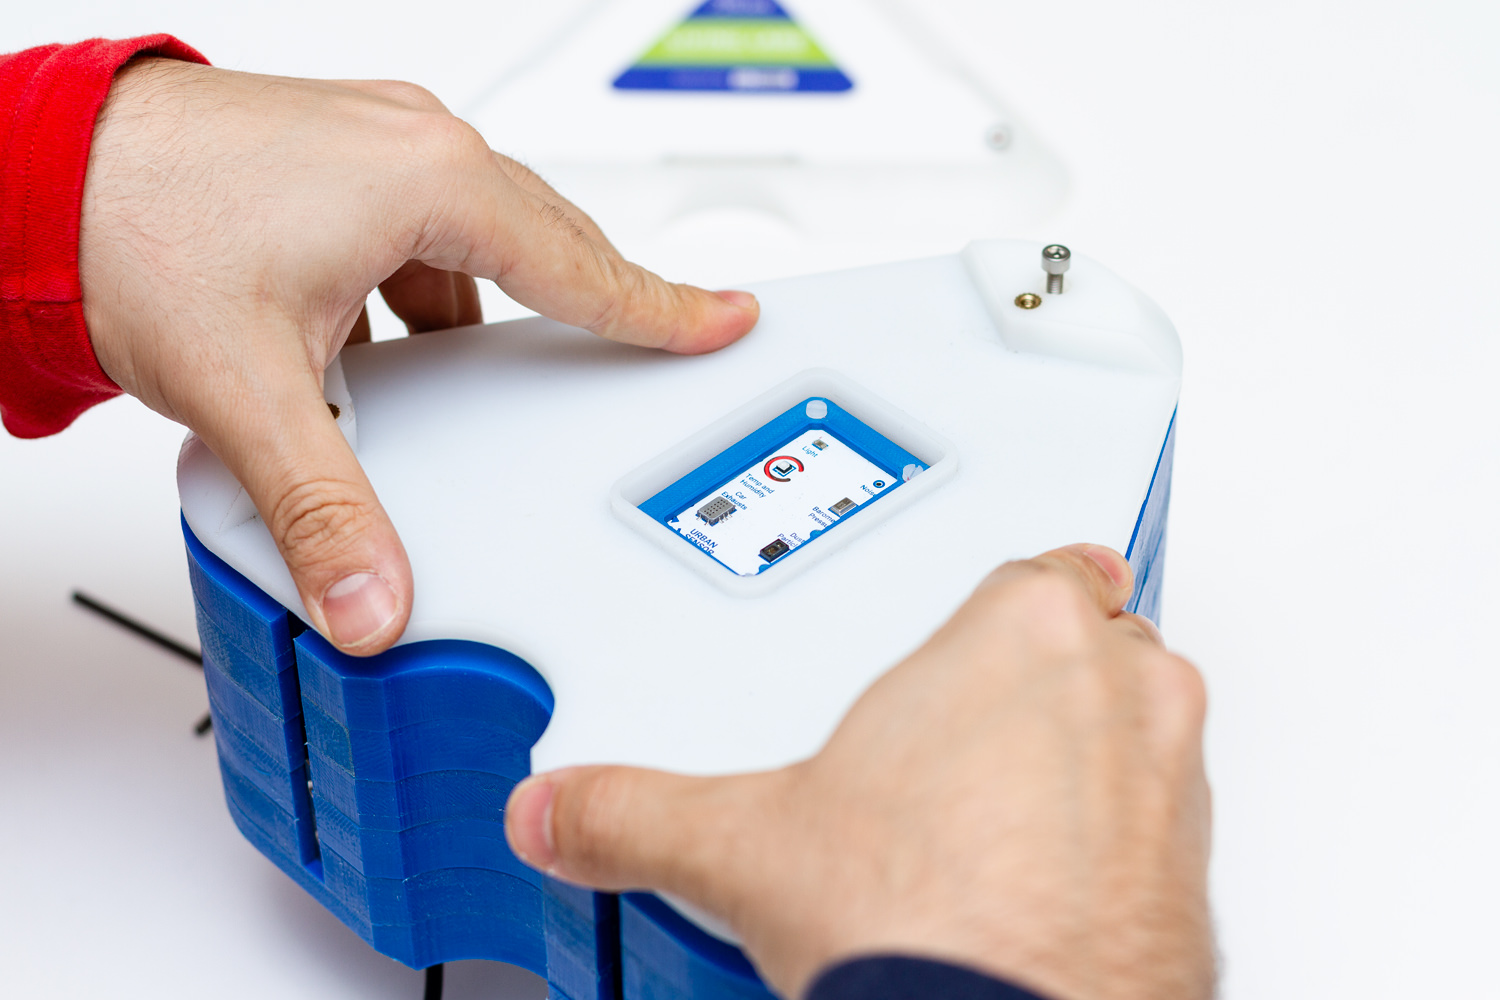
The Station is a modular system based on different sensor board that connected to a central datalogger.

Smart Citizen Stations Components Setup


Sensors
| Measurement | Units | Sensor | Component |
|---|---|---|---|
| Air Temperature | ºC | Sensirion SHT-31 | Urban Sensor Board |
| Relative Humidity | % REL | Sensirion SHT-31 | Urban Sensor Board |
| Noise Level | dBA | Invensense ICS-434342 | Urban Sensor Board |
| Ambient Light | Lux | Rohm BH1721FVC | Urban Sensor Board |
| Barometric pressure and AMSL | Pa and Meters | NXP MPL3115A26 | Urban Sensor Board |
| Carbon Monoxide | ppm | Alphasense CO-B4 | Gas Sensor Pro Board |
| Nitrogen Dioxide | ppb | Alphasense NO2-B43F | Gas Sensor Pro Board |
| Ozone | ppb | Alphasense OX-B431 | Gas Sensor Pro Board |
| Gases Board Temperature | ºC | Sensirion SHT-31 | Gas Sensor Pro Board |
| Gases Board Rel. Humidity | % REL | Sensirion SHT-31 | Gas Sensor Pro Board |
| PM 1 | µg/m3 | Plantower PMS5003 Dual System | PM Sensors Board |
| PM 2.5 | µg/m3 | Plantower PMS5003 Dual System | PM Sensors Board |
| PM 10 | µg/m3 | Plantower PMS5003 Dual System | PM Sensors Board |
The Pack

-
iSCAPE Living Lab Station
- Urban Board 2.0
- Data Board 2.0
- PM Board 2.0 + 2 PM sensors
- Gas Pro Board 2.0 with 3 EC sensors
- 6Ah Battery
-
Accessories
- MicroSD card 512MB
- USB Charger
- MicroSD to SD card adapter
- USB Power Supply
- 2m 3 Wire 220V cable
- Mounting brackets and screws
- Mounting tools (1x Wrench + 2 Allen Keys)
Instructions
Before setup
Before configuring the Station setup make sure the LED is red. If not, press the button multiple times until the LED turns red.

On boarding
To start the installation simply visit the setup website stations.iscape.smartcitizen.me.

Warning
 We will need you to send us the following information once you are done with the setup: the device ID, which appears in the URL of your device https://smartcitizen.me/kits/XXXX and the physical station ID that corresponds to that device ID, which can be found in a sticker underneath.

Get data from the SD card
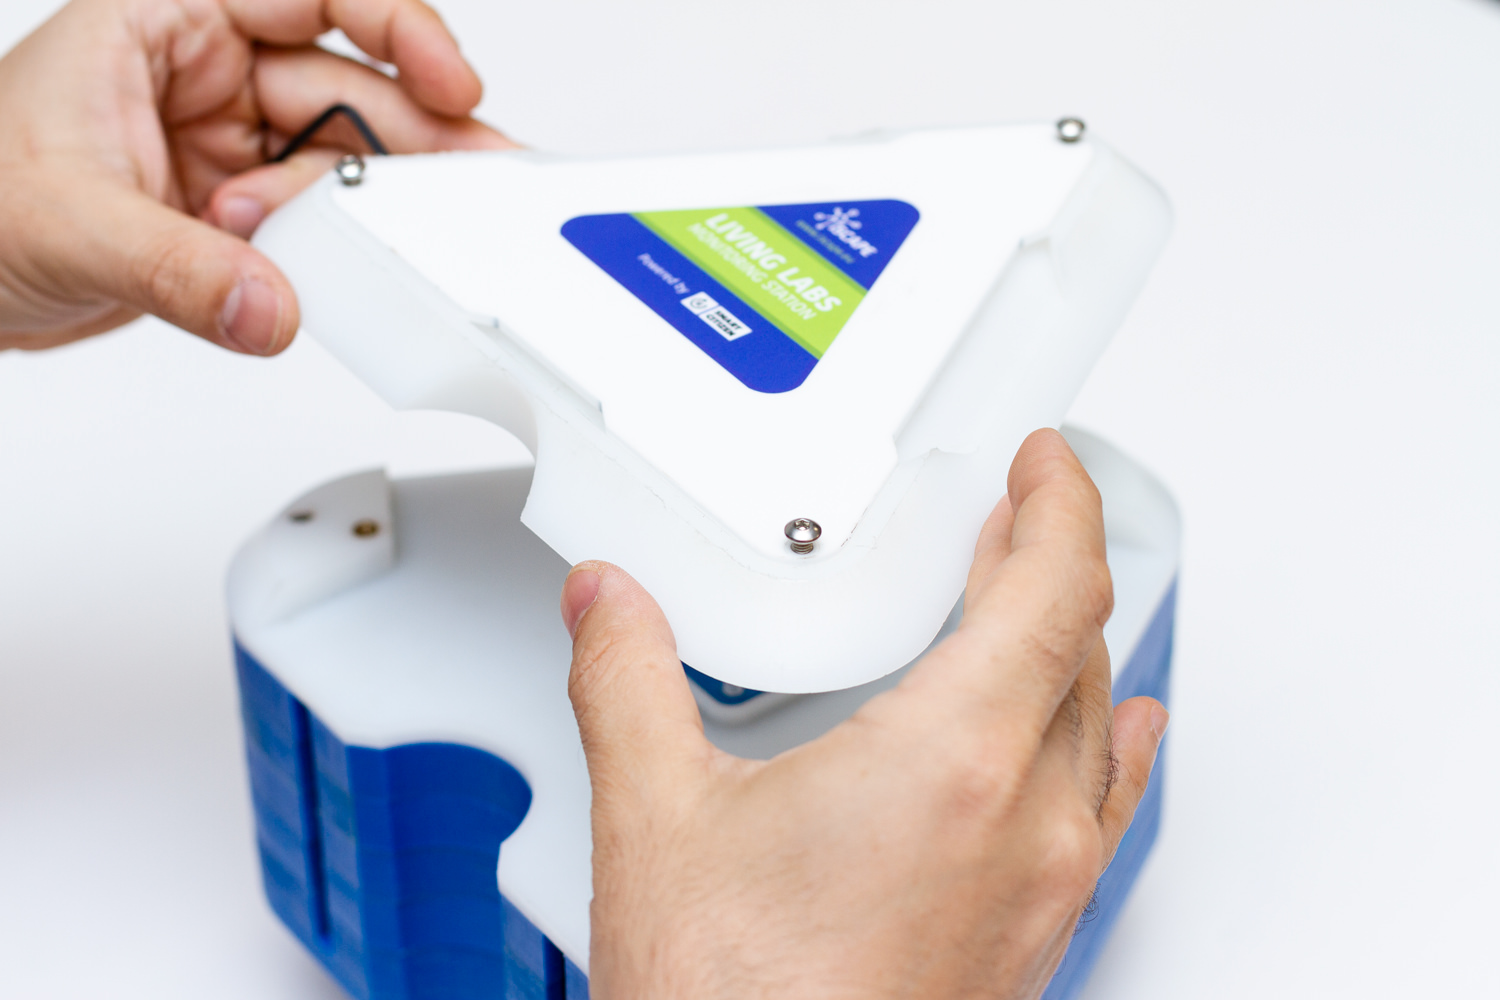
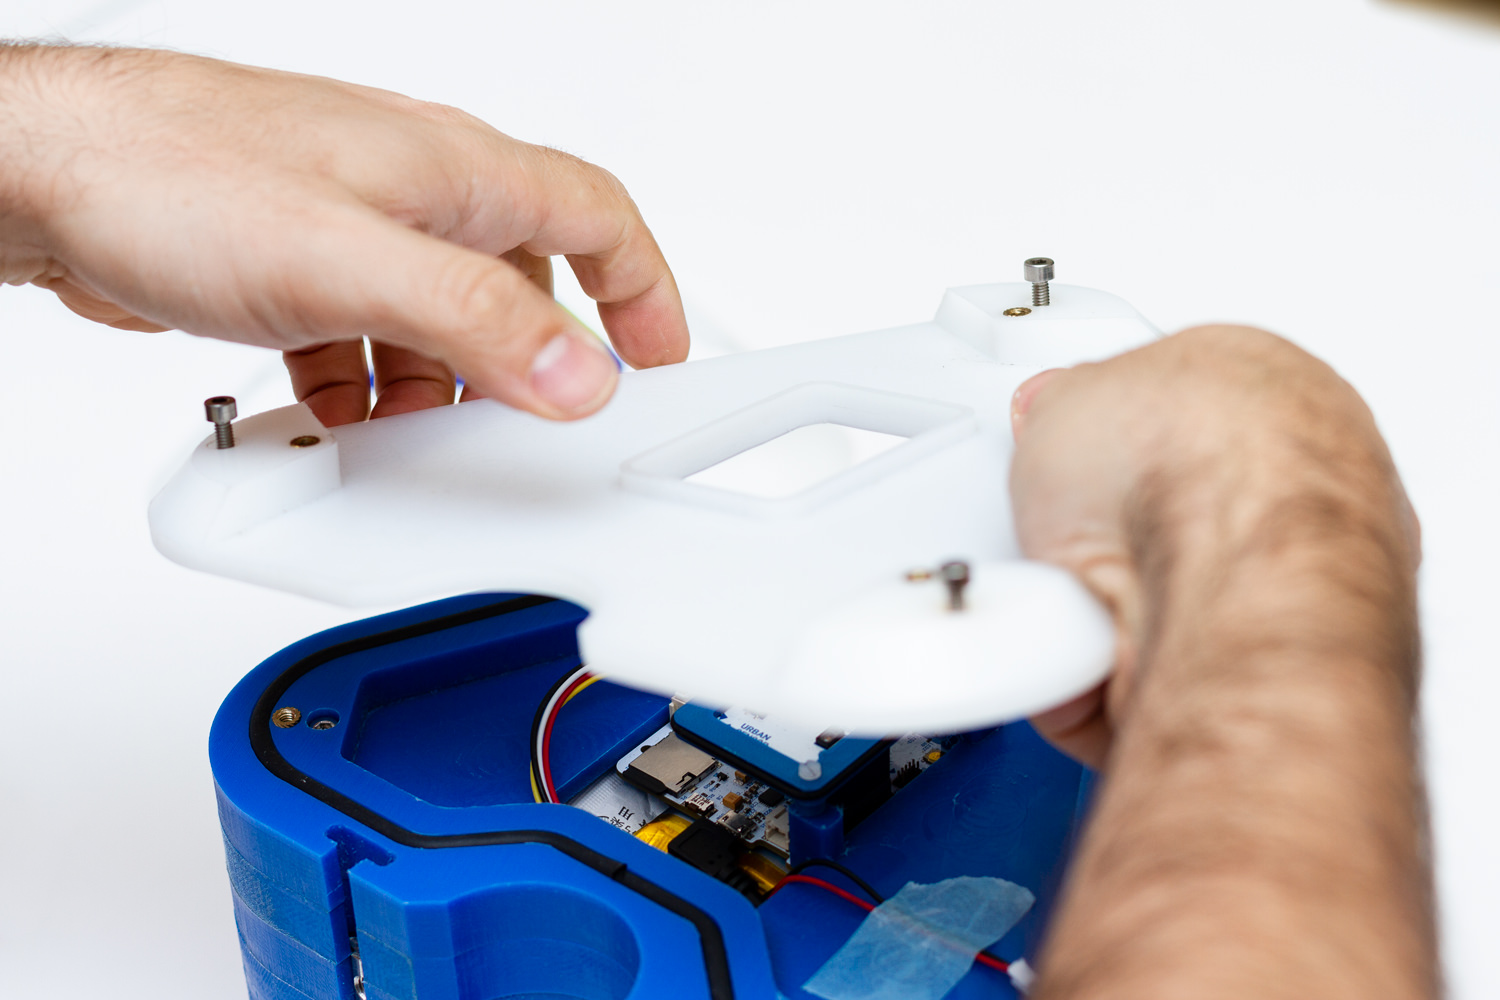
You will need to access the Kit in order to get the SD card. For this, first unscrew the two white layers at the top of the station with the keys provided in the Pack:

Then turn off your Kit by pressing the button for 5 seconds and remove the micro SD card. You can plug the card on your computer using a Micro SD card reader.

Warning
Handle the SD card with care! It might drop inside the station
You will find inside a YYYY-MM-DD.CSV with all the data. You can follow the Manual CSV data upload guide to manually upload the data to the platform.
Power it back on!
Once you are done uploading the data and you want to keep on logging, put the SD card back in with the Kit OFF and press the button. It will come back to life!
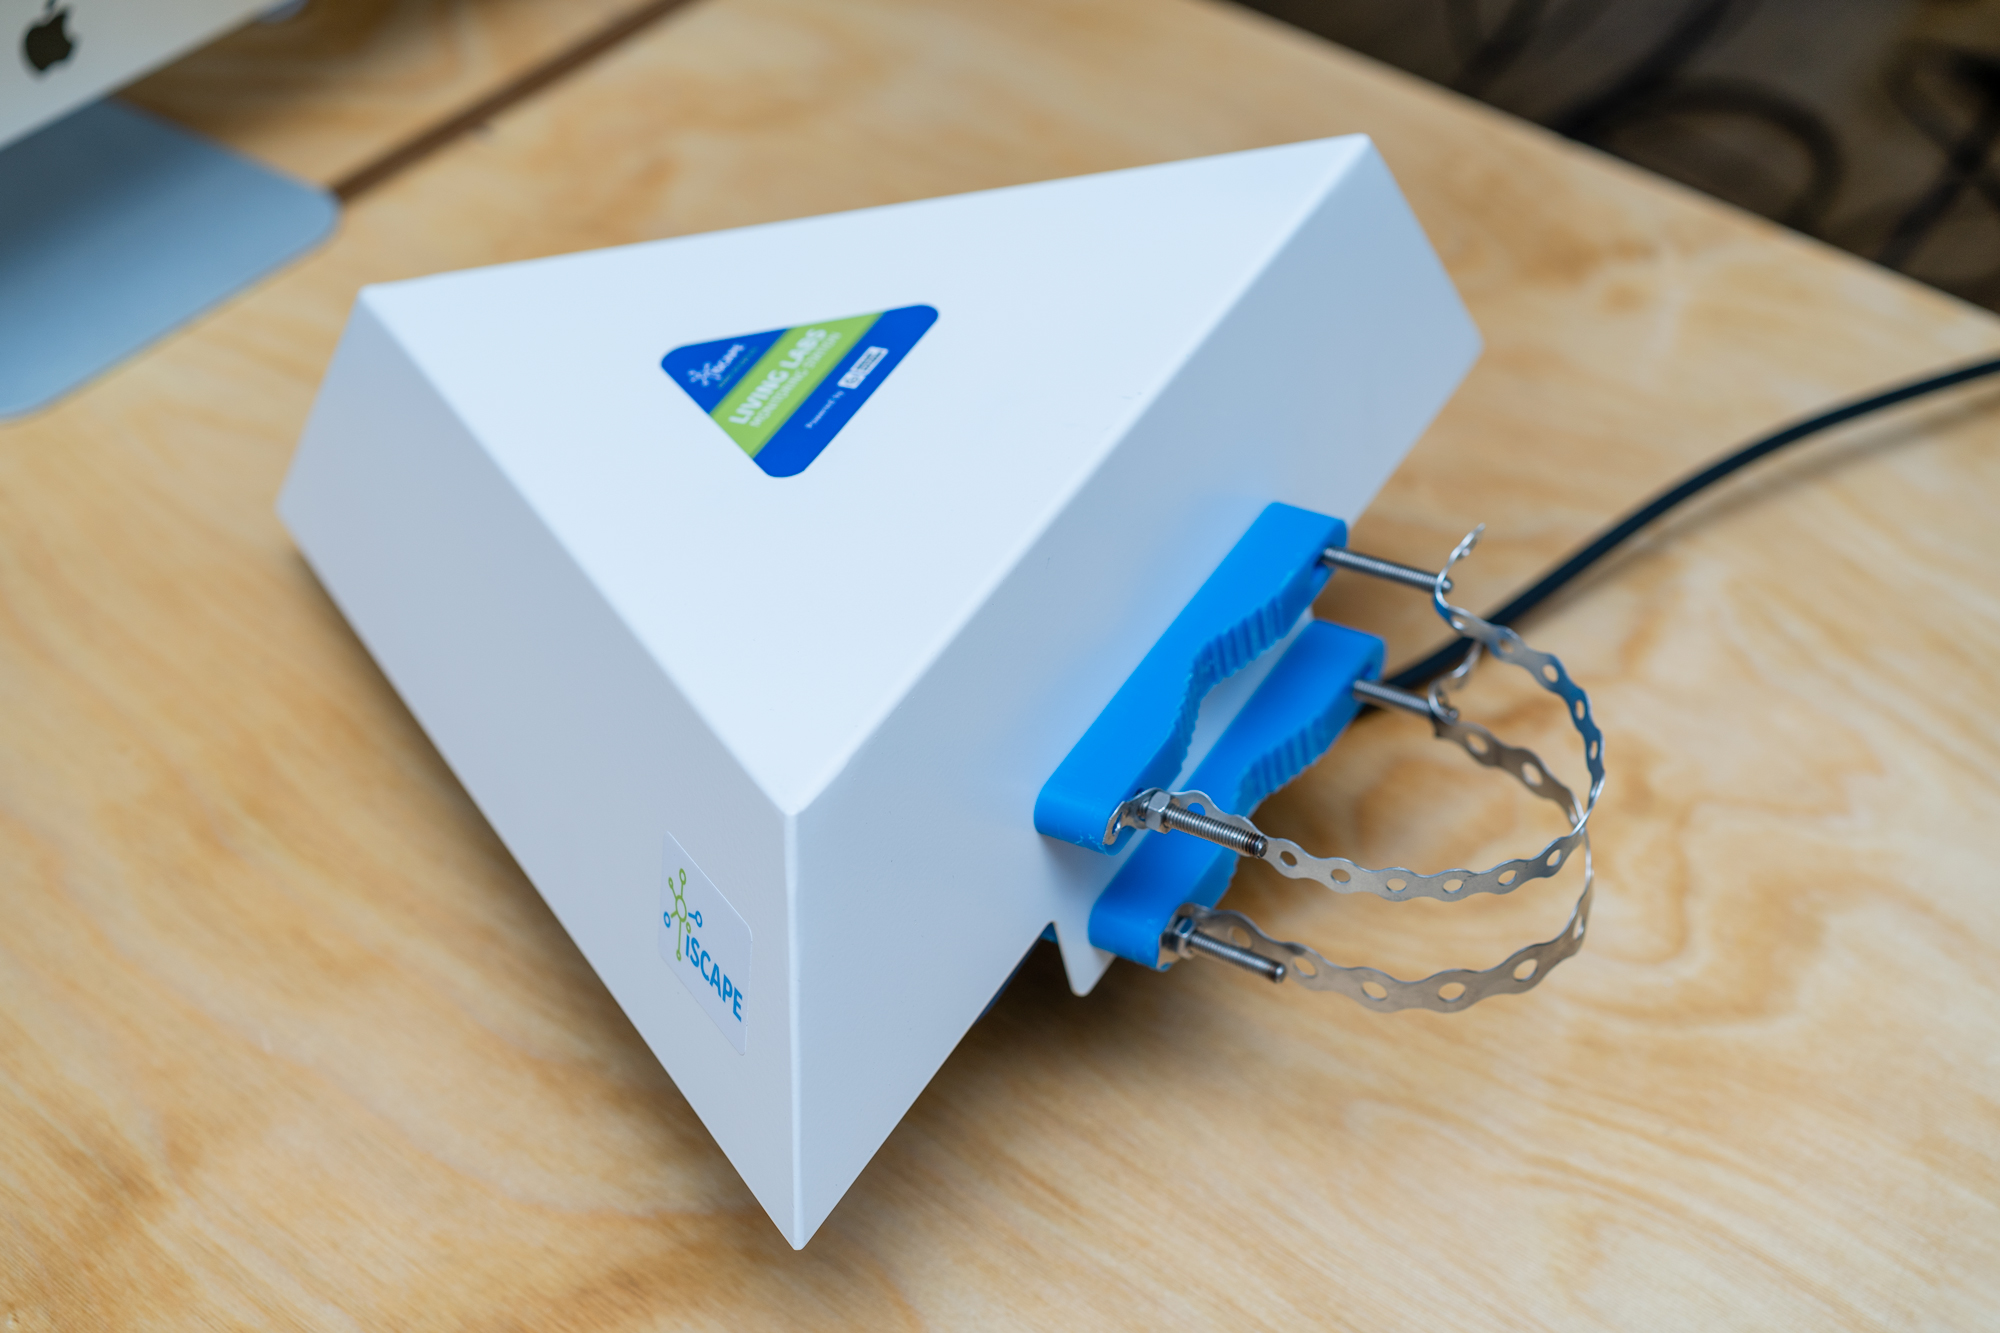
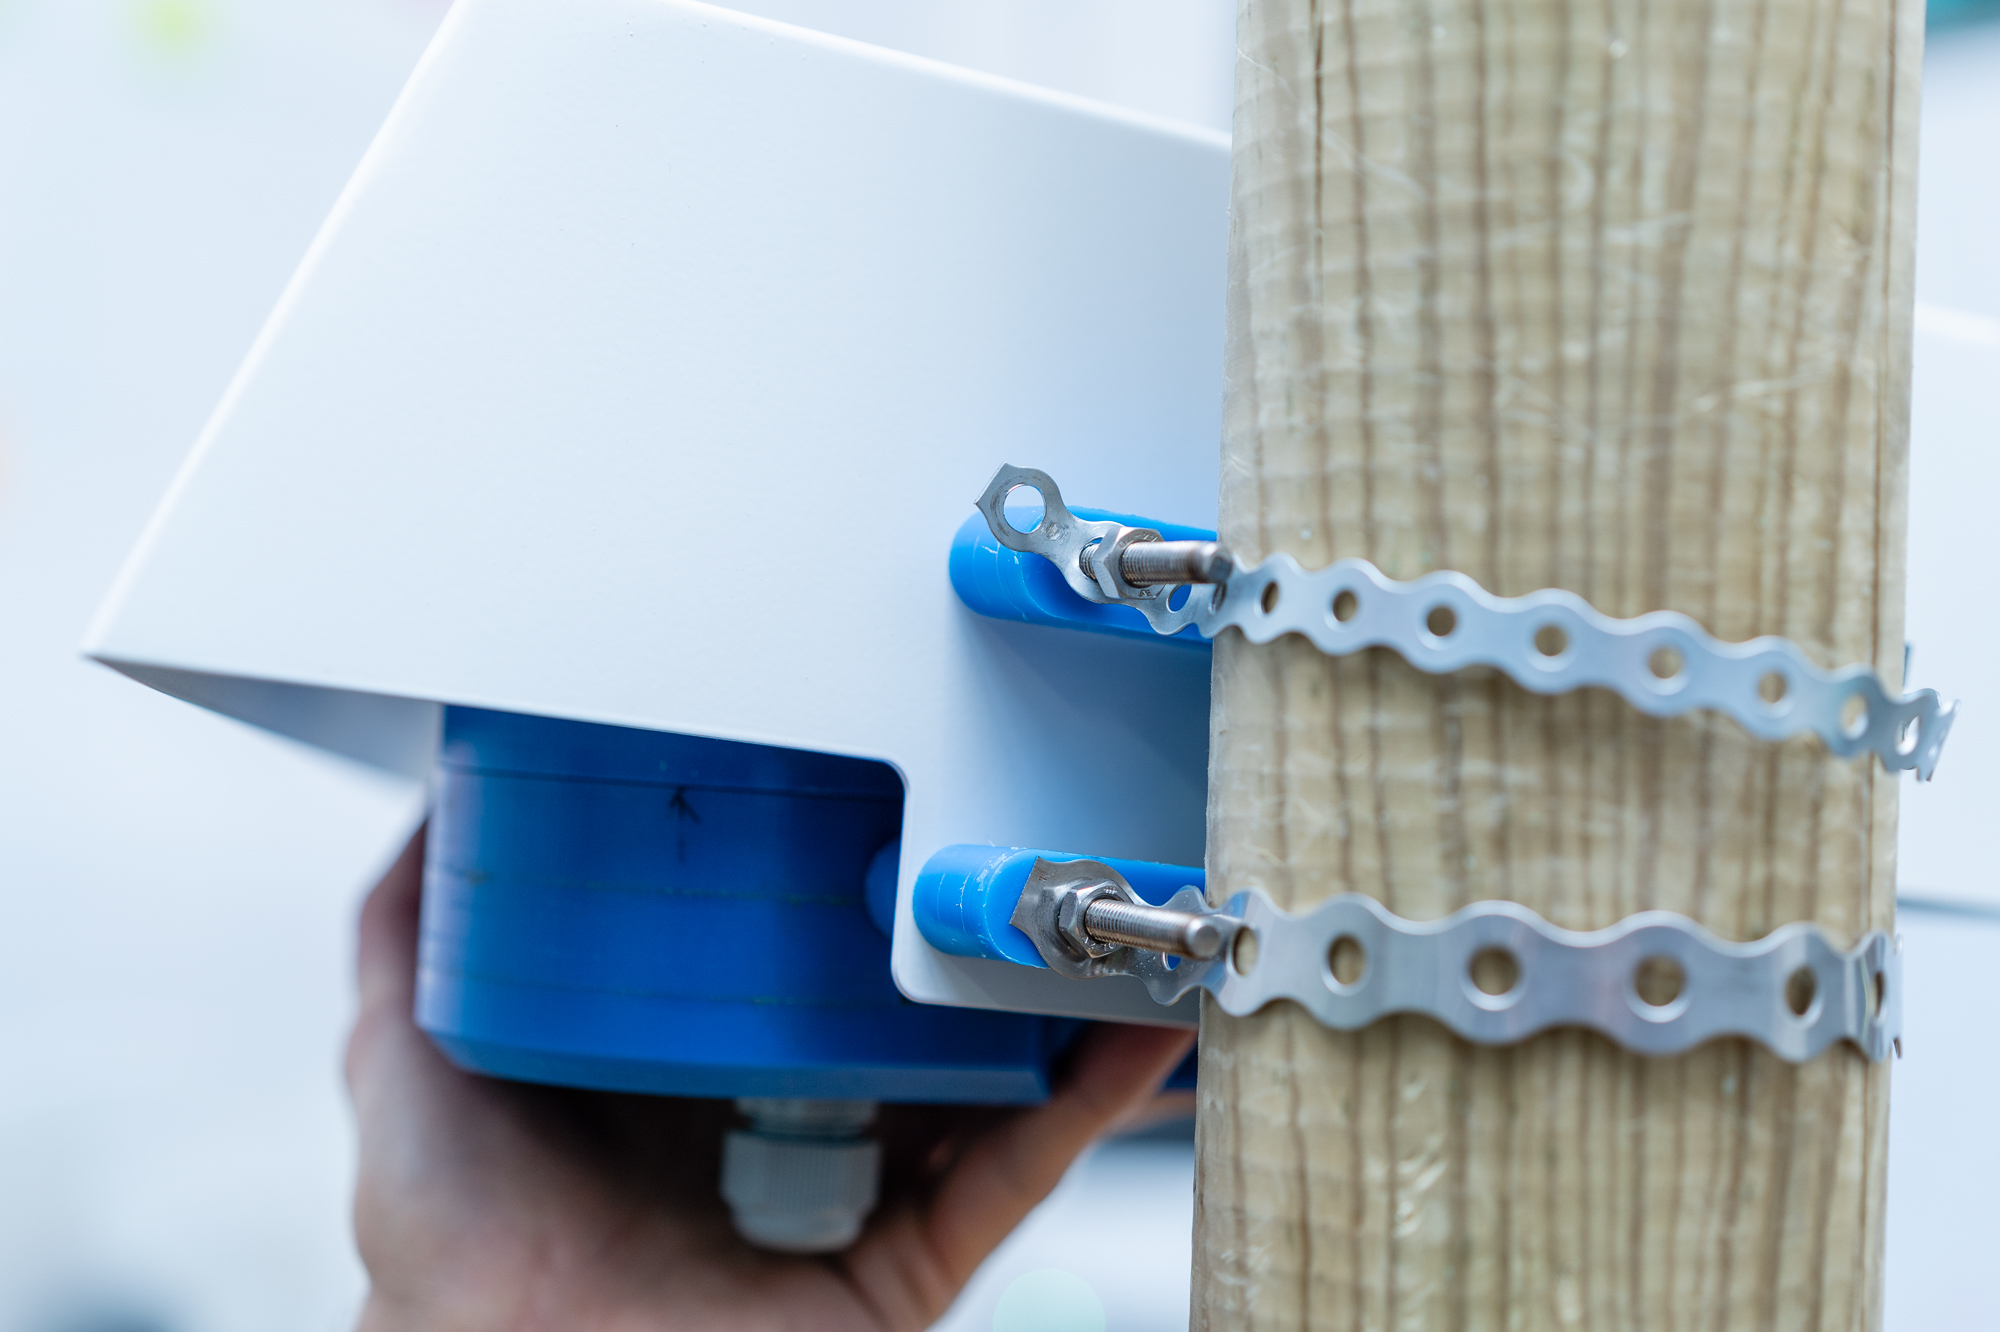
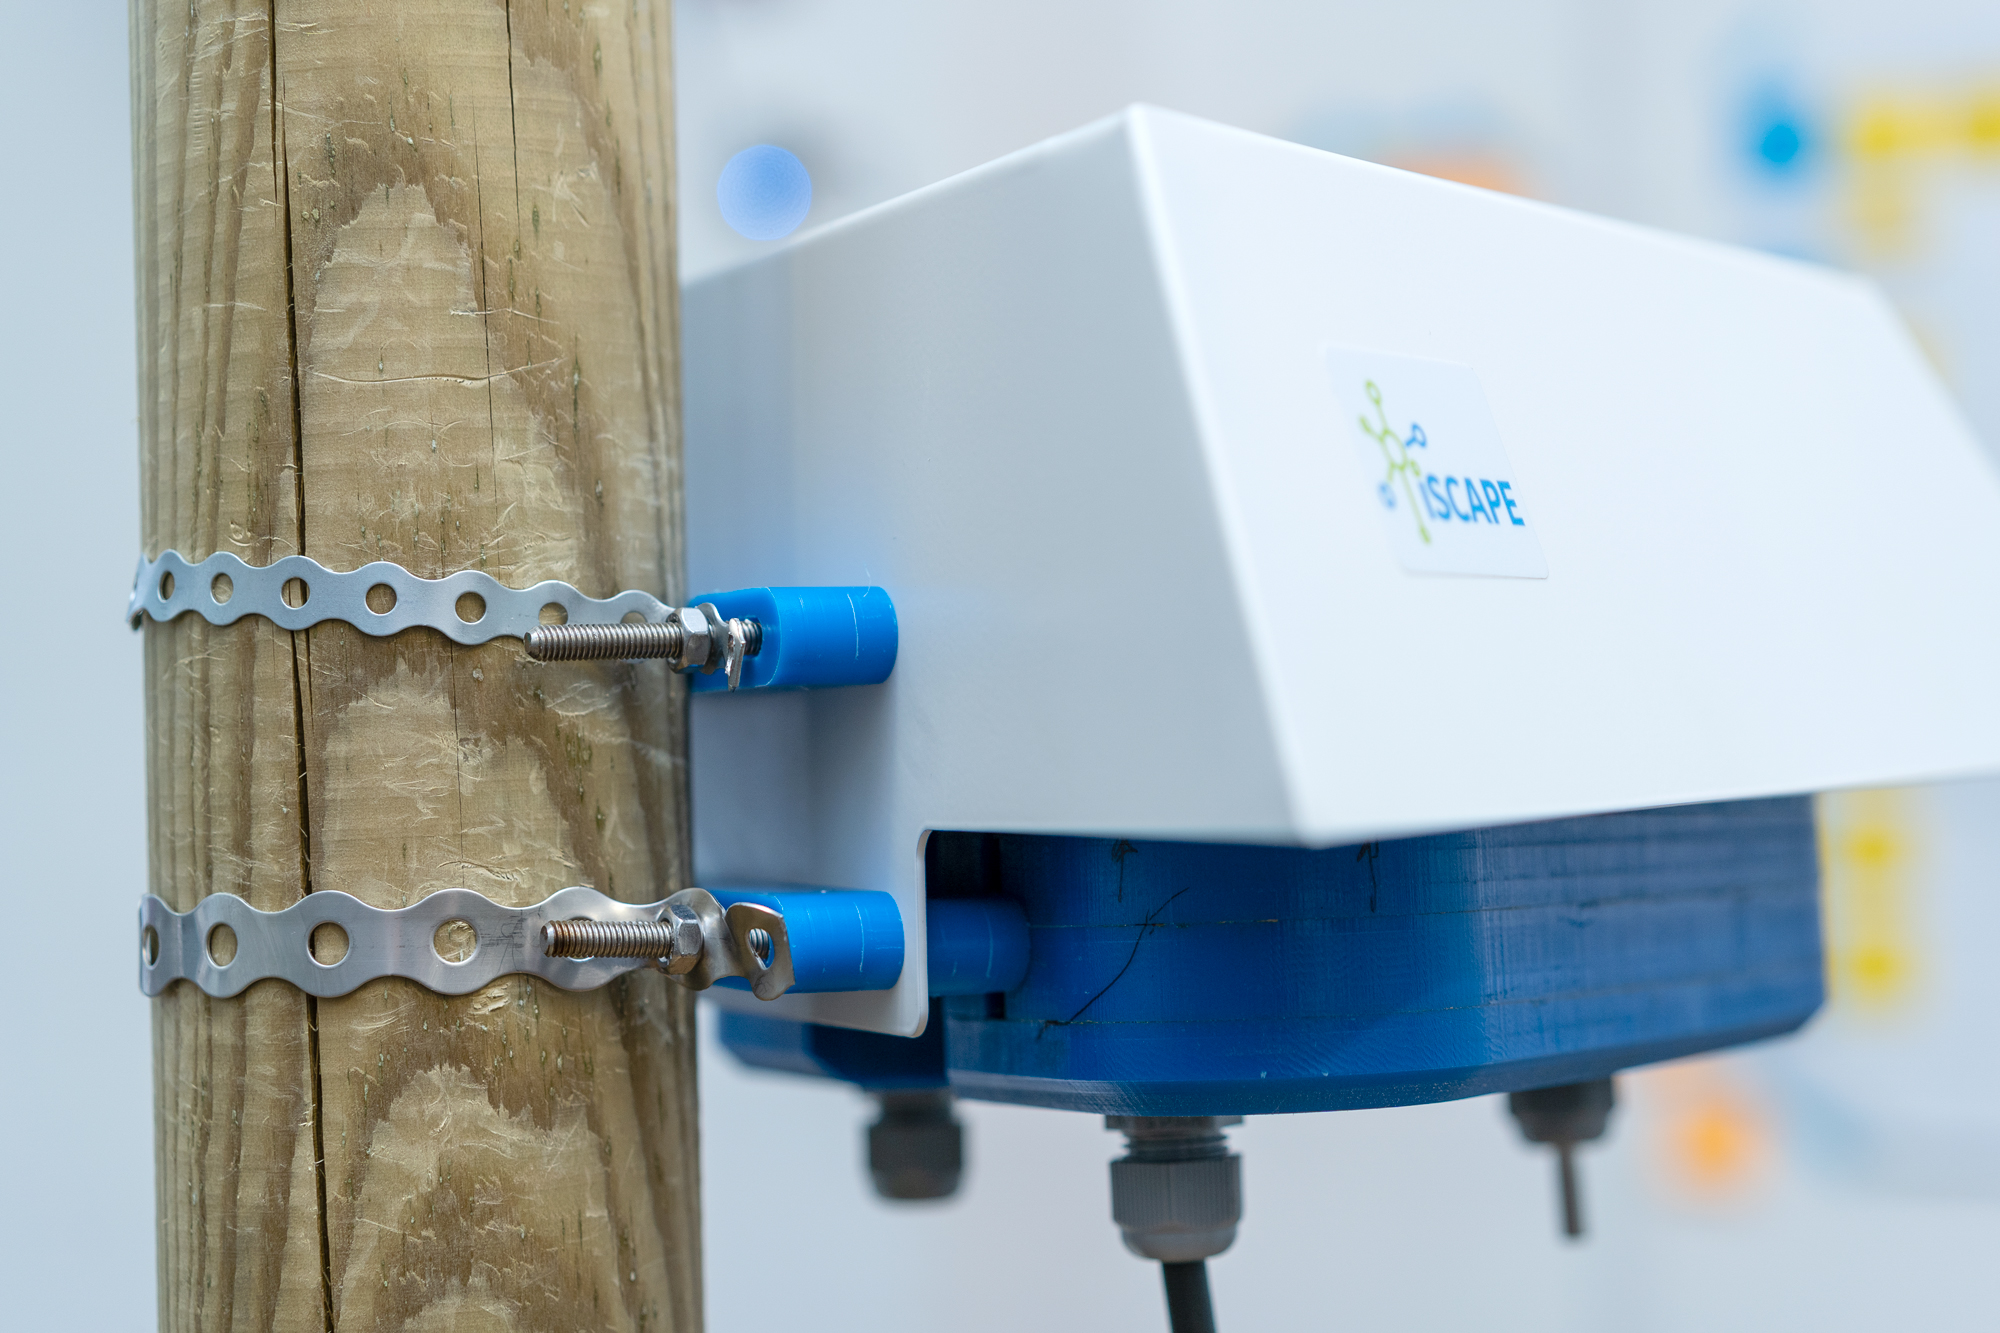
Outdoor installation
Use the perforated steel tape and the M6 provided to mount the Station on any street light or pole. The Pack also includes the required wrench:

Also, a temperature probe needs to be extracted from the bottom of the station:

And it should look like this:

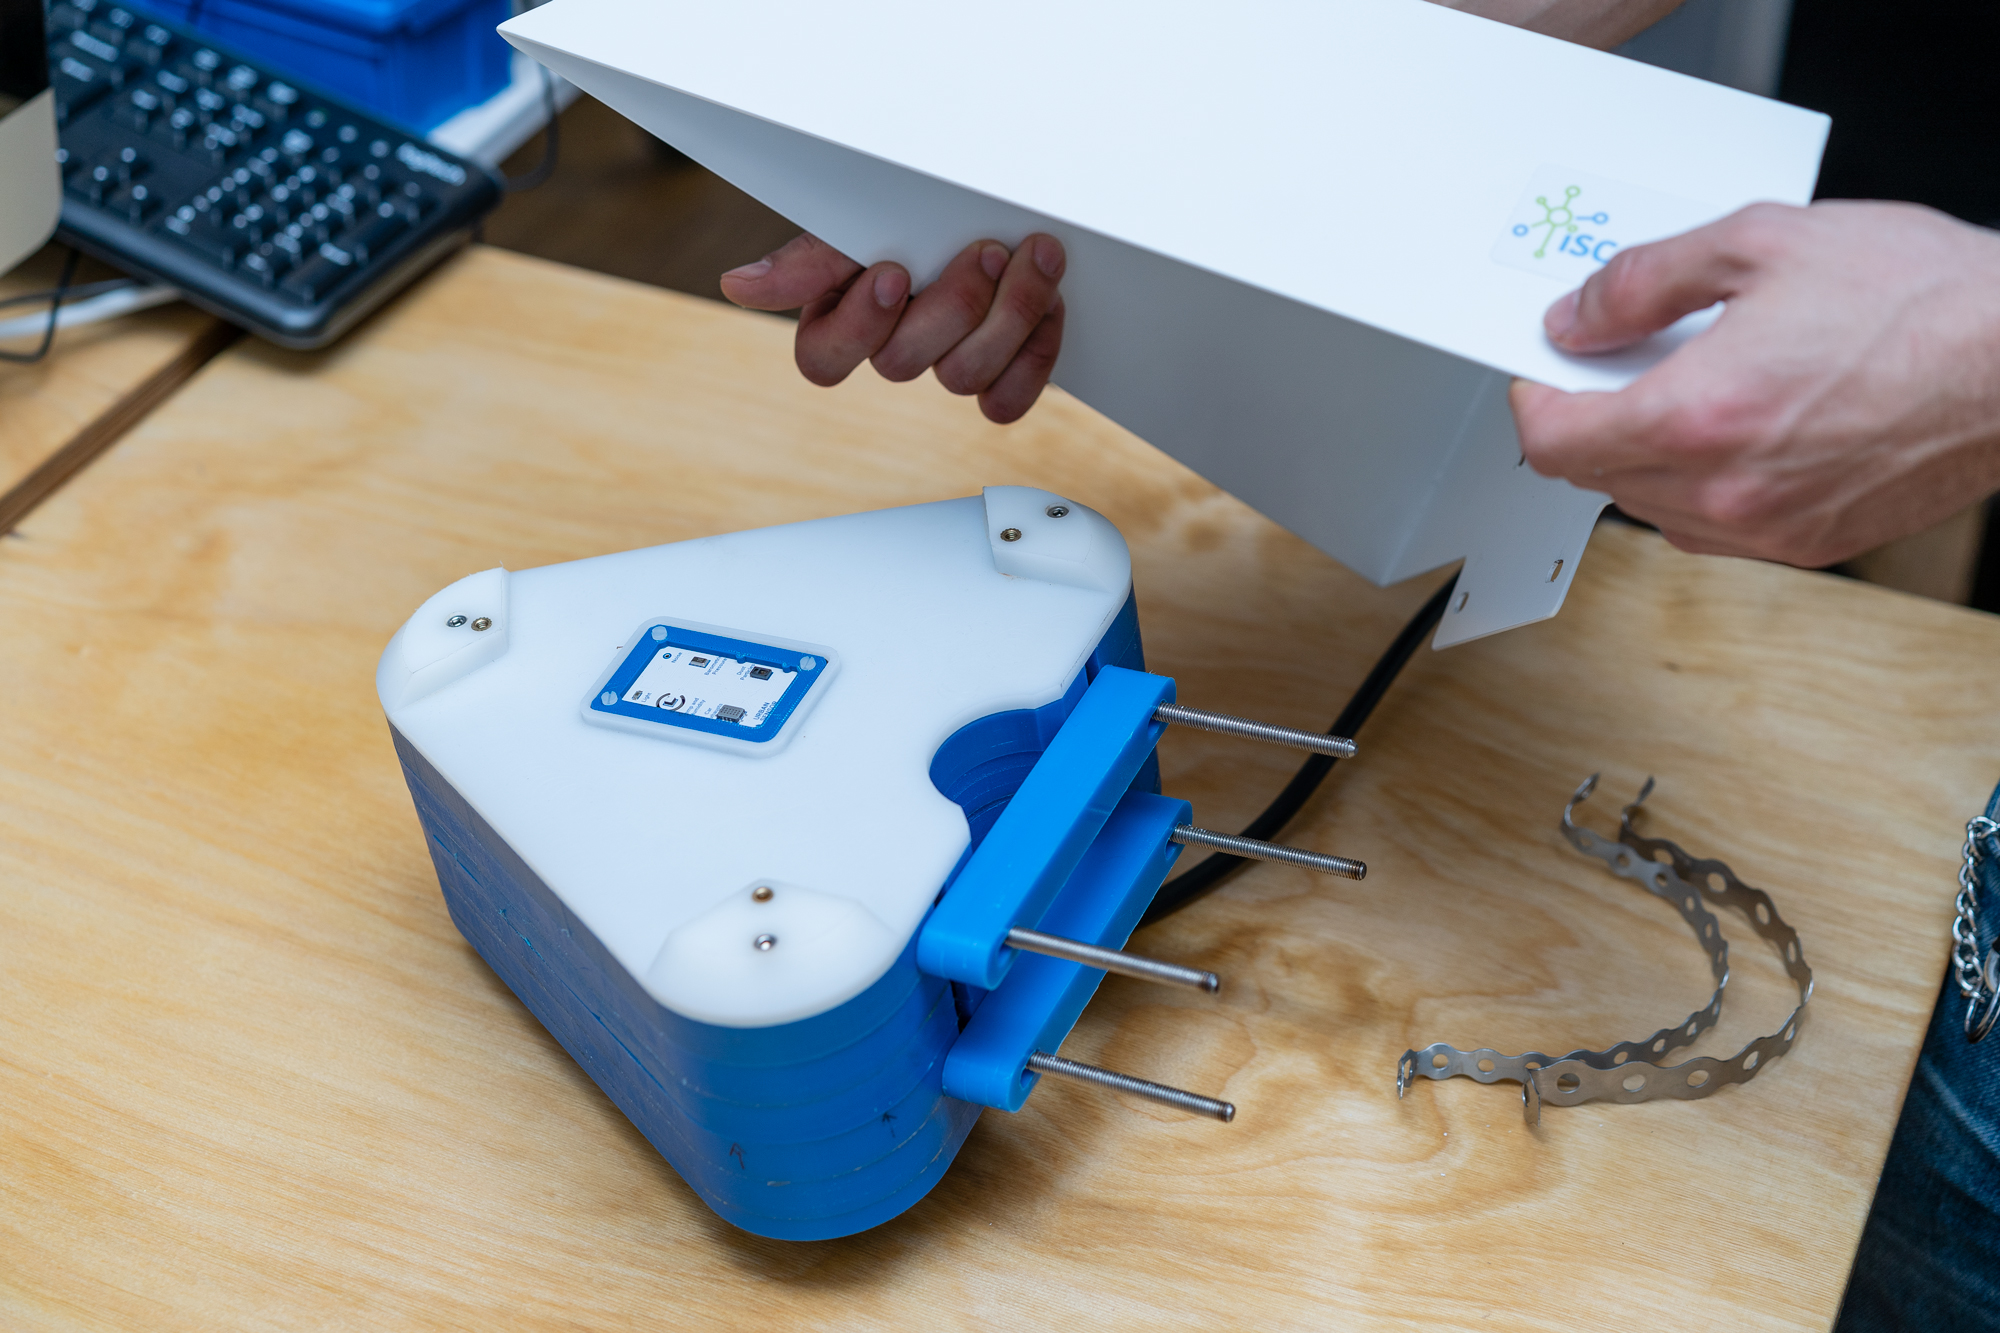
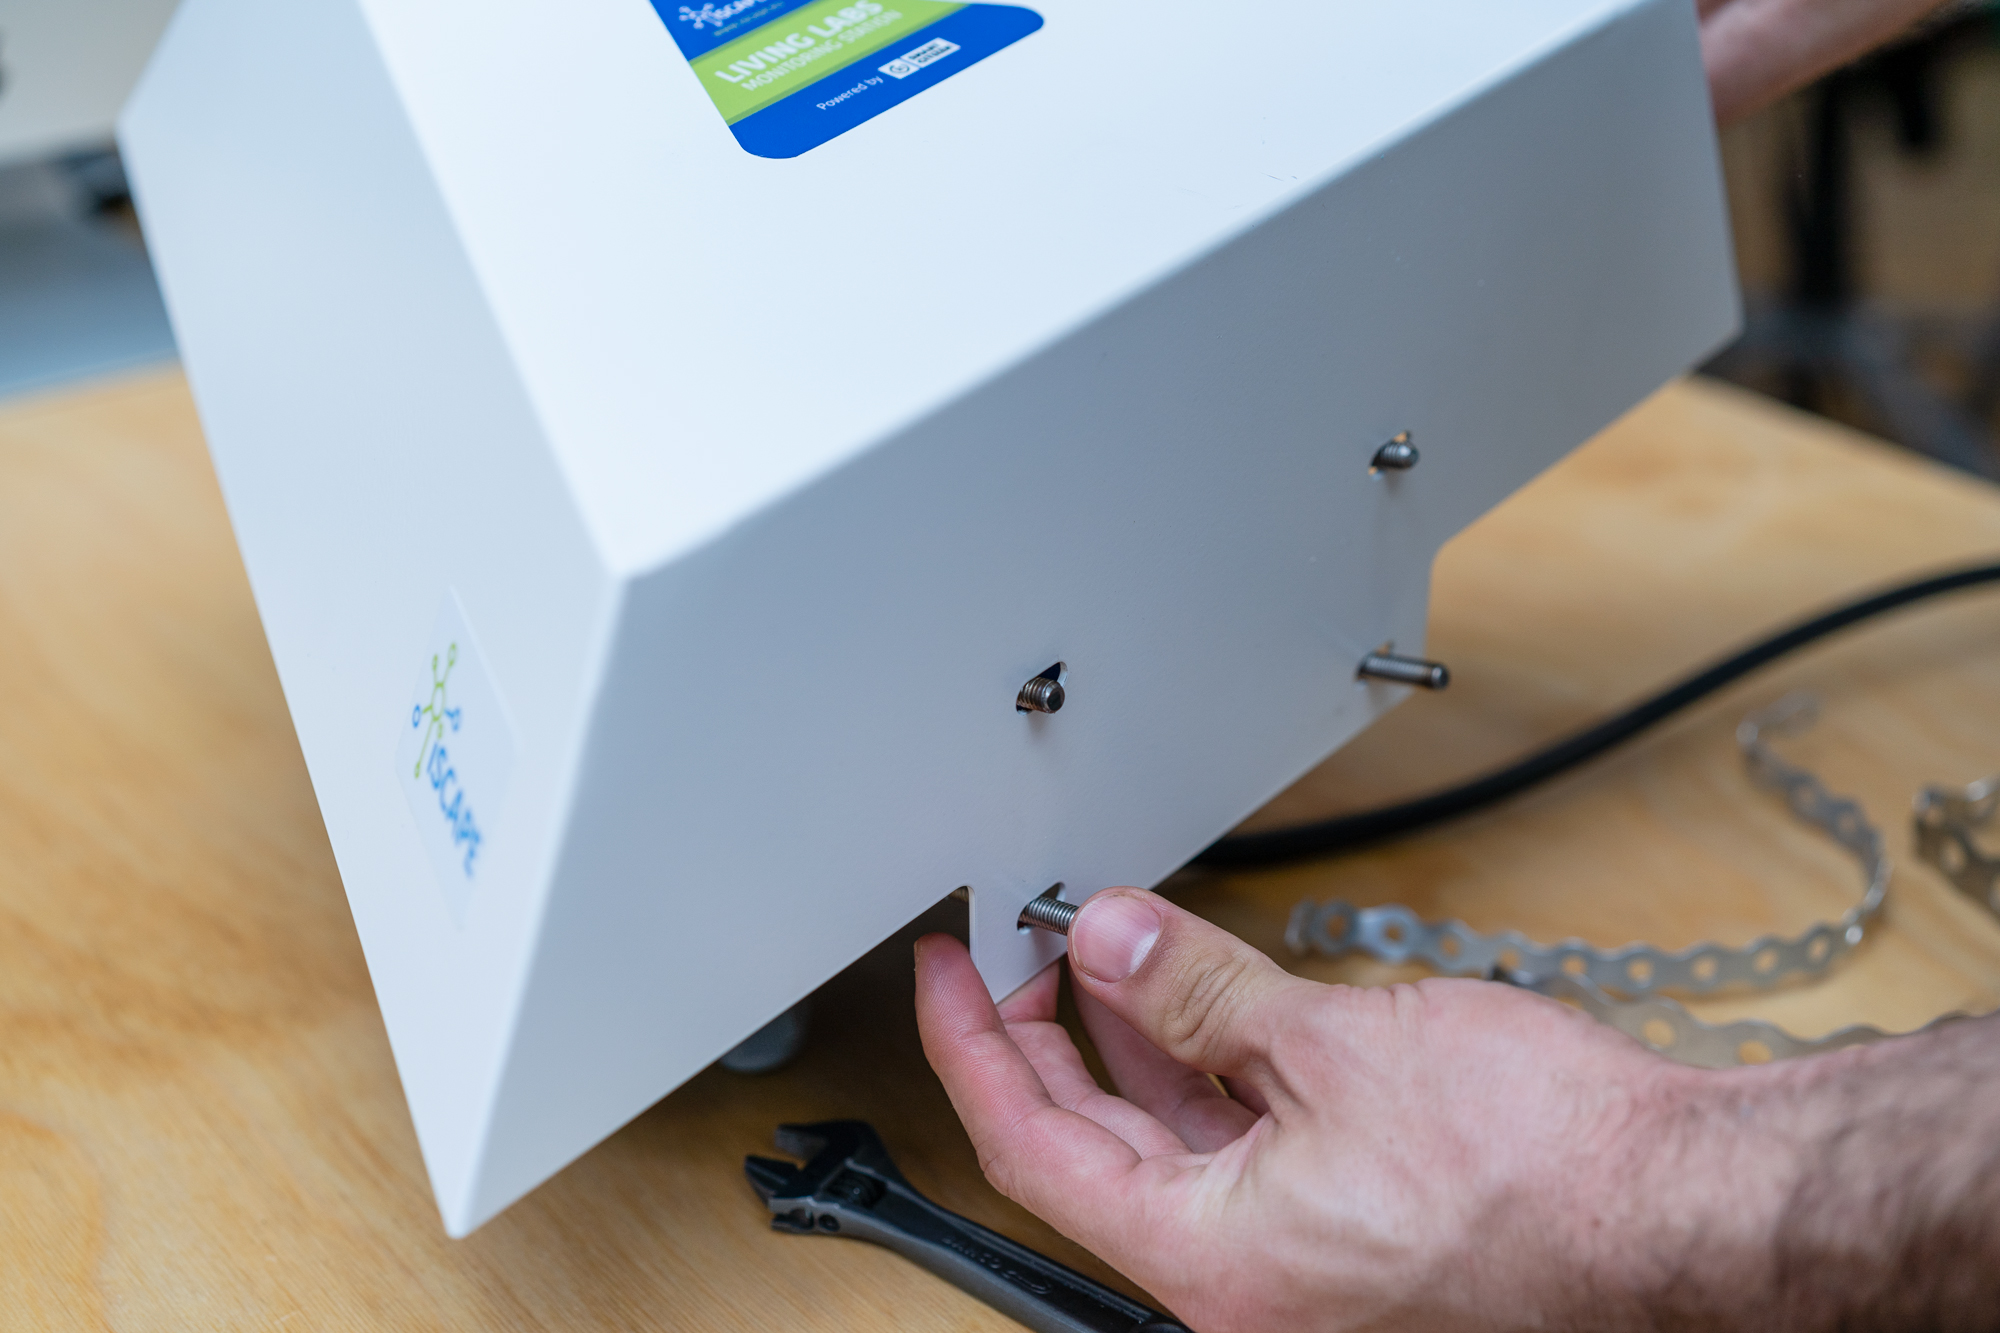
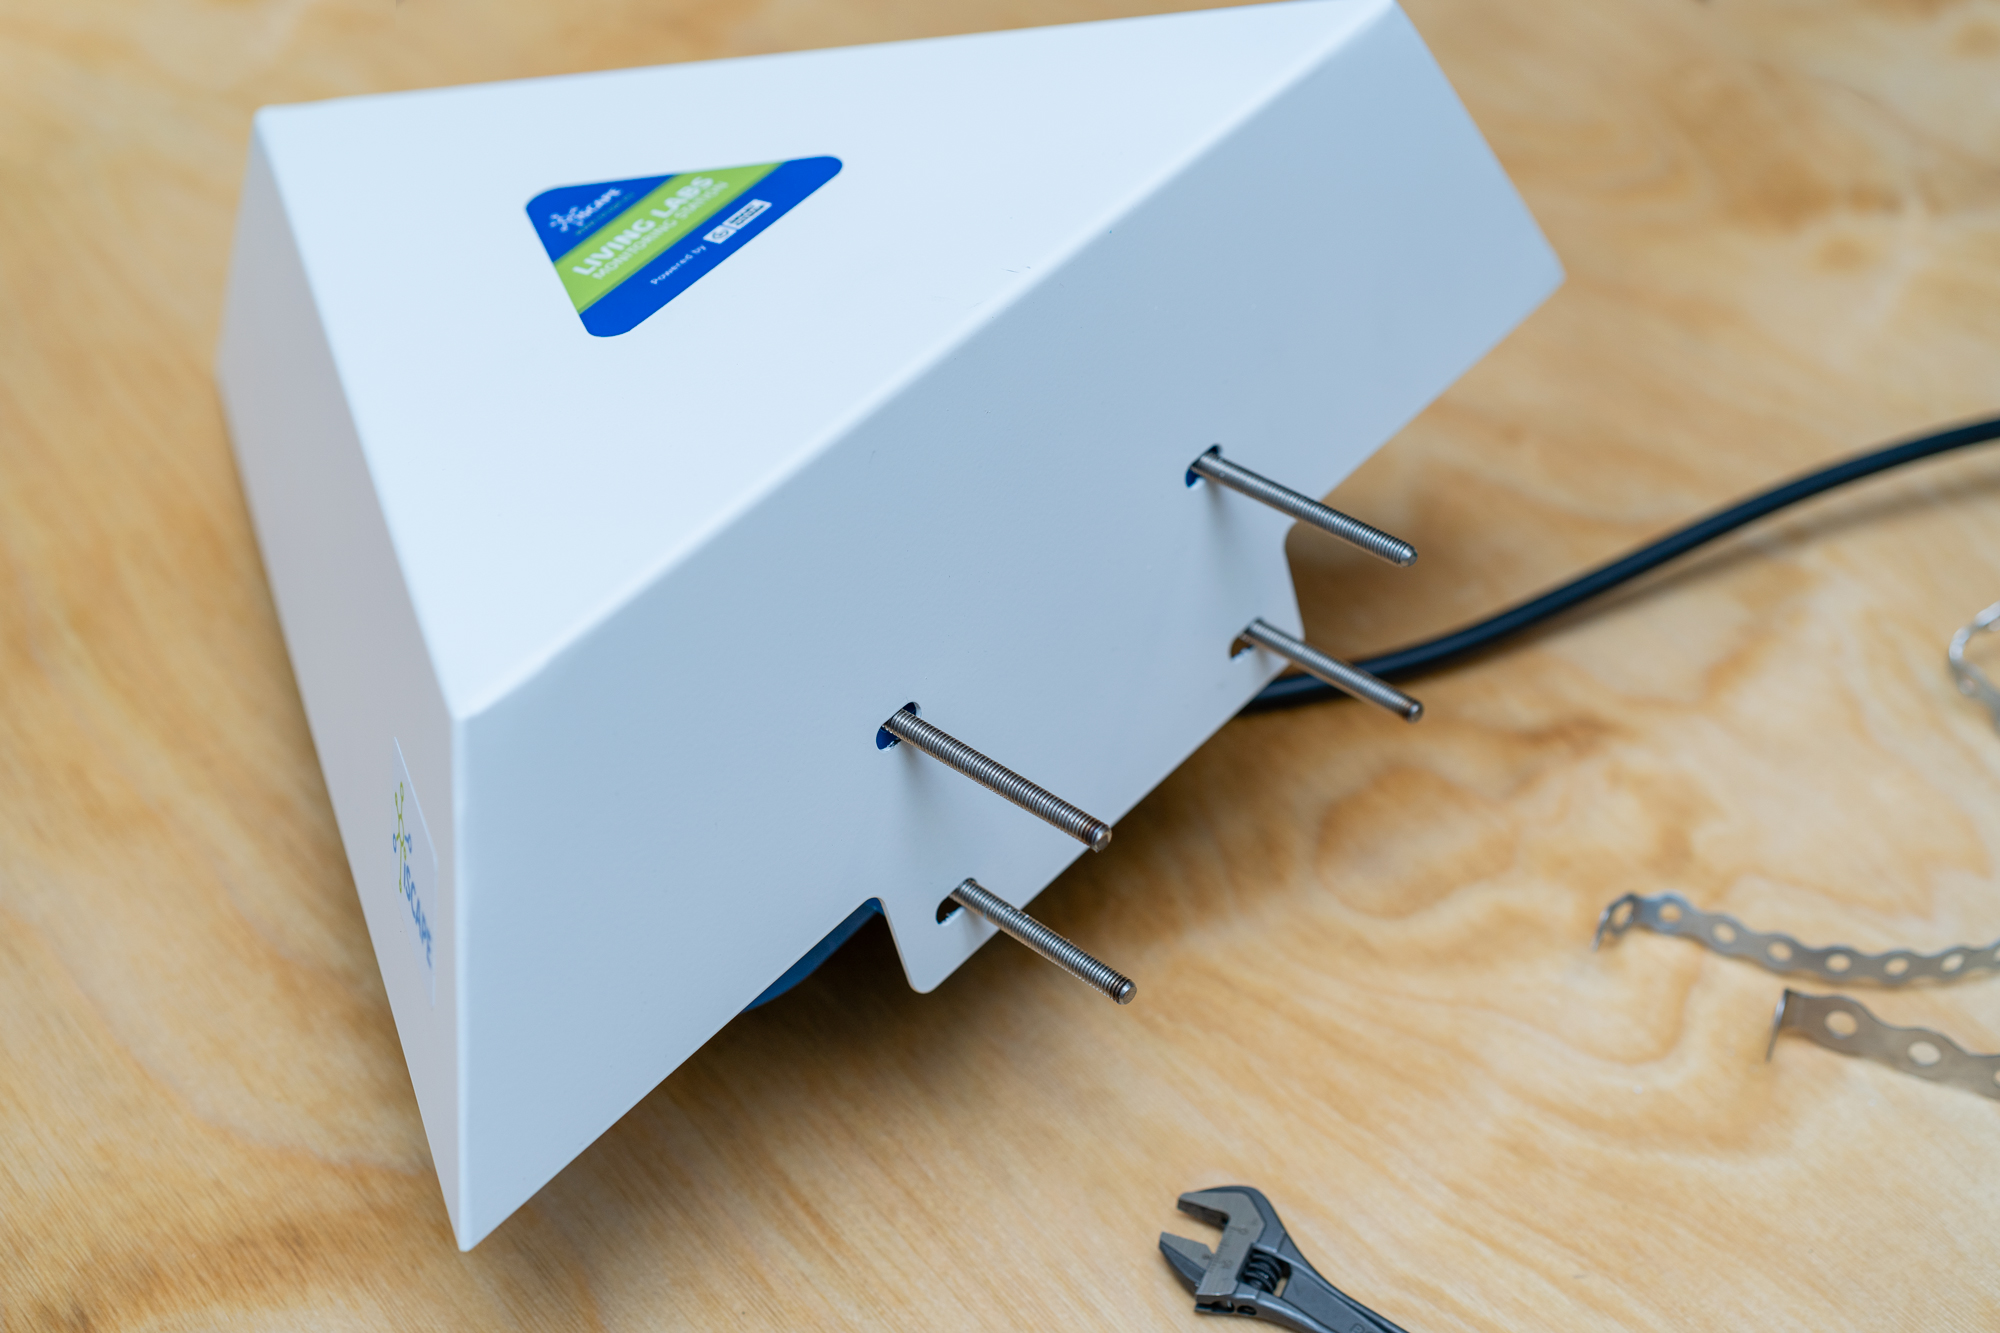
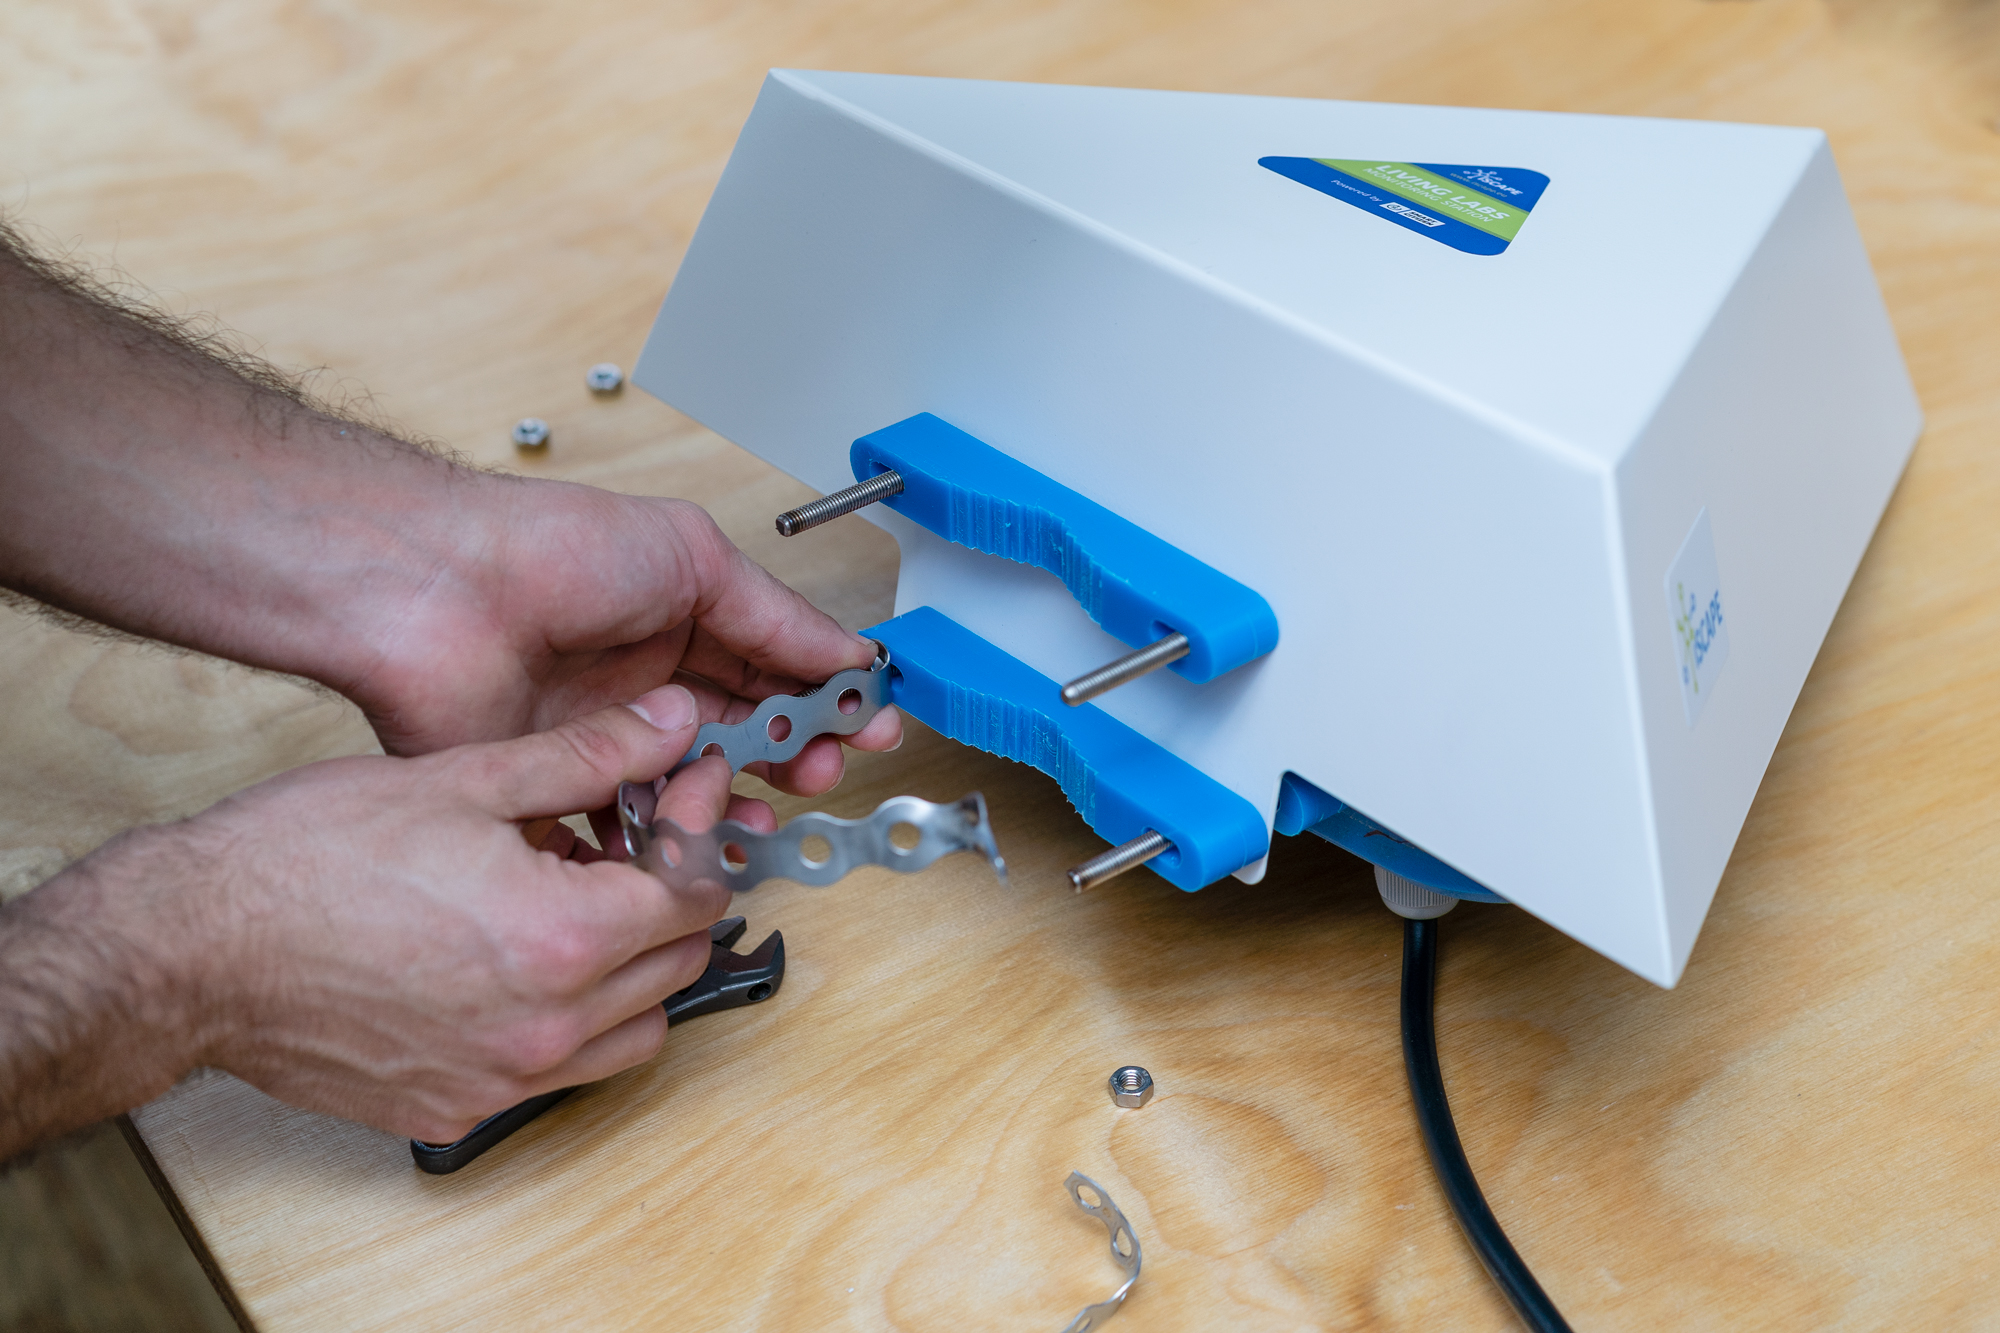
Umbrella cover installation
Due to some issues with the waterproofness of the Living Lab Station, we have developed a solution to protect it from the rain. This solution is shown in the pictures below, and it's meant to solve these problems for the current version of the LLS. The newer version of the LLS has a simpler setup, already including such cover to protect it from the rain or sun radiation.

Beware of collisions
As you can see, the cover is a rugged piece and it's only meant for the current version of the station. Please, be careful and do not fit it in places where people could bump into it.
This is what you get in the package (except the wrench):

Step by step
-
If you have the 3D printed cover on the Smart Citizen Kit, it's time to remove it.
-
There is no need to remove the two top white layers (in the pictures we did it without them)
-
Insert the threads in the already mounted t-slots. The distance between them is ~50mm
-
Insert the 4x flat spacer in the threads
-
Place the cover on the station
-
Place the serrated spacers, with the serrated side on the outer part (they help to hold the station in place)
-
Place the perforated steel stripe in one of the sides. Don't tight it too much, so that you have room to place it in the pole
-
Put the station in it's final location, and tighten it with the perforated steel stripes. Play with both sides, so that the stripes are tight on the pole
-
You are done!
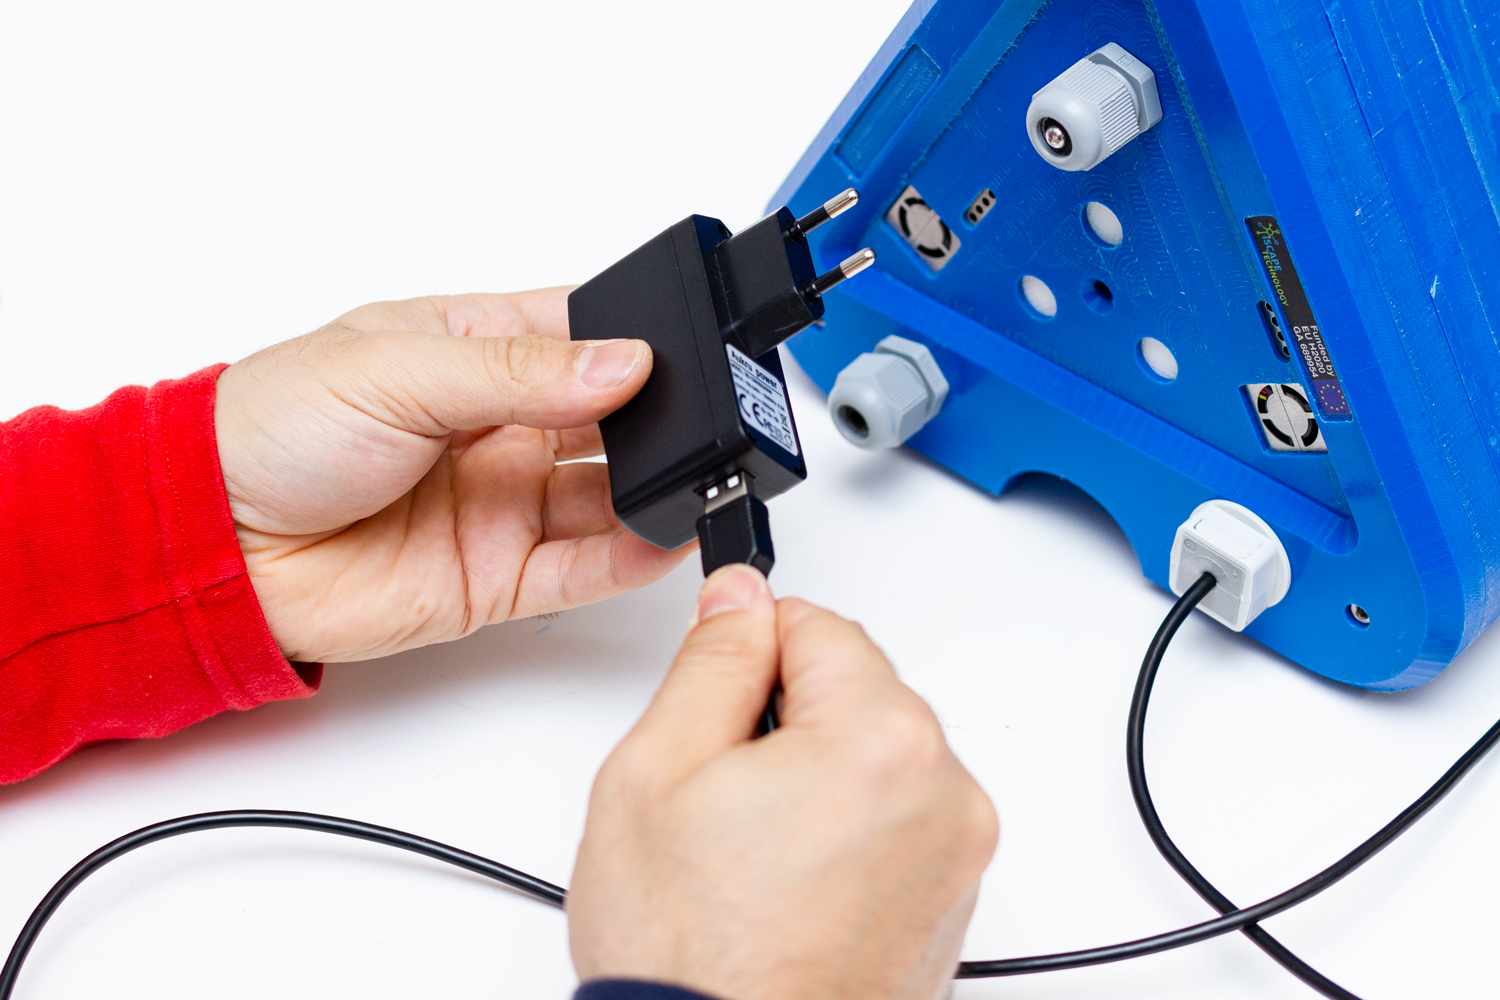
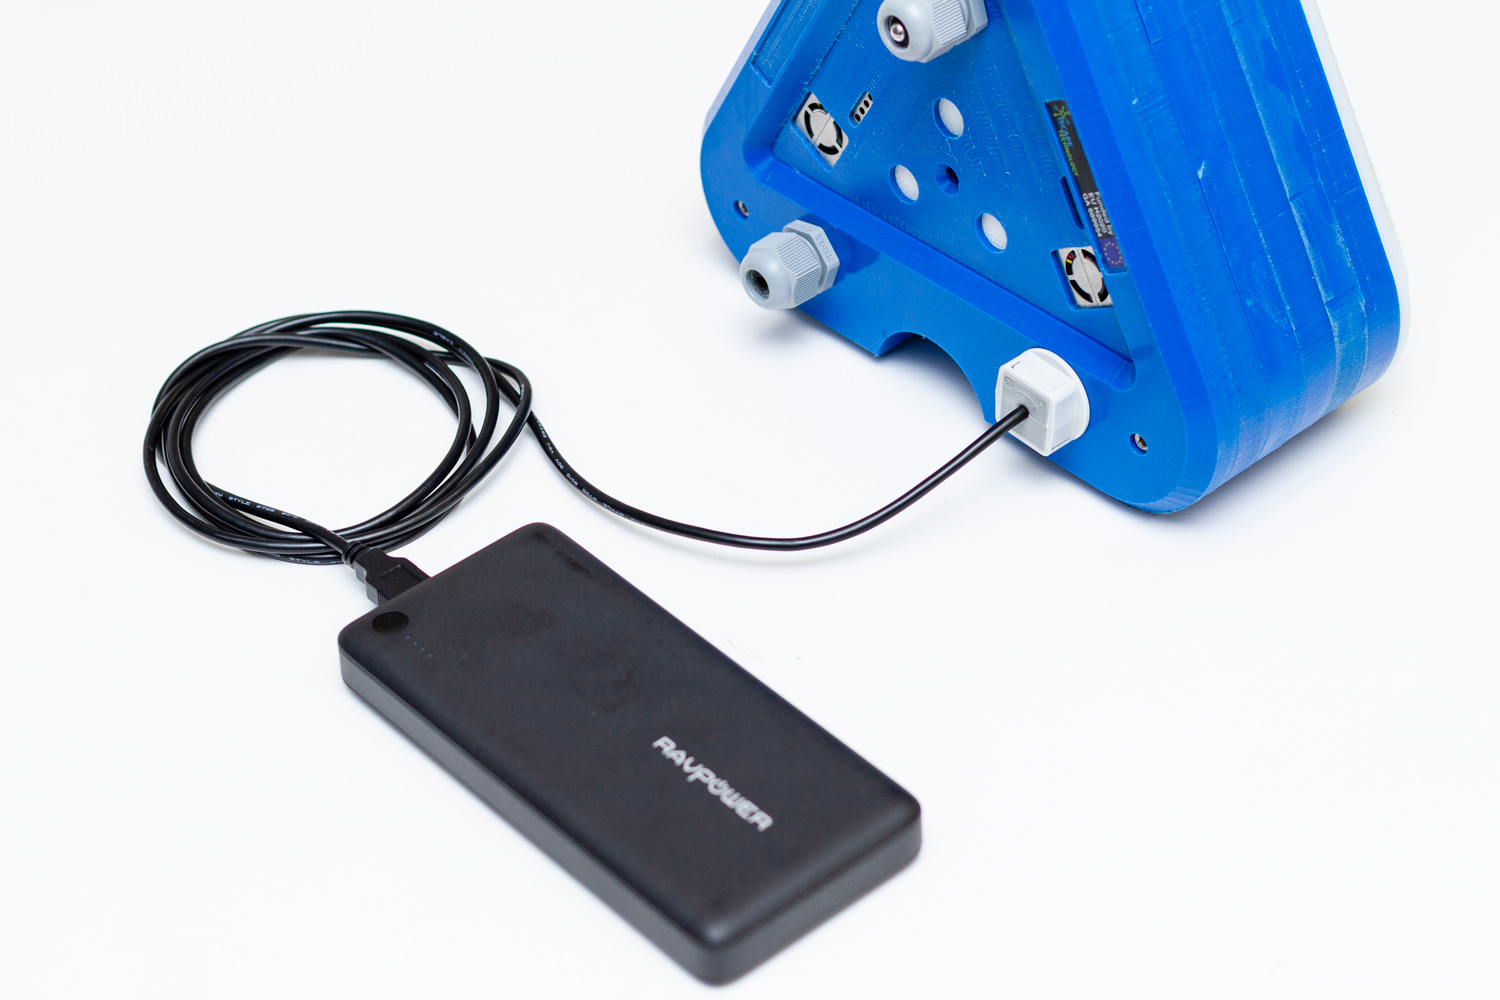
Power supply
The Station can be directly powered at 220-240V AC (Max. consumption with the AC supply is 5W). It can also be powered via USB, with a normal phone charger (5V and 750mA max). However, there is a bit to do in order to change it. Let's see how!
Batteries
The Living Lab Station has a higher consumption, mostly due to the fans on the two PM sensors.
That means the internal battery last just for 20h, and it is only aimed at providing backup power.
For example, we can connect the station on the street light electric line, so the Station gets charged during the night when the lights are on.
Solar Panel
Unfortunately, we are having some problems with the PV Solar Panel system to power the Station independently. The system is currently under tests, and it will be available in the next few months.

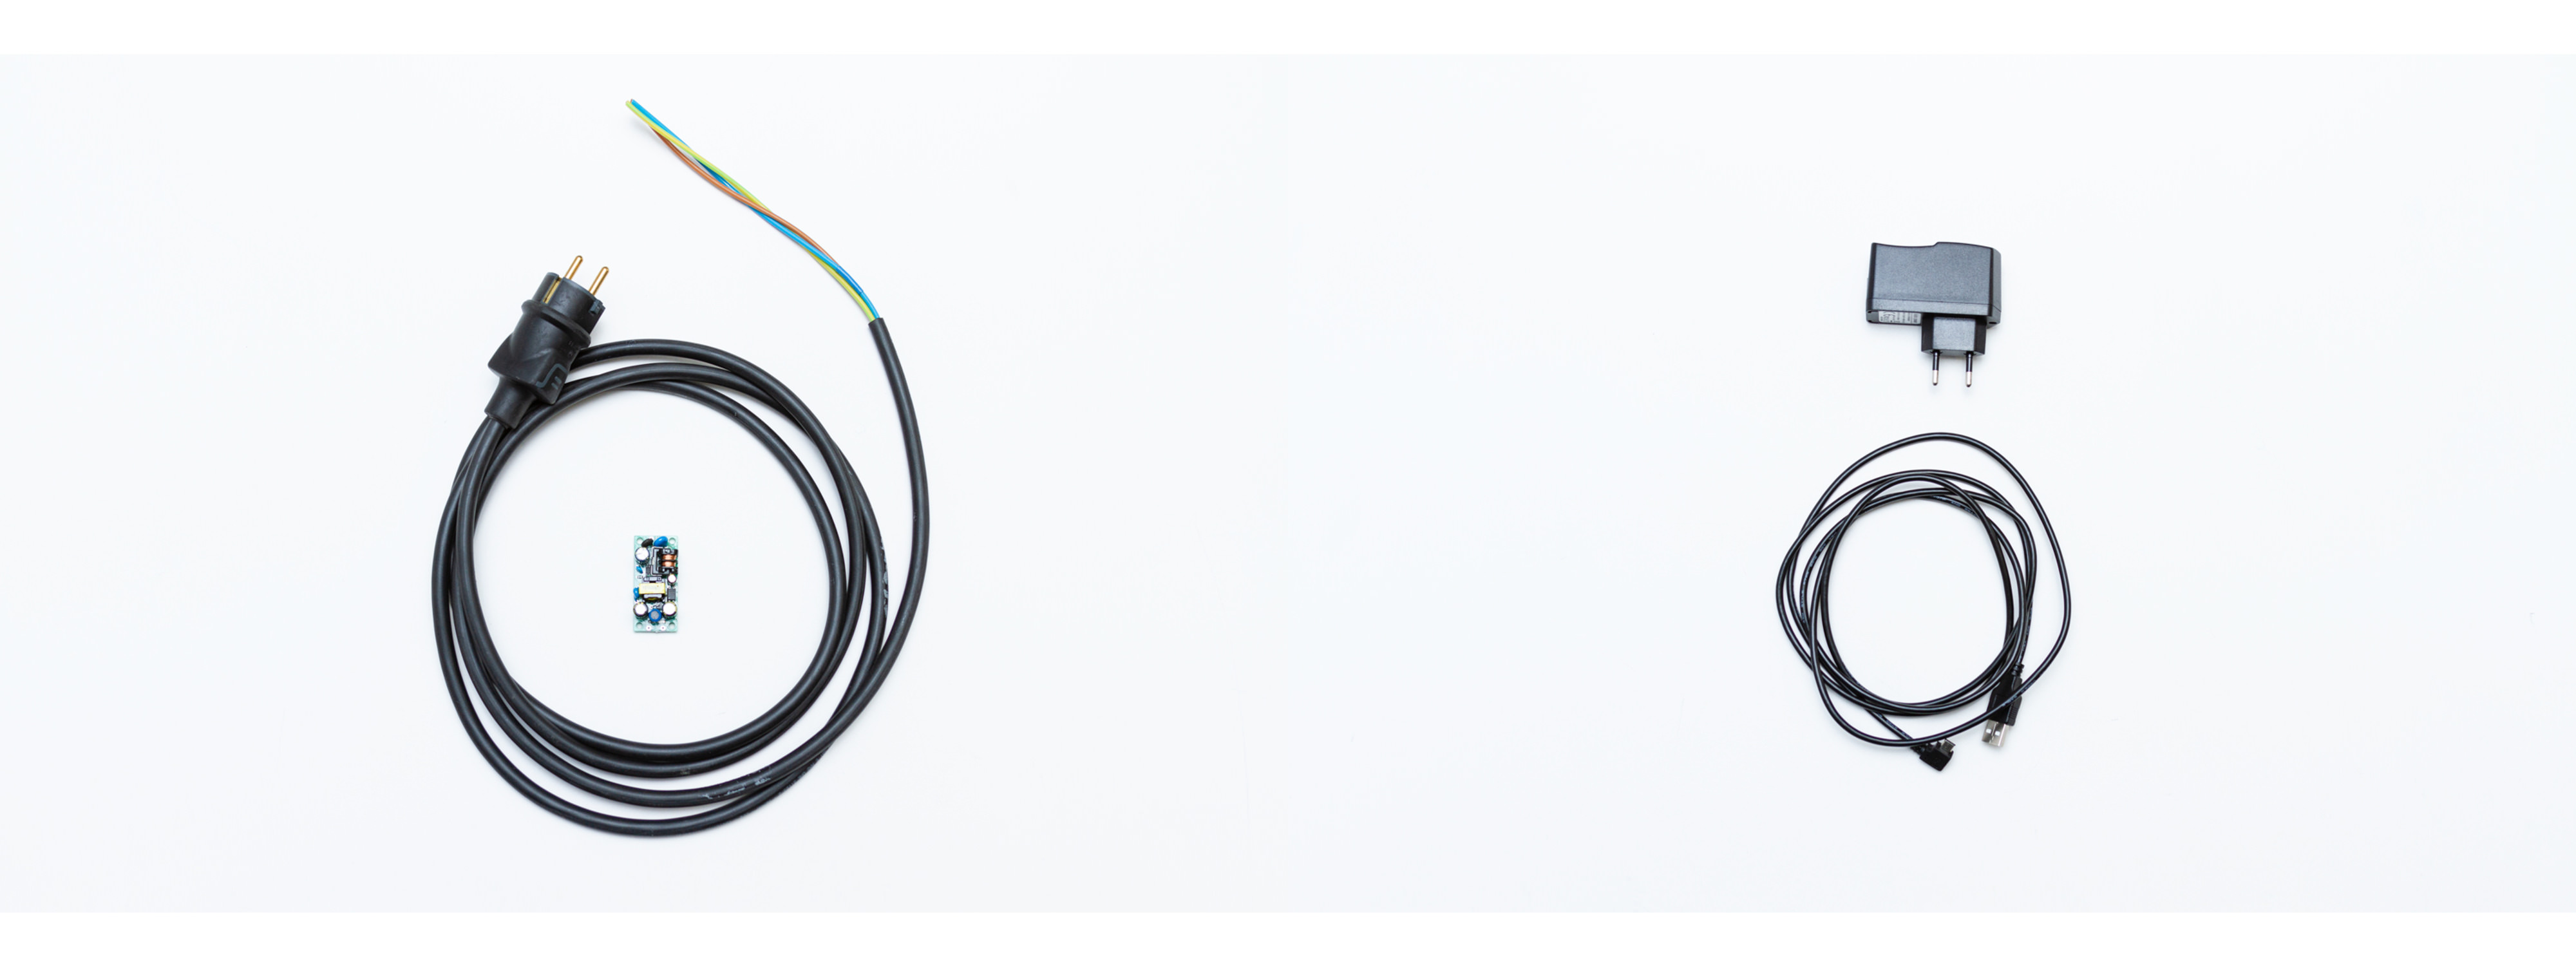
Changing power supplies
Before we start, some tools that will be helpful during the process:

Danger
Unplug the station before starting this process from any type of external supply
Step by step
-
Remove the two covers using the allen keys as explained on the setup instructions.
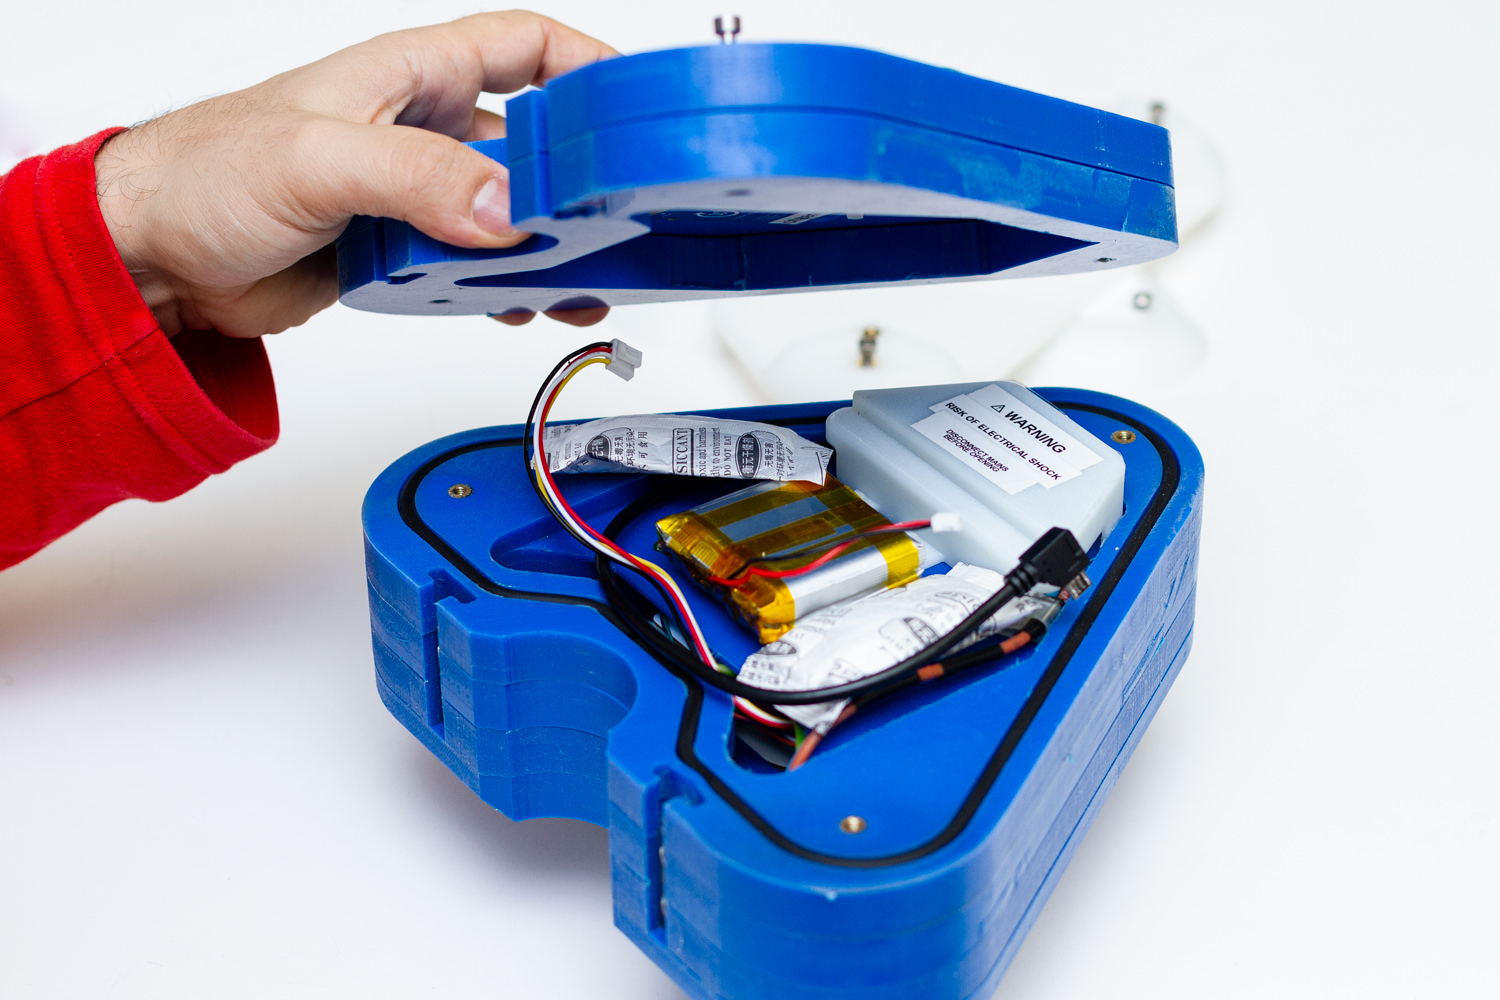
-
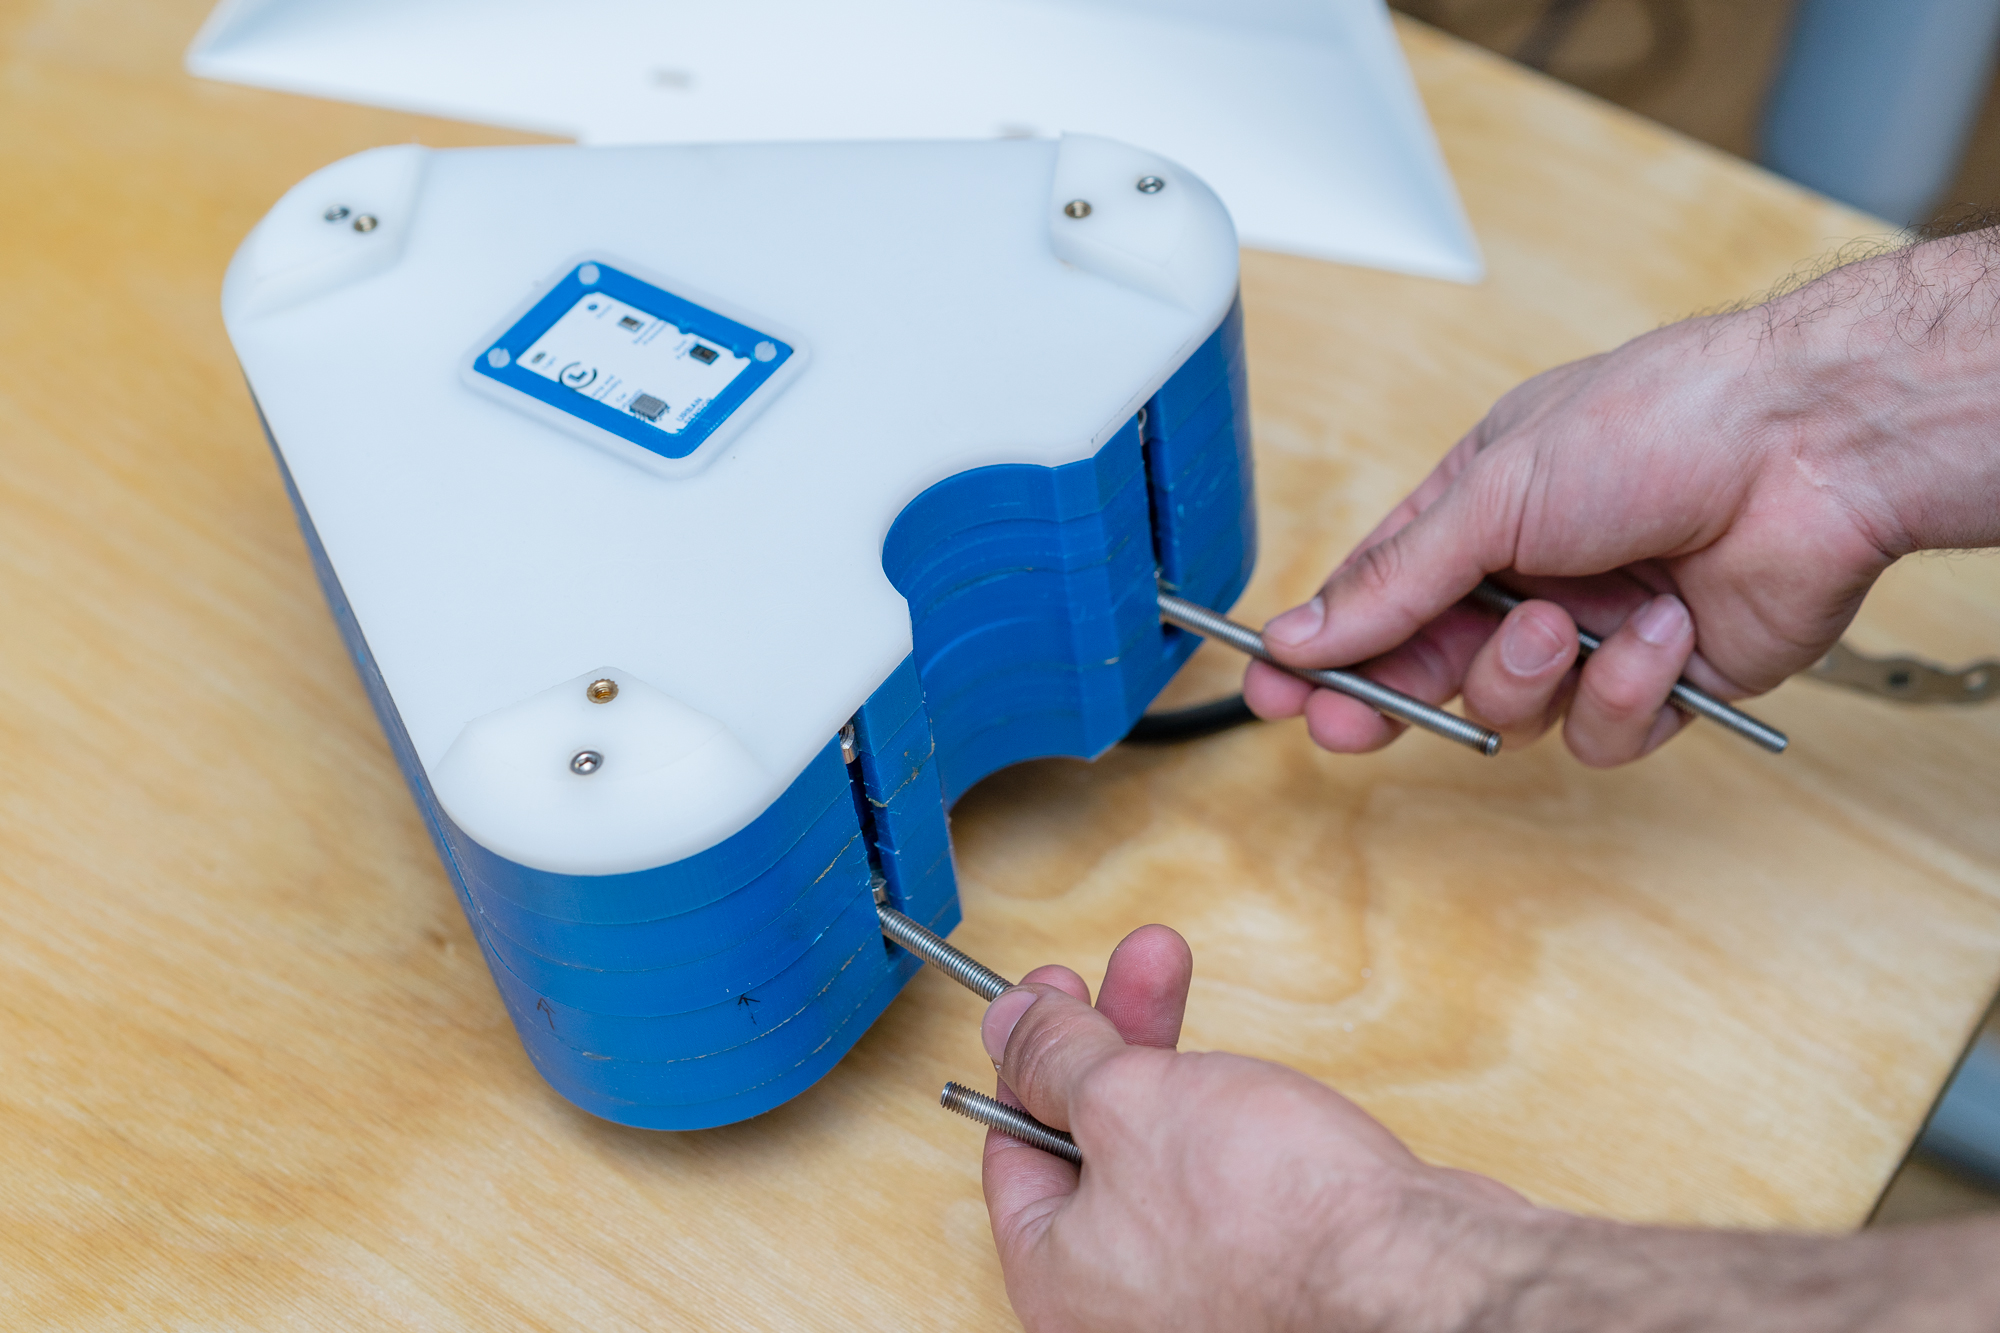
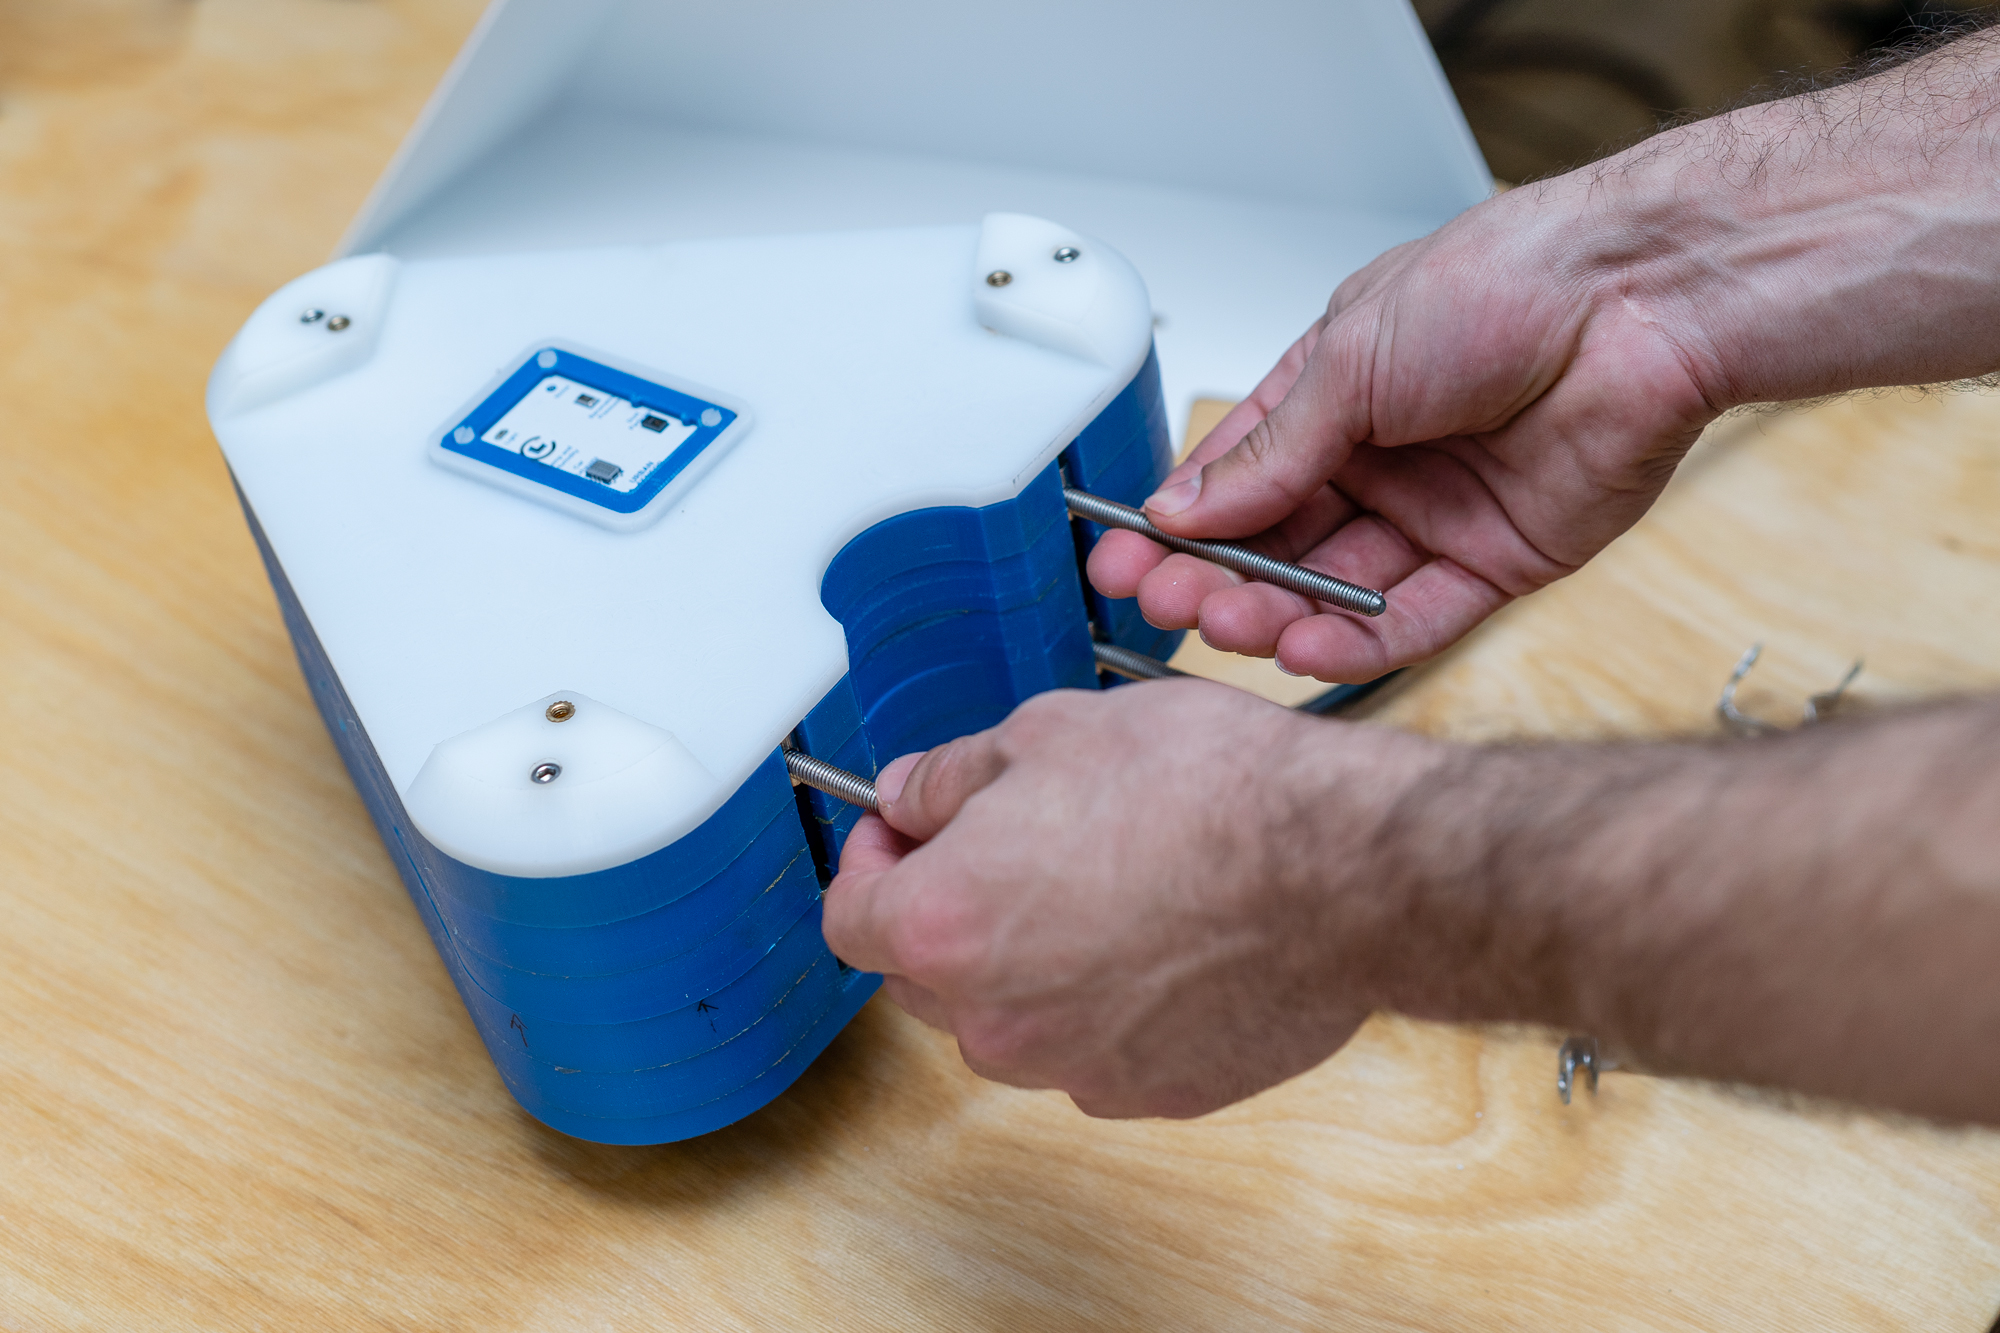
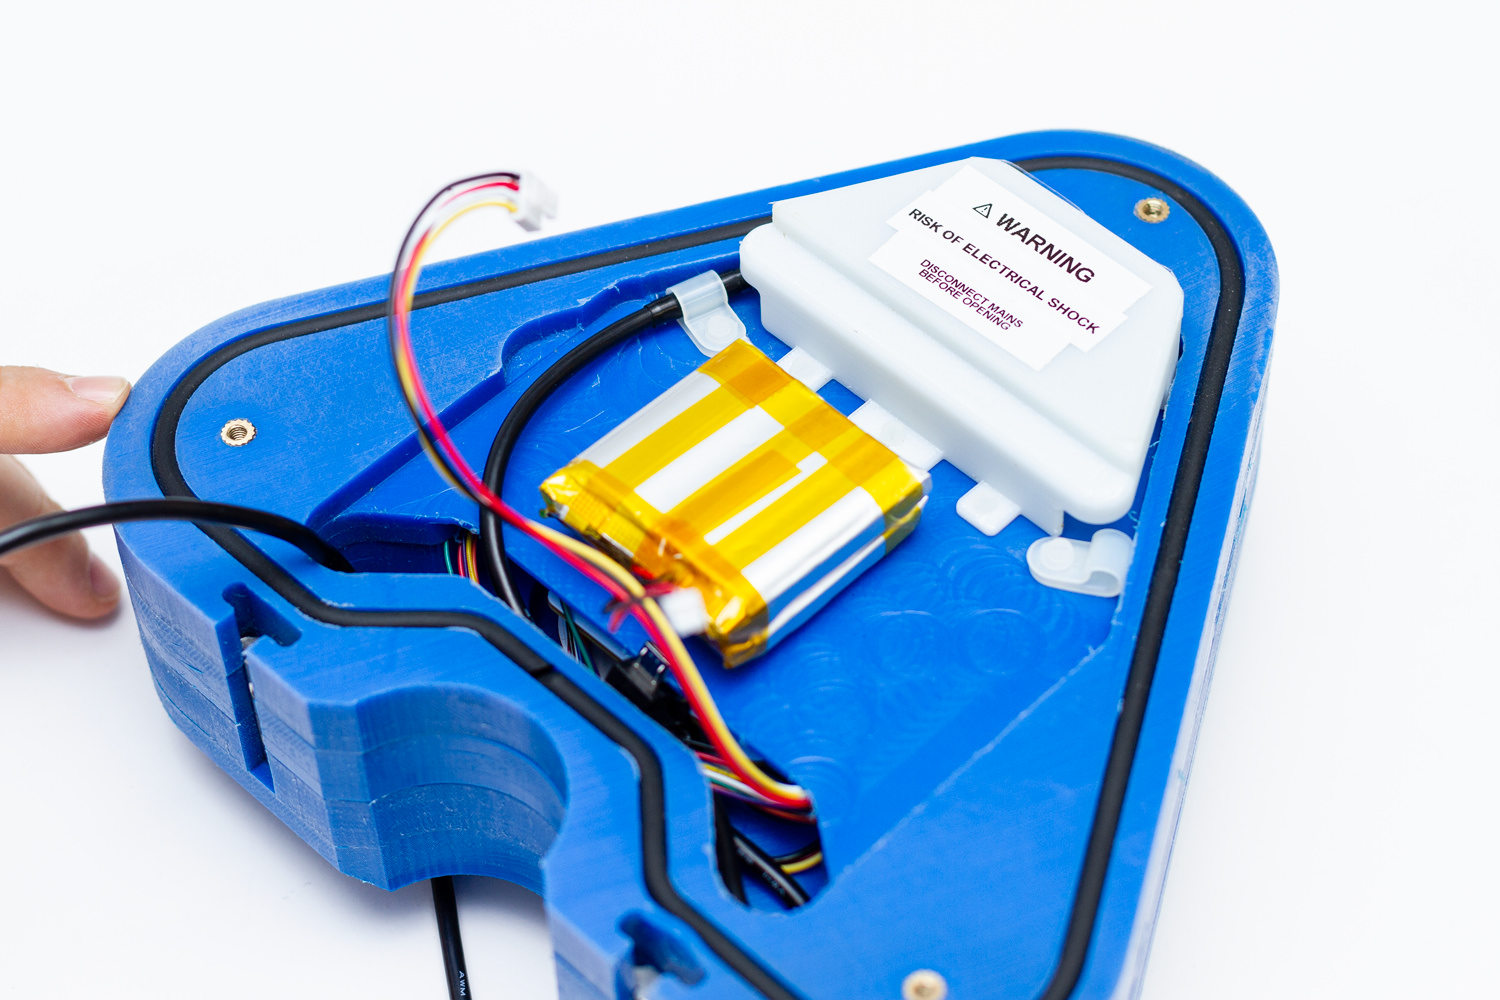
Remove the layer which contains the kit. The kit is attached to the layers below, as seen in the image
-
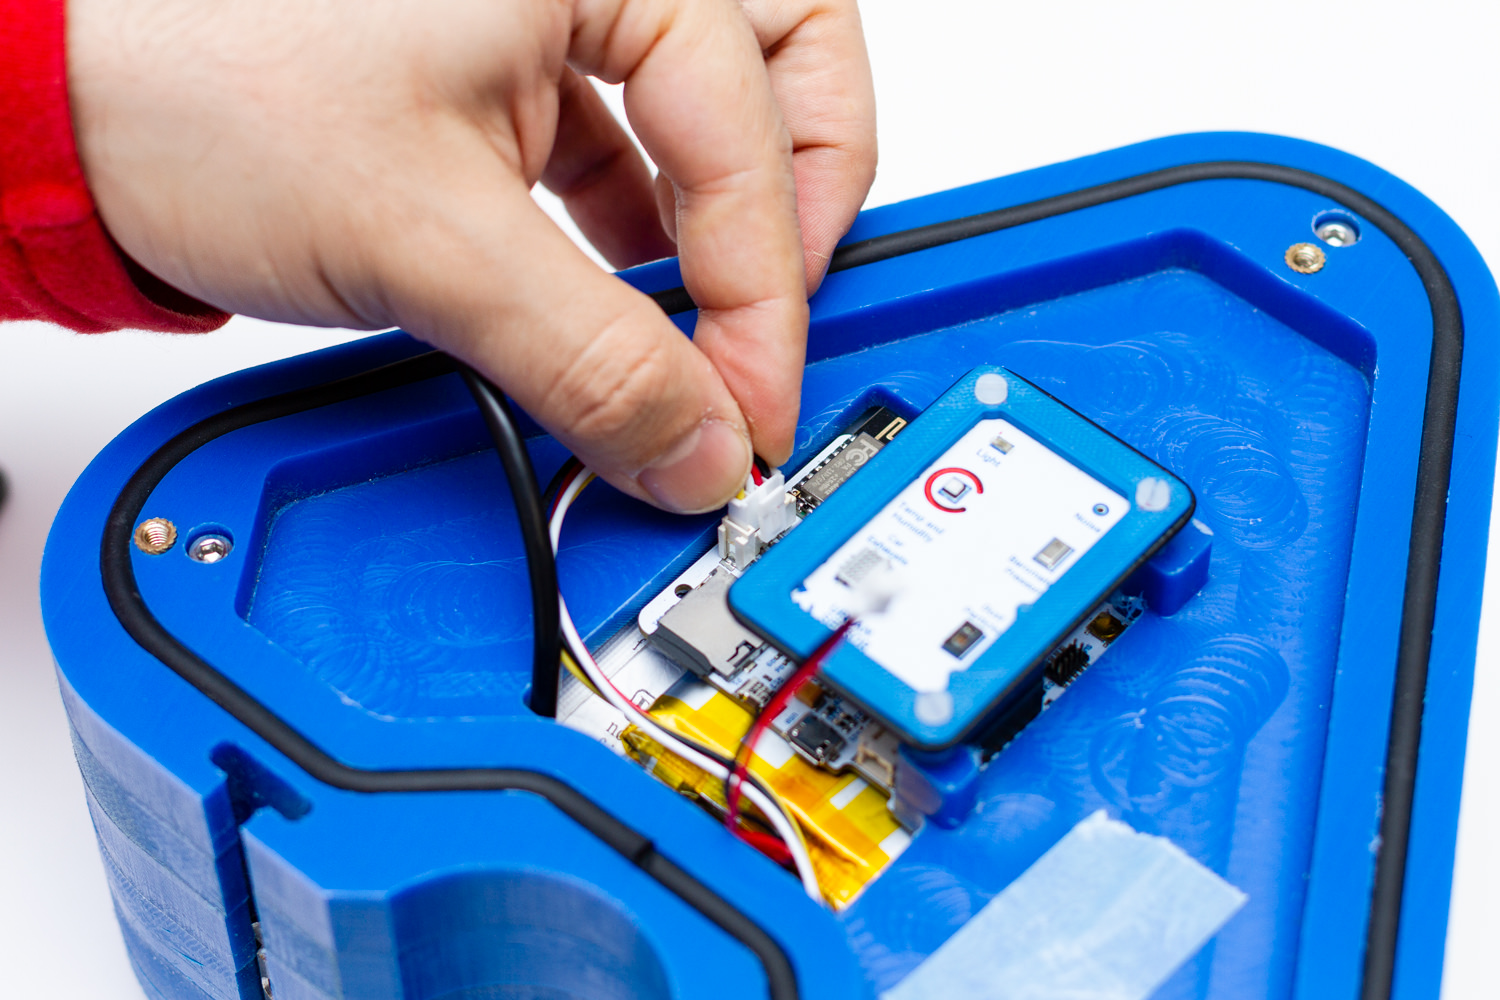
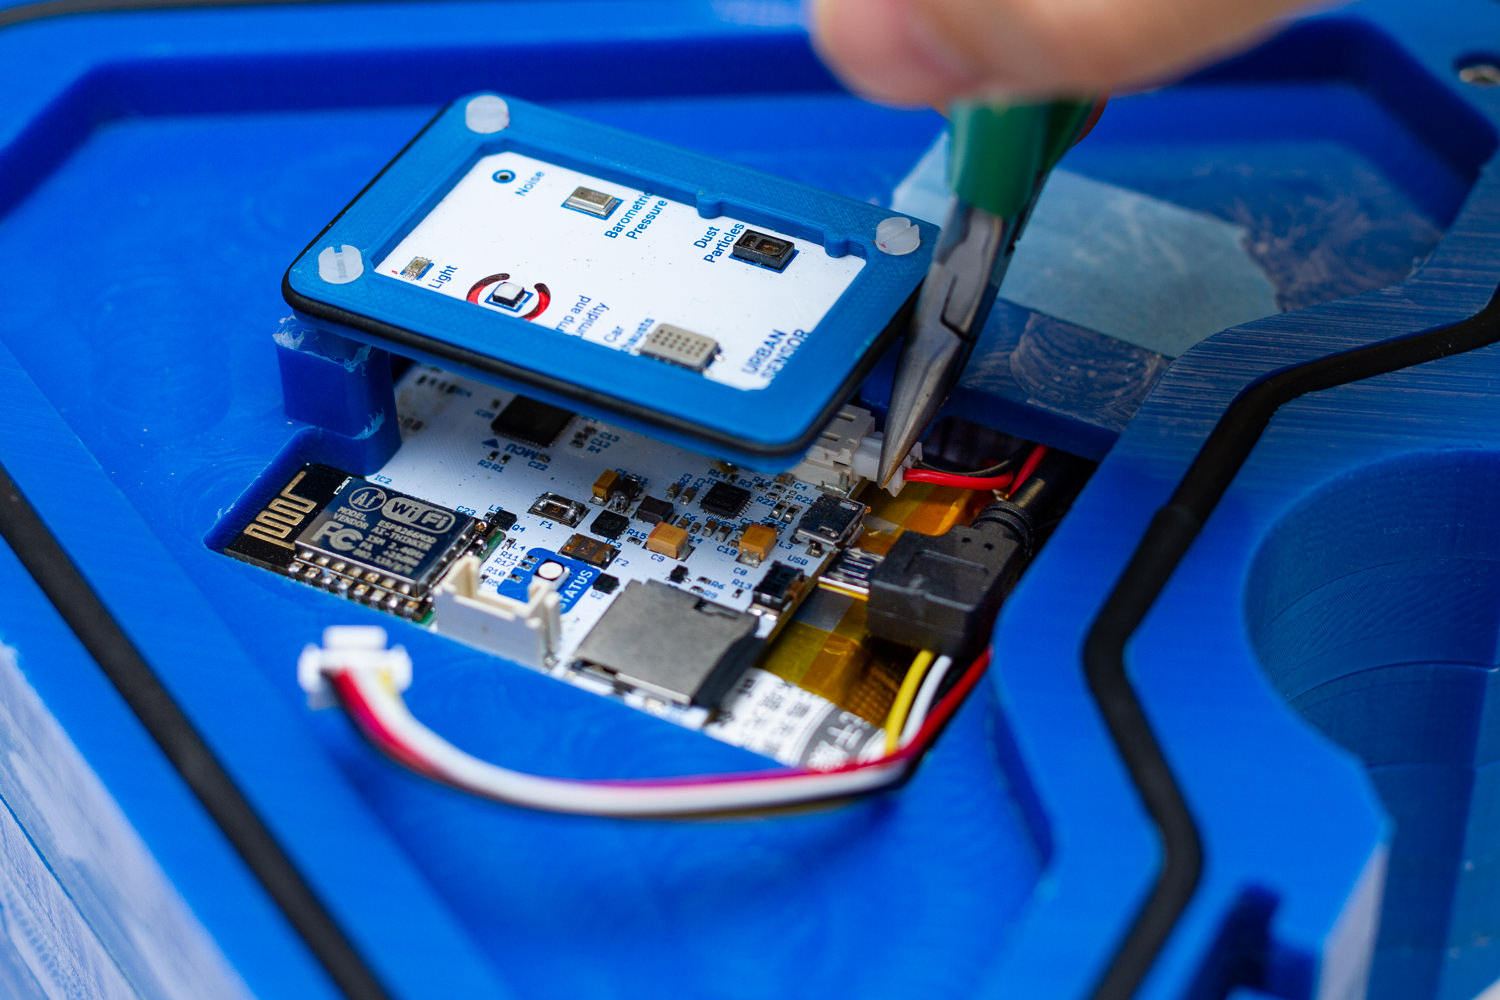
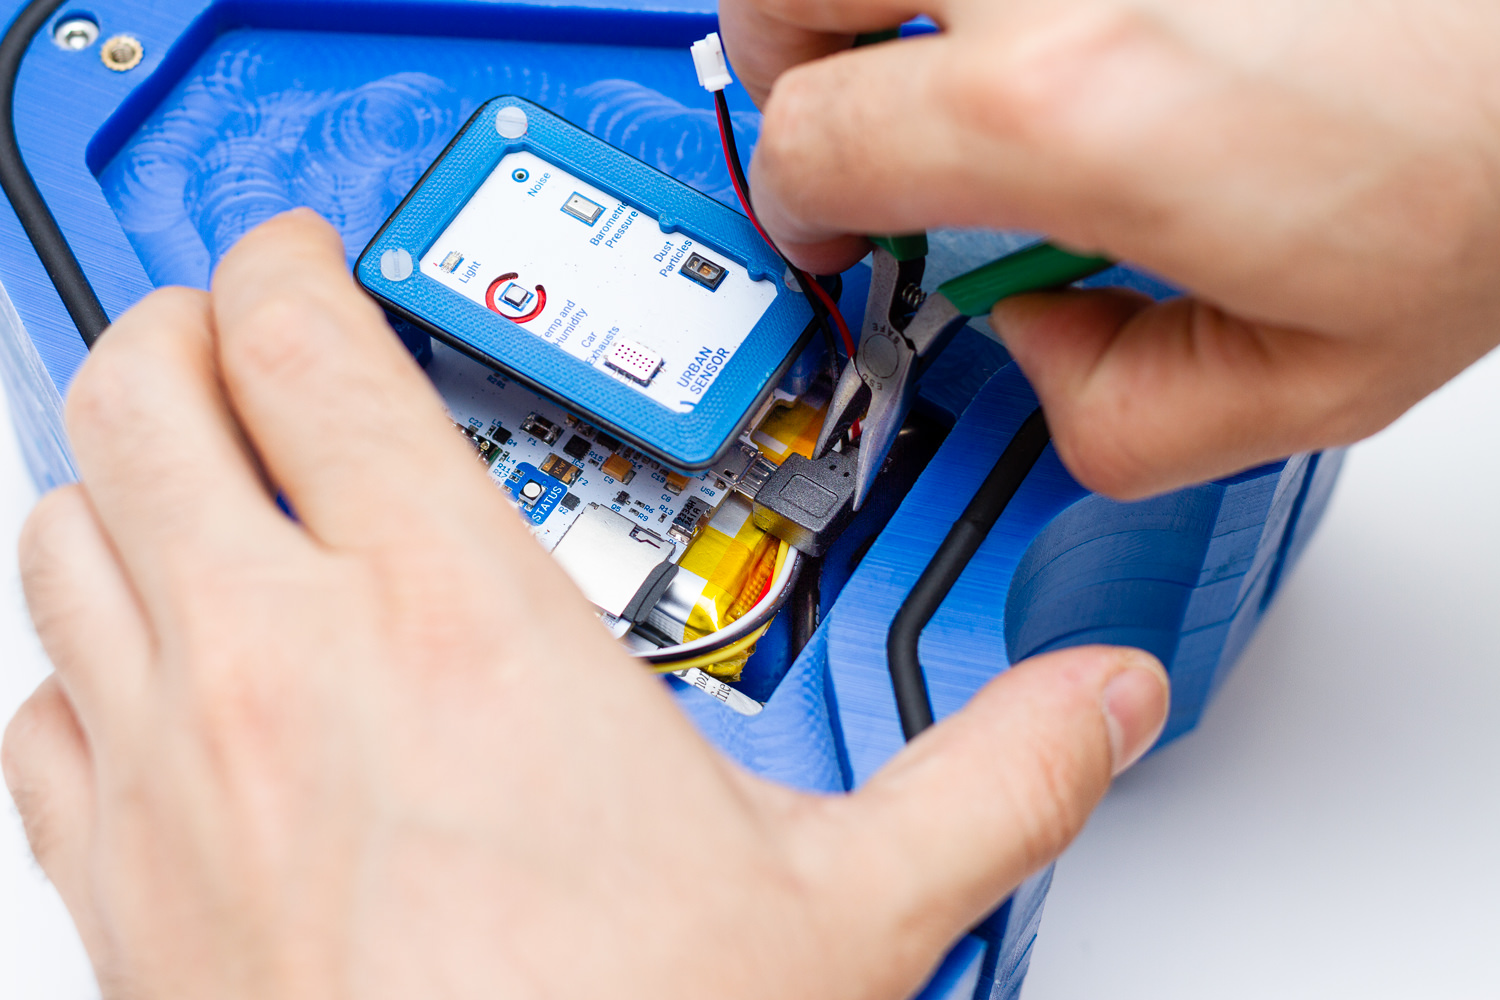
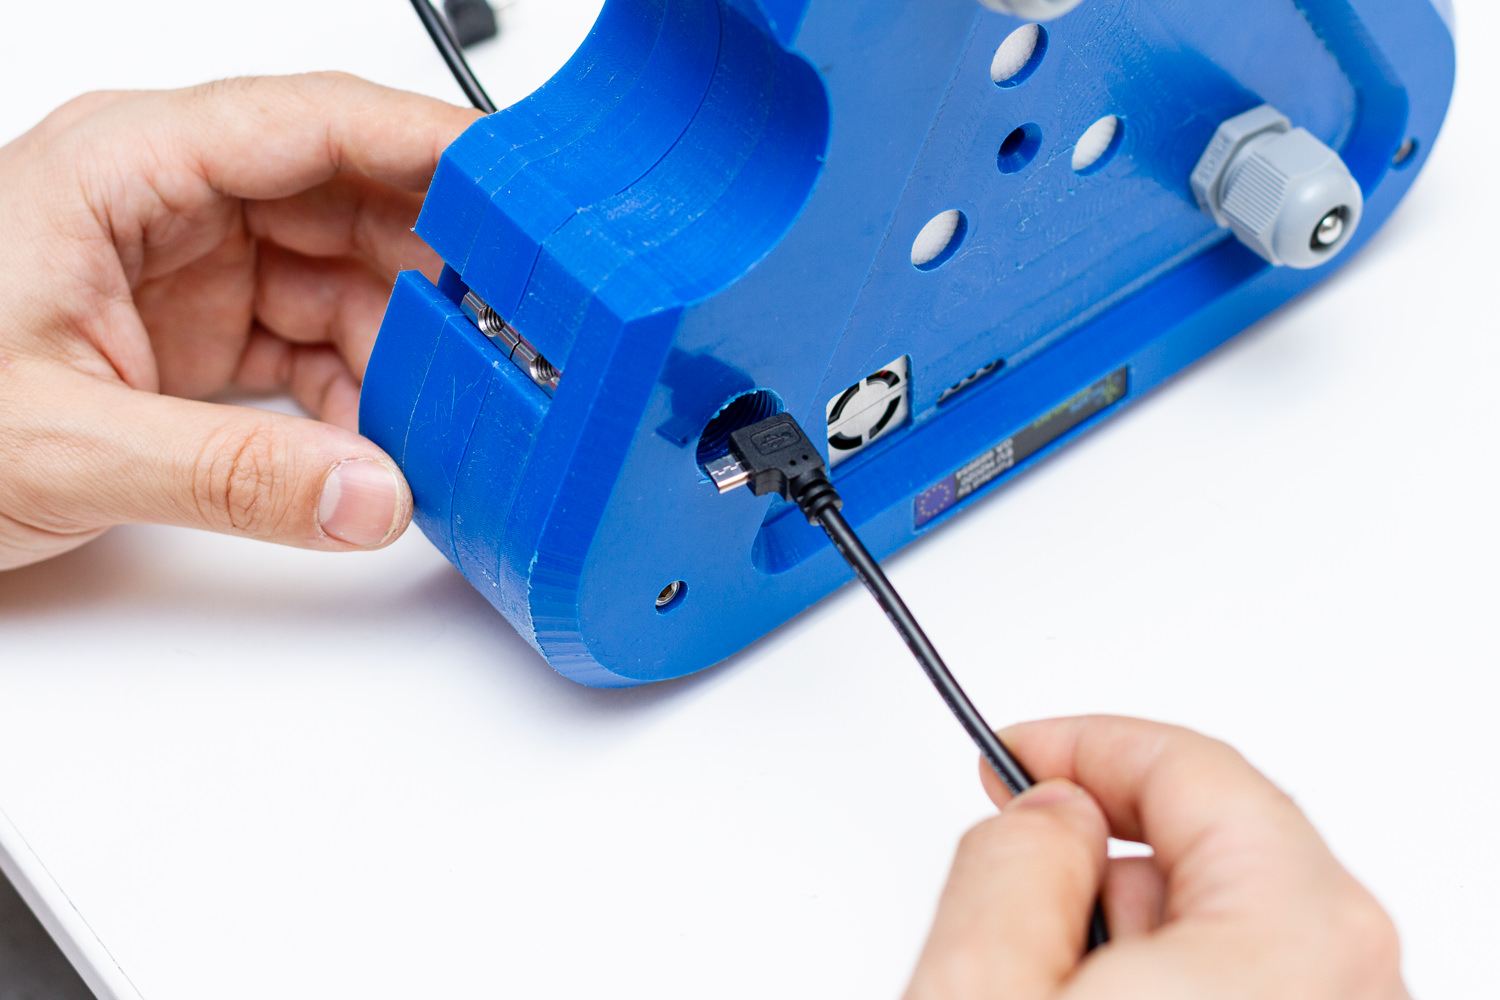
Unplug the different connectors in the kit: I2C, battery and USB
-
You can use nose pliers for the USB and the battery
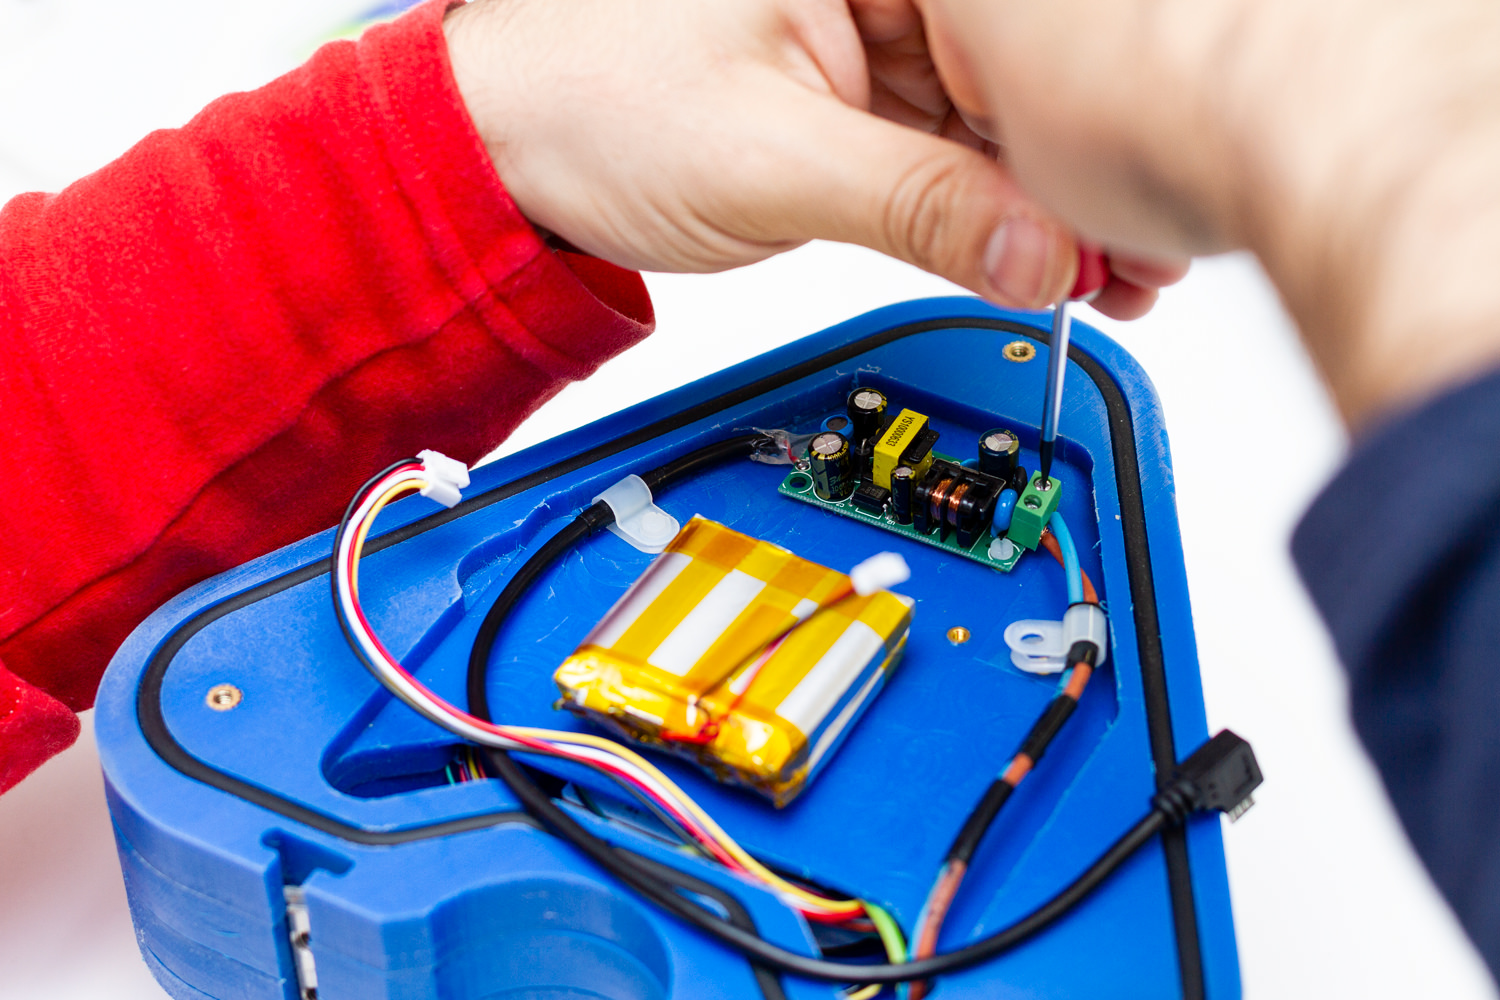
-
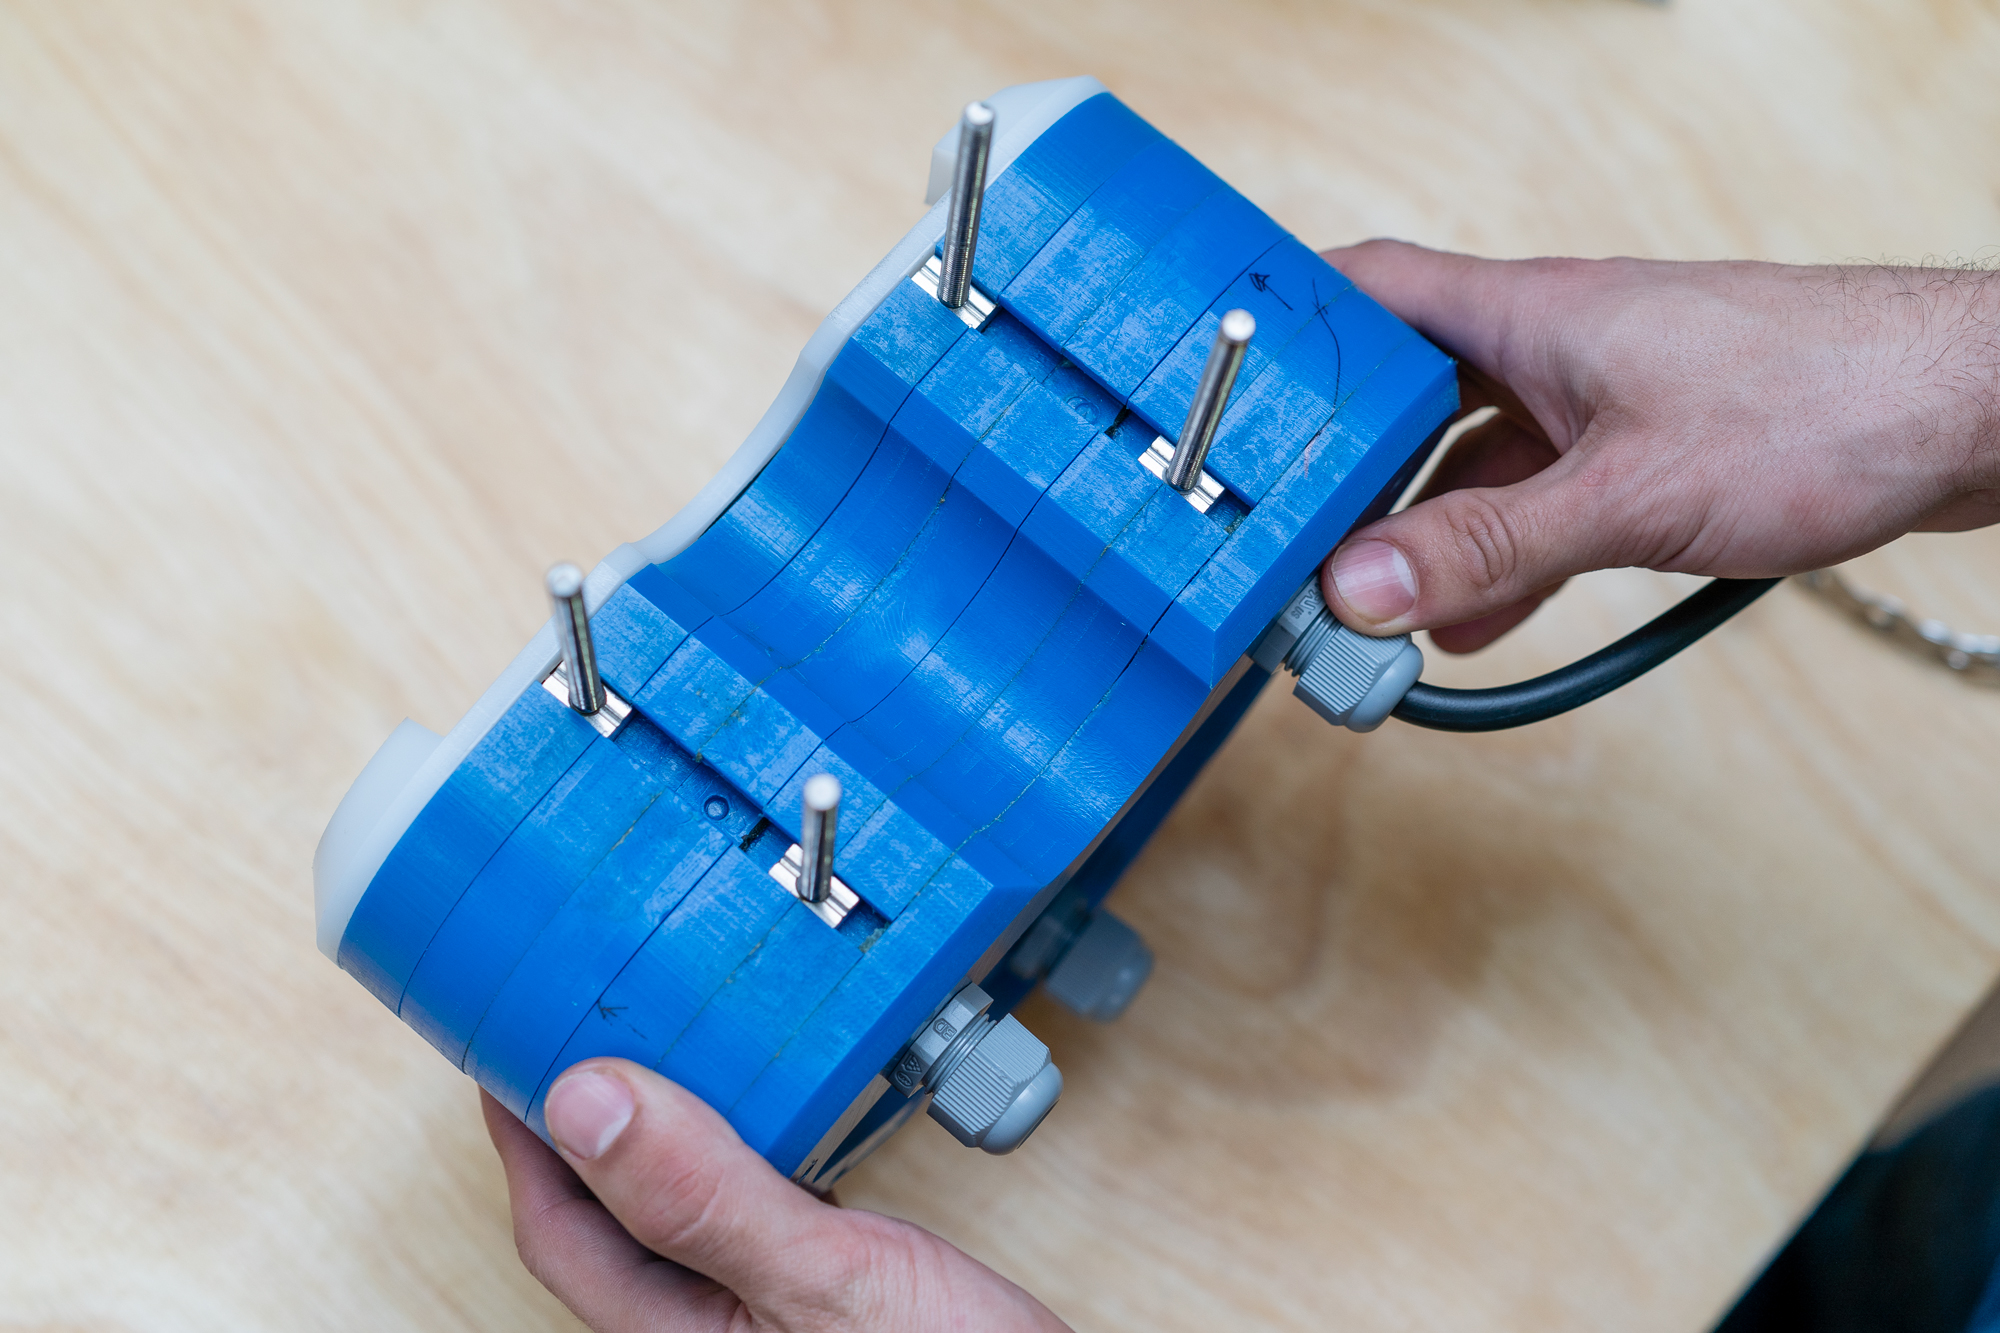
Time to get to the power layer, this time, two blue layers will come off
-
Unscrew the cover for the power area

-
Make sure there is no energy left in the power supply by checking that there is no LED on in it. Then, remove the cables from the power supply and the white brackets
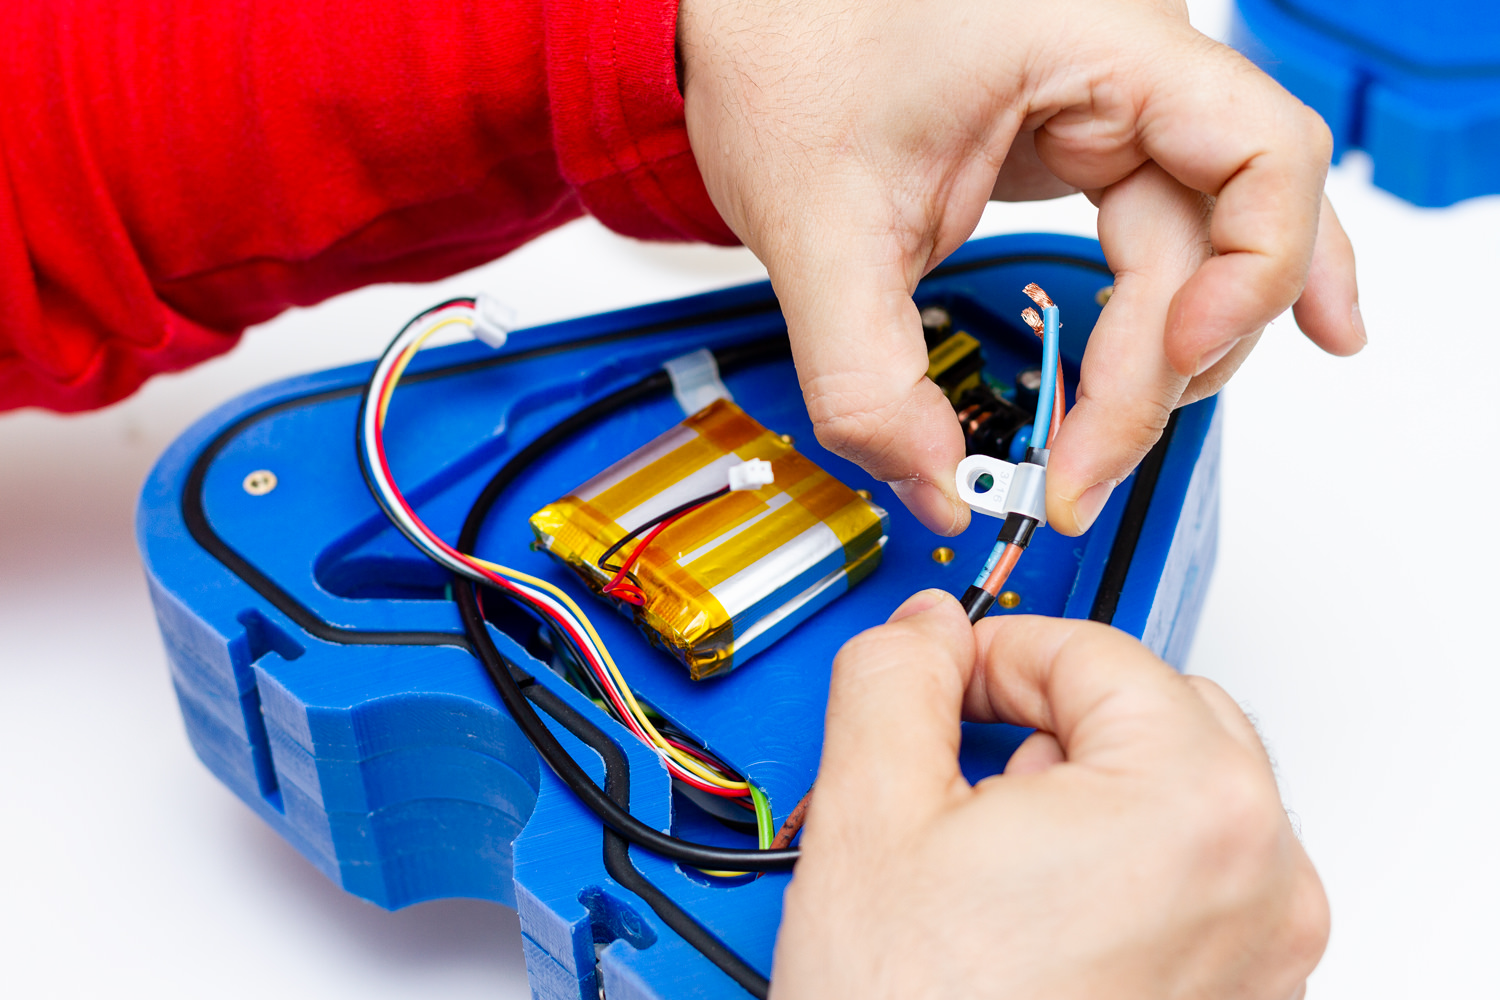
-
Extract the cable from the base's cable gland
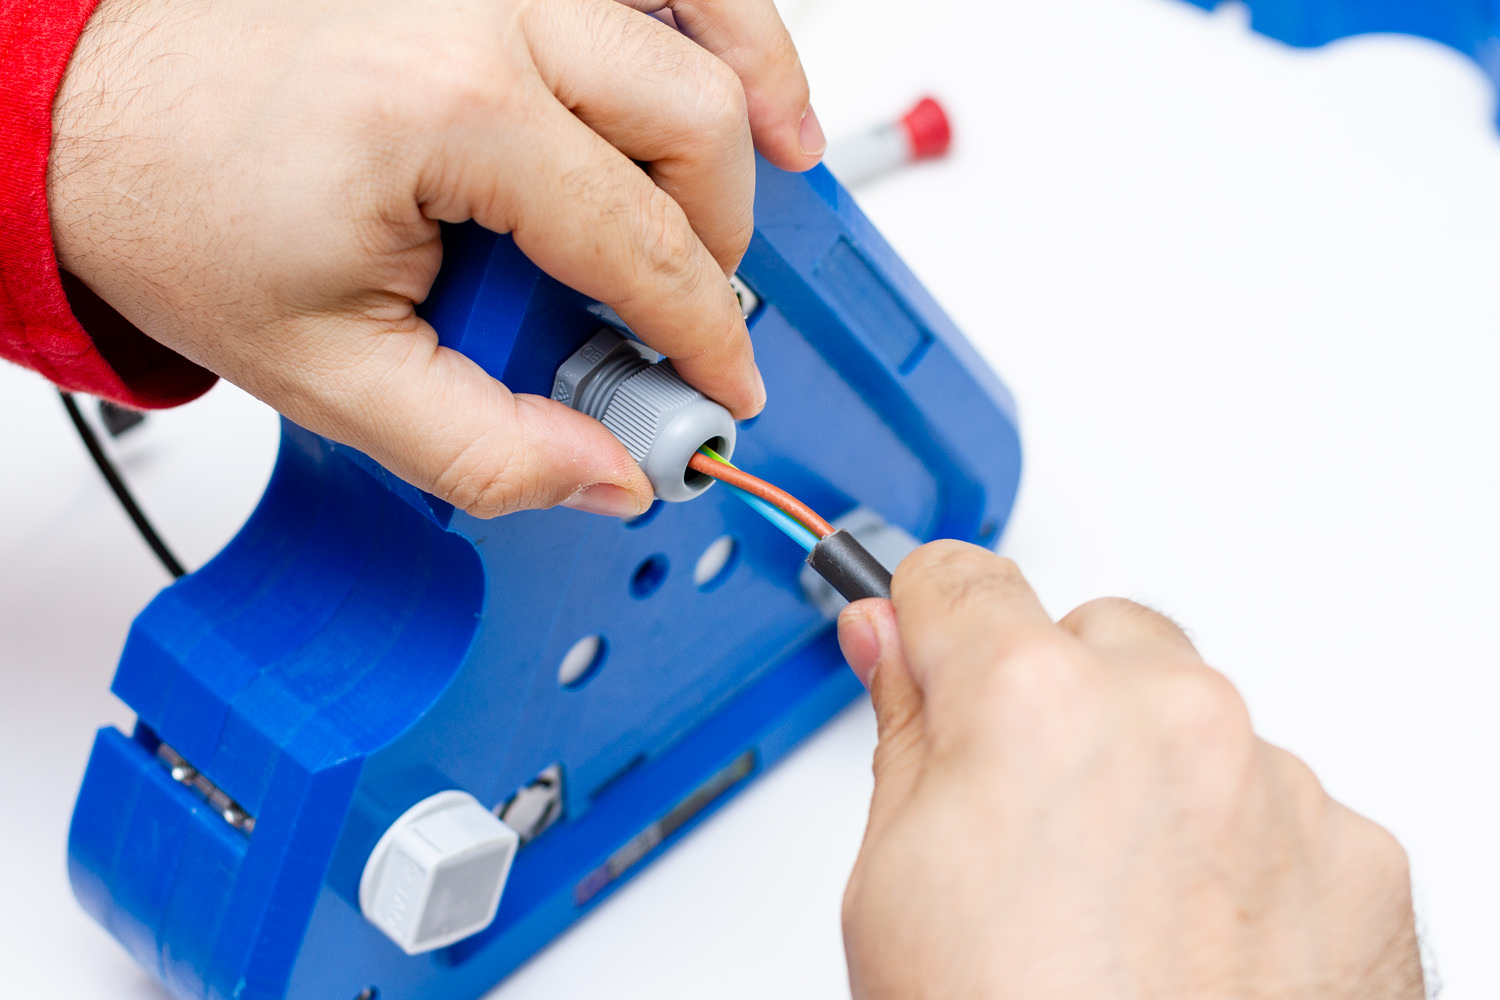
-
Cover the cable gland again and remove the square cable gland on the other side
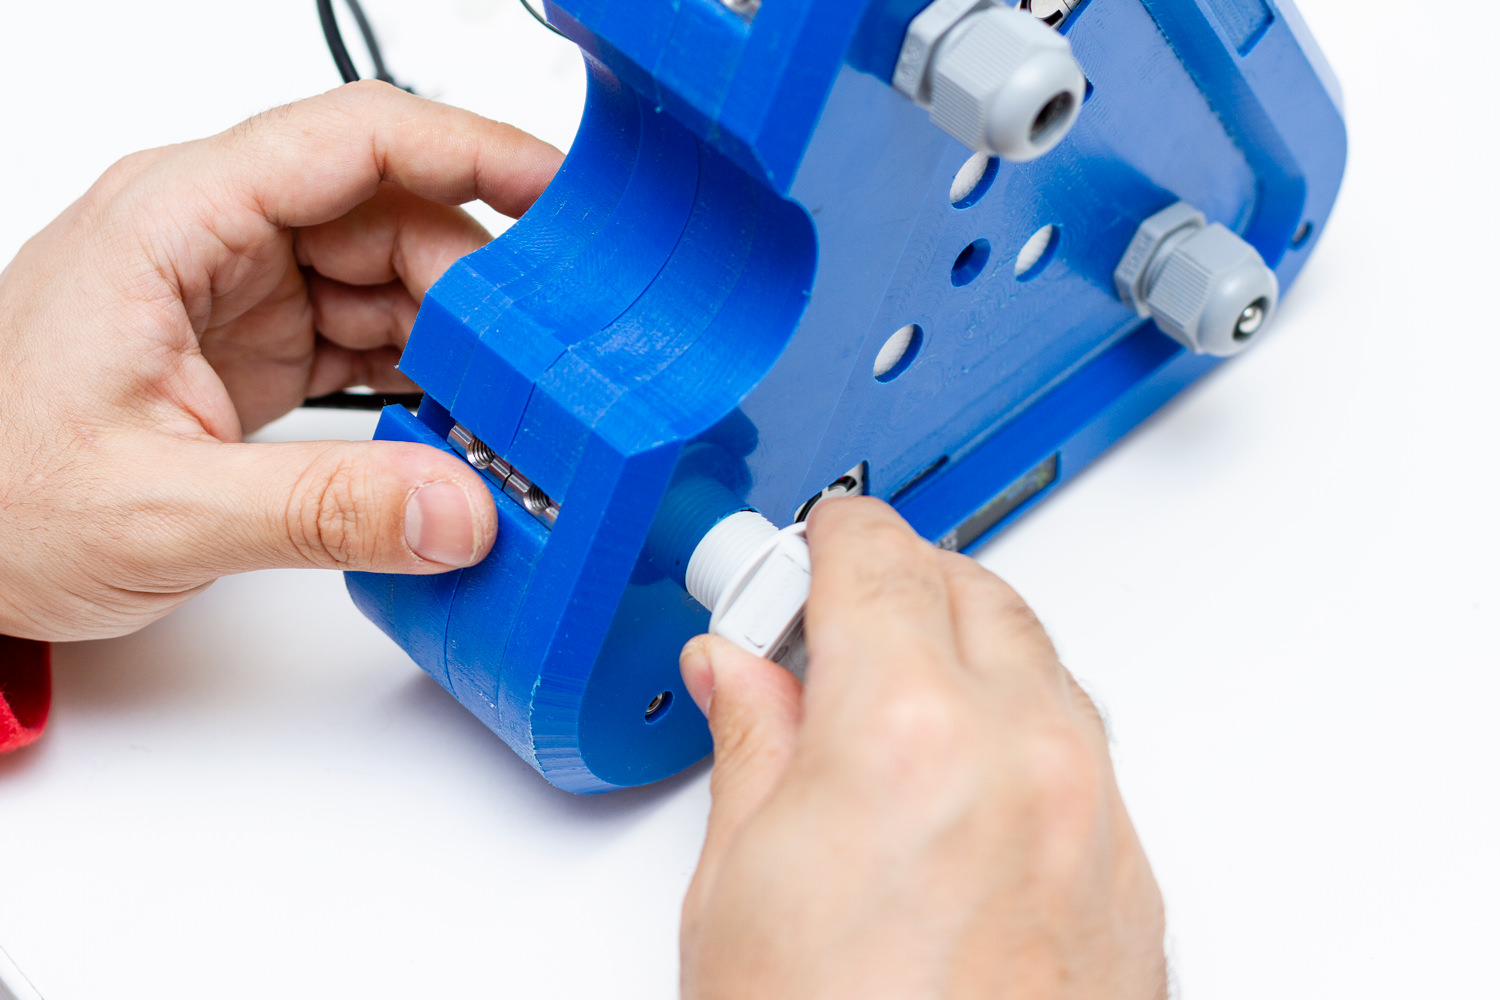
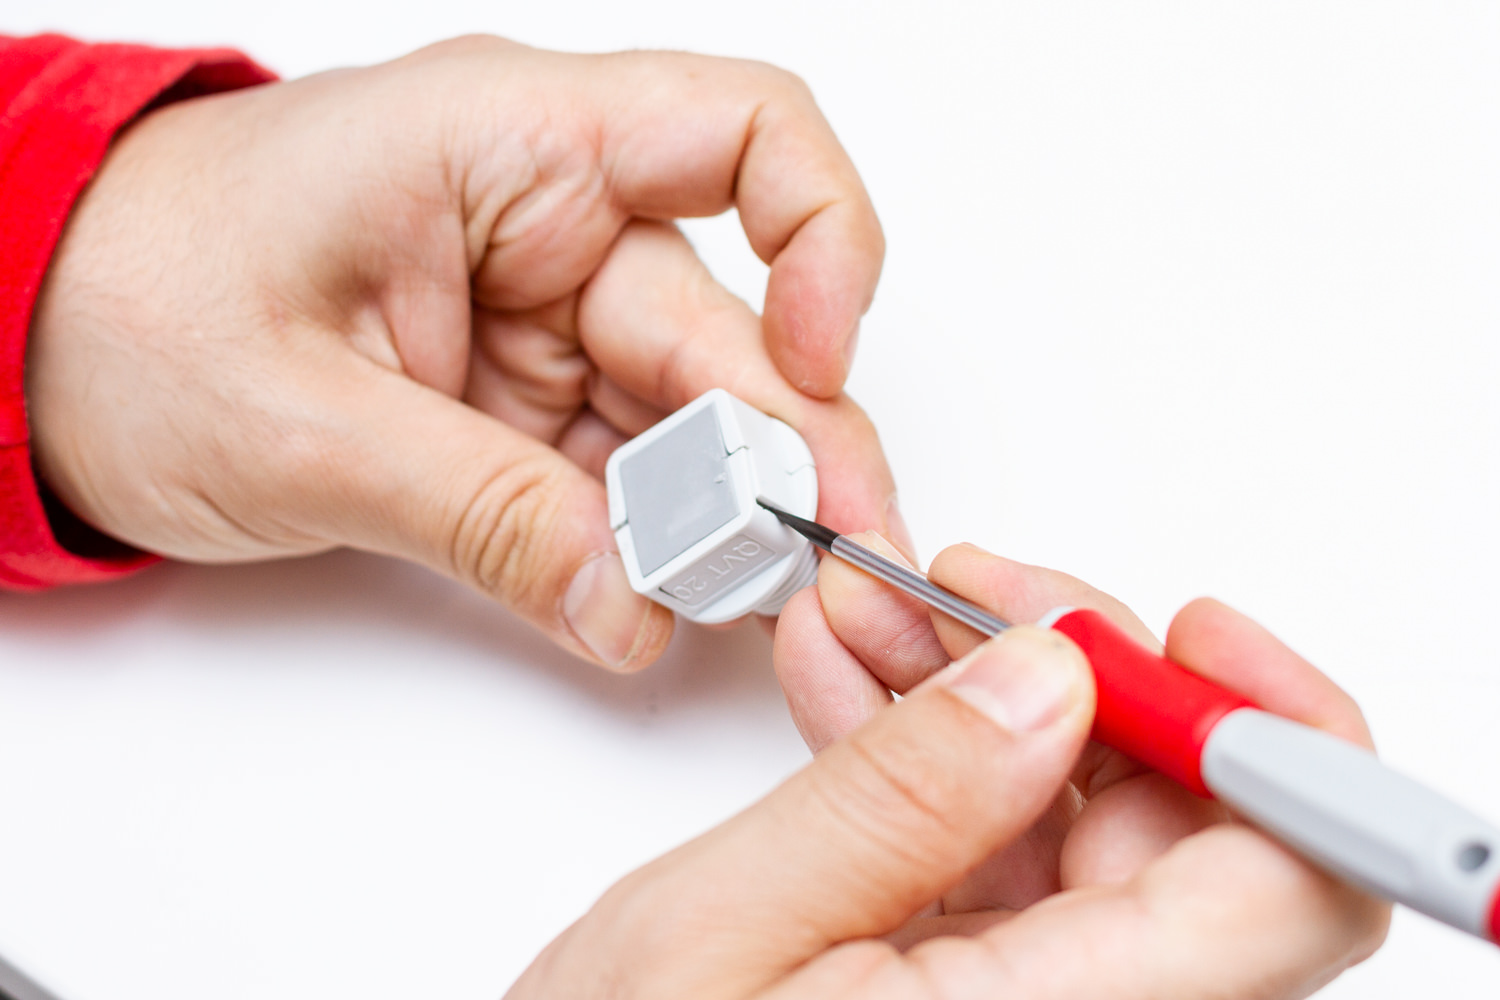
-
Exchange the rubber in the cable gland with the one provided with a hole
-
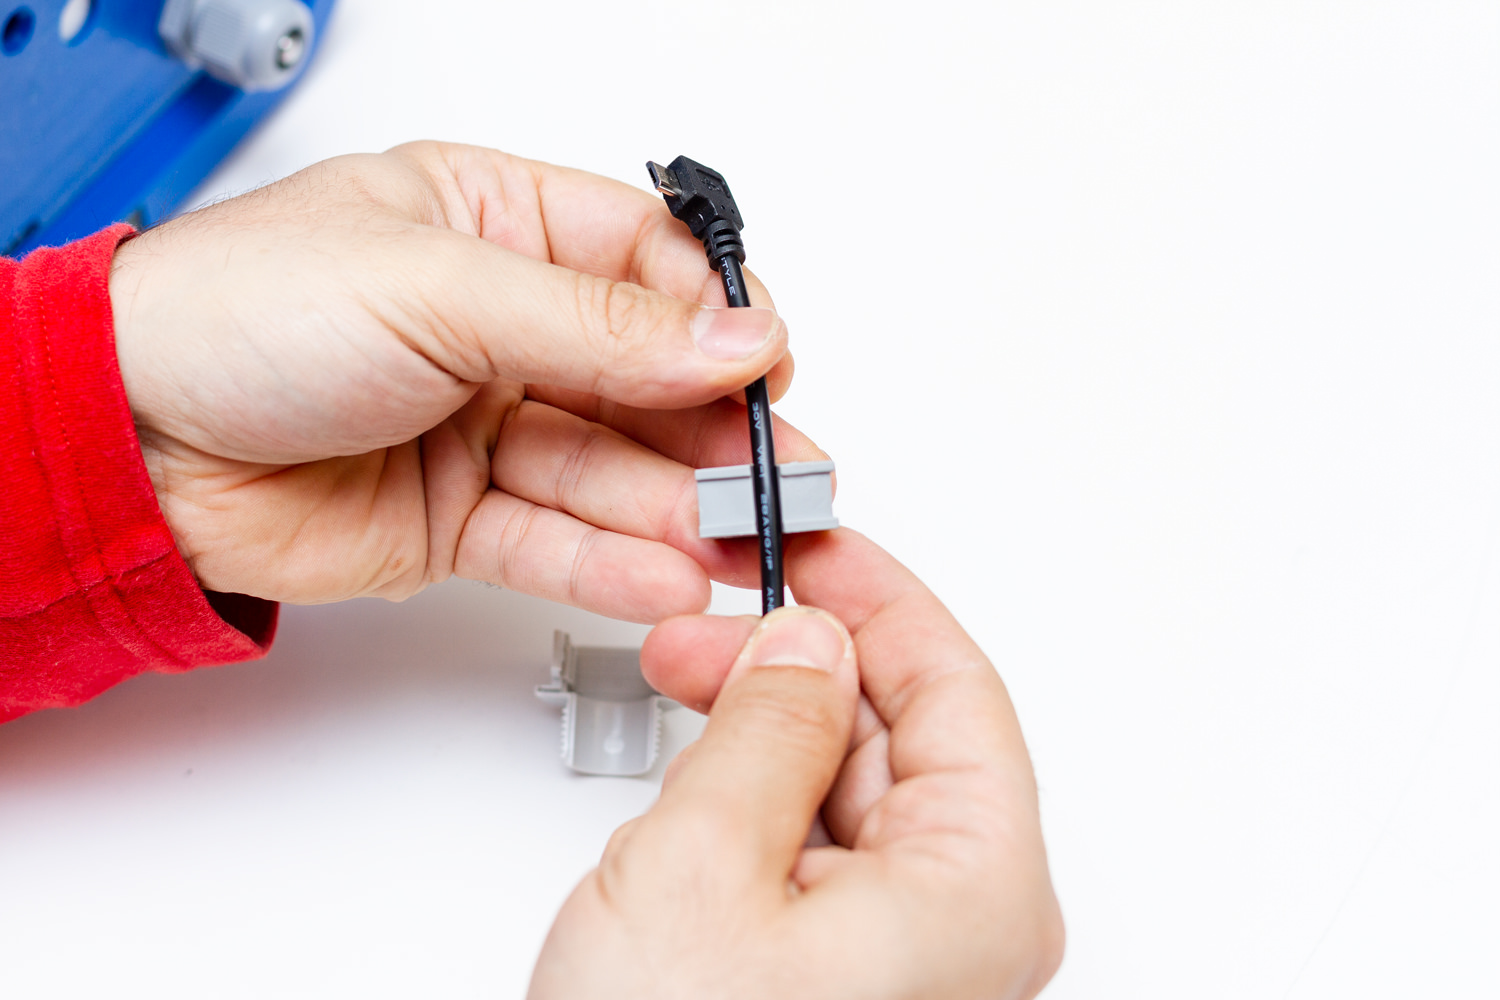
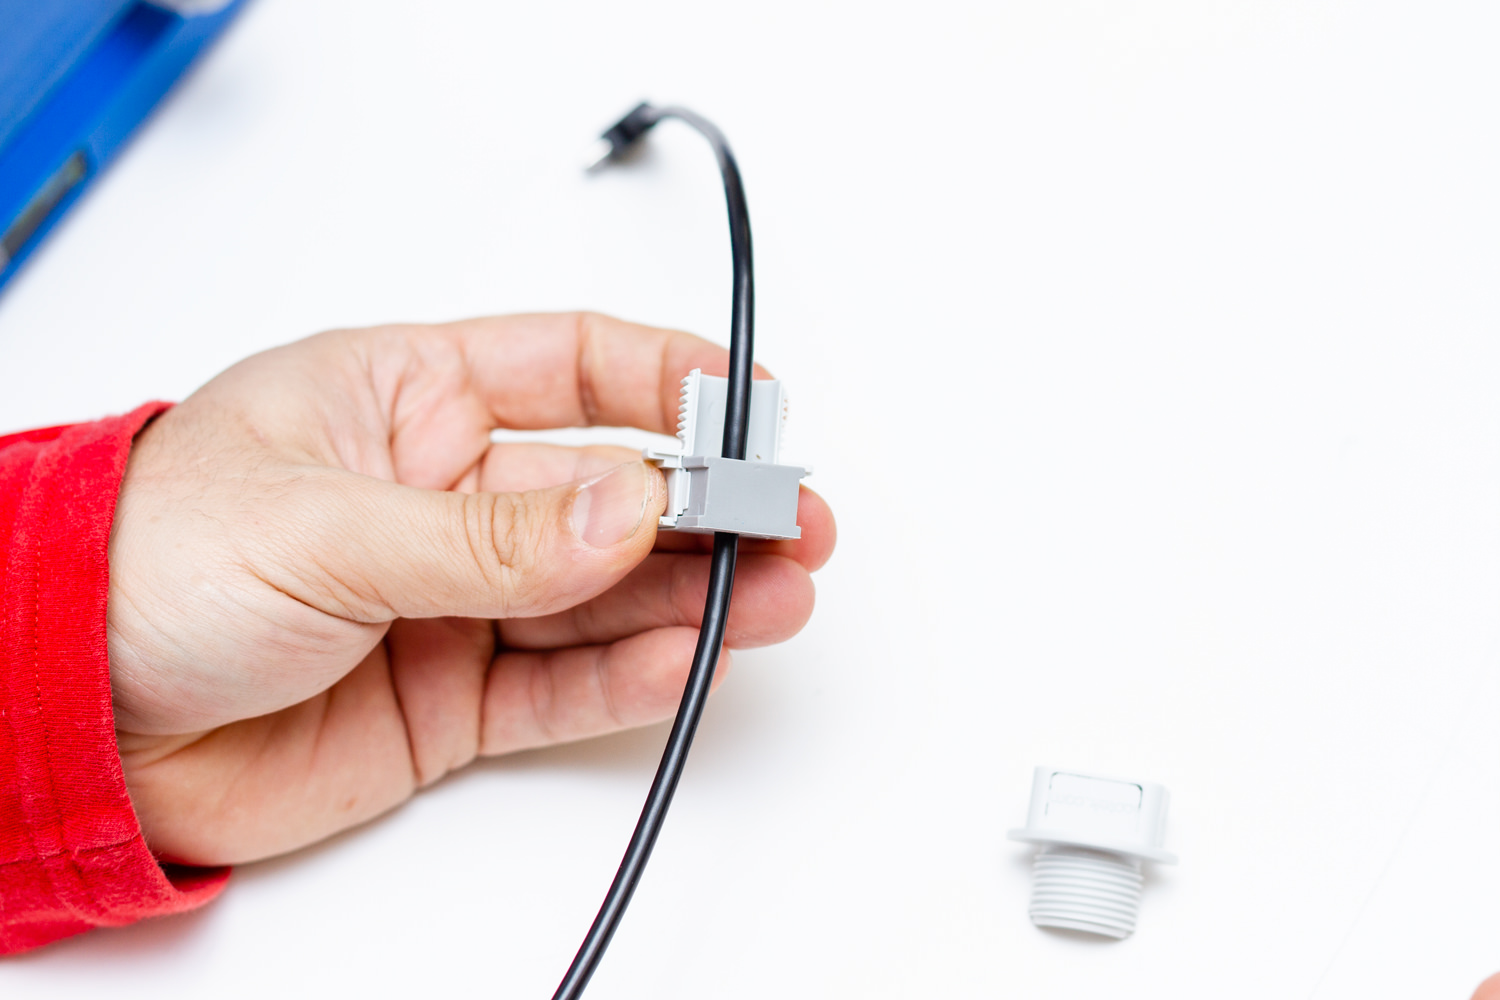
Put the cable in and fix the gland in place. Leave sufficient overhead in the cable to be able to connect it to the kit
-
Put the power cover back on
-
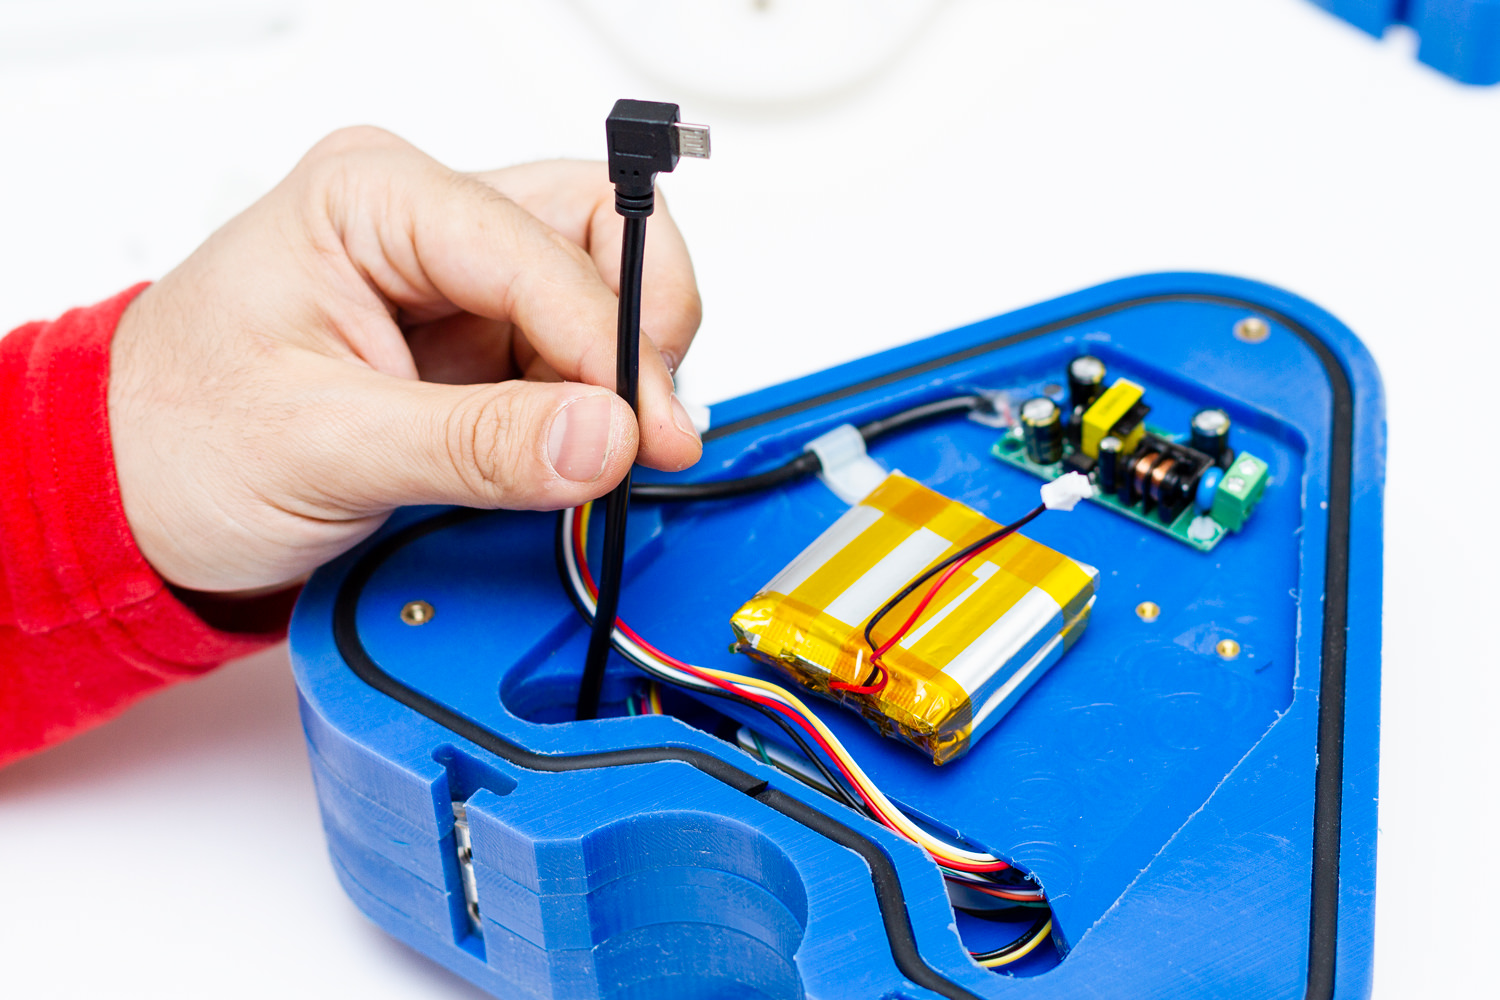
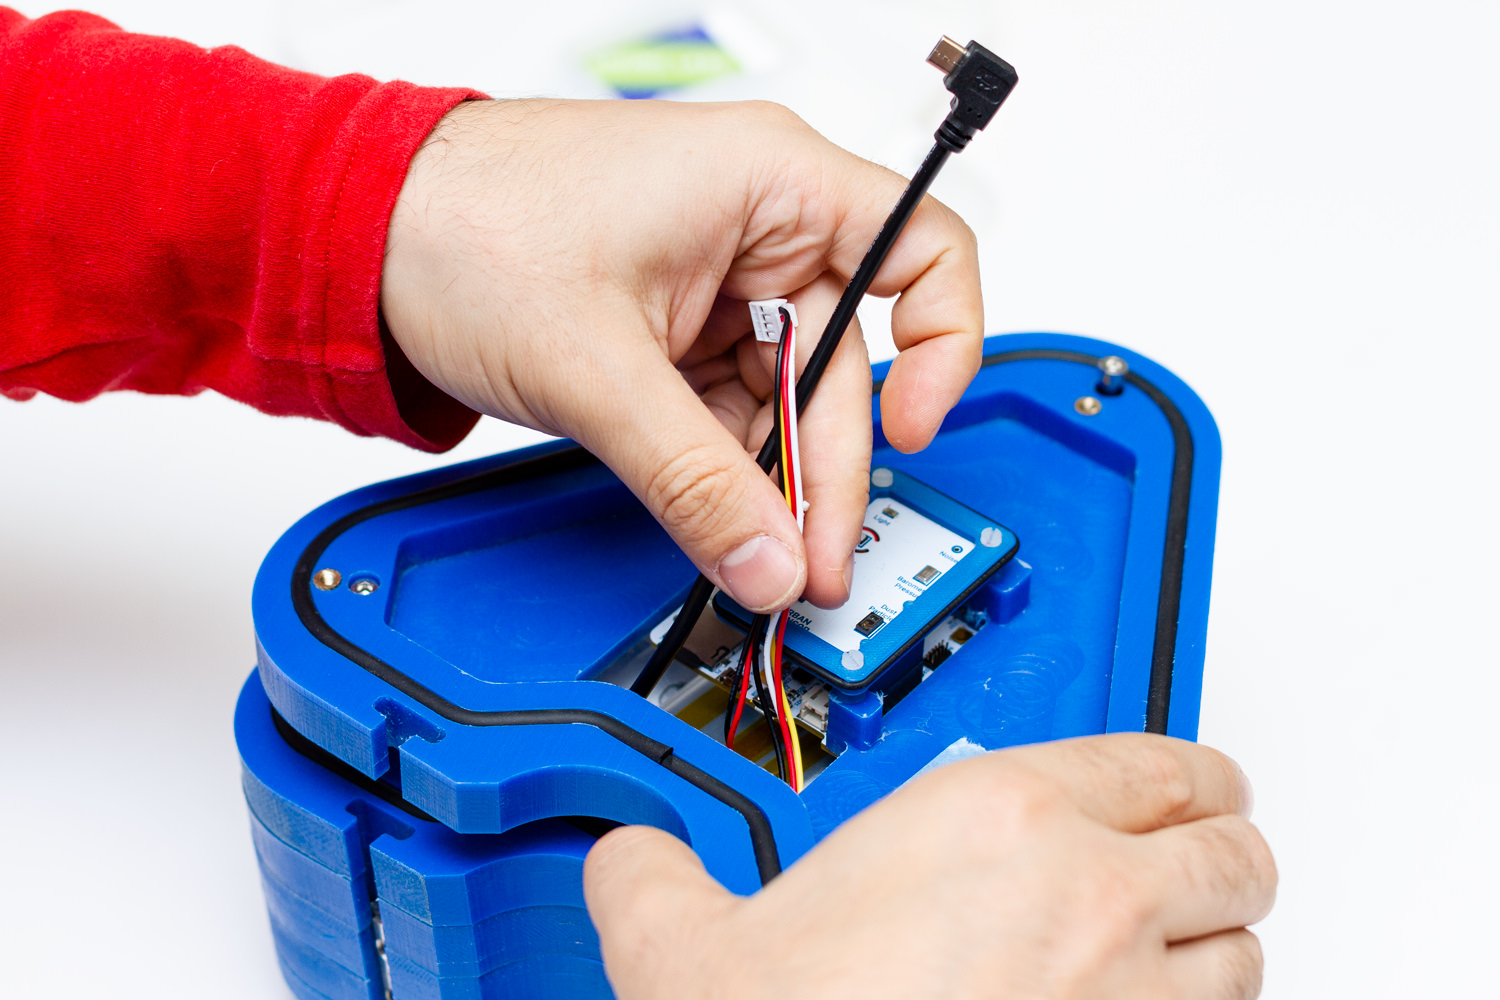
Put the kit's layer back on and pass the cables through
-
Connect everything in this order: first, the I2C connector, second, the battery, third, the USB
-
Put the kit's layer on again. Verify that the o-ring fit's in properly. Close everything and put both layers back on on
-
Now, you can use the USB power supply or the battery pack!
Dimensions

Troubleshooting
The station does not respond
If the station does not respond or does not work properly you can do two things:
Reboot your Station
You can fully reboot your Station by pressing the reset button located under the sensors board as seen on the picture.
That will not delete any configuration, it will simply restart your device.
Press the RESET button for a second. The light will go off and on and the device will start again.

You can also perform a reboot by disconnecting the battery and the USB cable so that the station is restarted. In this way we will not lose any data and configuration except the time in case of being in SD mode.
Factory reset your Station
You can fully reset the Station to the default settings so you can register again your device. Press the main button for 15 seconds.
After 5 seconds the light will go off and will go on again after 15 seconds. Then you can release the button and your device will be fully resetted as a brand new Station.
The LED does not turn on and the station does not work
First of all, push the station button. Maybe it's simply off.
If this does not work, surely the station has been left without battery. You will have to charge it using the USB charger. Any other mobile charger will also work.
We will know that it is charging when the LED emits orange pulses and once the battery is charged it will emit green </ span>
The station does not store the data on the SD card.
Some SD cards may have problems over time. We can try formatting it but in case it does not work any micro SD card we buy at any mobile or computer store it will work. The size is not important and any micro SD or micro SDHC 512MB card up to 32GB will work.
