Water sensors

Getting around the box
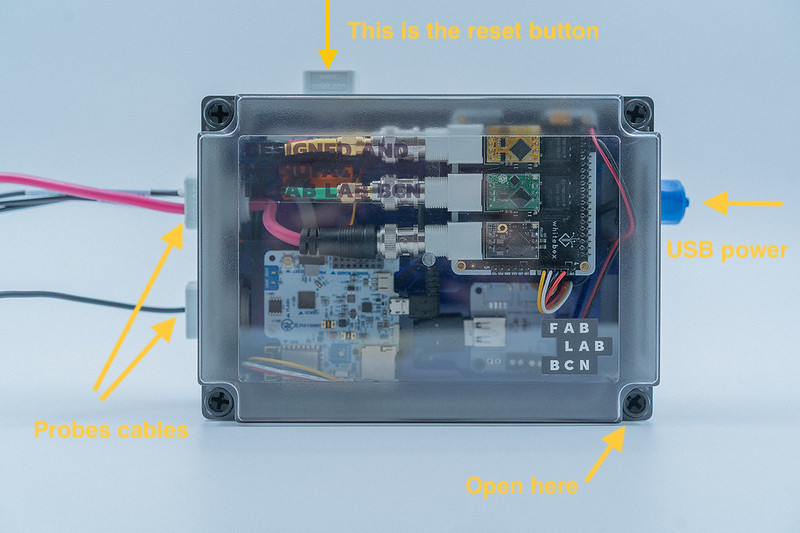
Here is a first overview of the box:
Setup
Only if you bought them separately
This guide describes the setup procedure of the Atlas Scientific probes in case you bought them separately. If you have a Water Station, you don't need to do this.
Manually switching circuits to I2C mode
If the drivers are new normally they come configured in UART mode so we need to change them to I2C mode.
- Remove circuit from Tentacle shield.
- Put the circuit into a breadboard.
- For PH, DO, ORP and EC: Short the
PGNDpin to theTXpin using a jumper wire. - For RTD (temperature): Short the
PRBpin to theTXpin using a jumper wire. - Power the device (connecting
GNDandVCC) - Wait for LED to change from green to blue (UART→I2C) or from blue to green (I2C→>UART).
- Remove the jumper wire from the
PGND(orPRBrespectively) pin to theTXpin (Do this before removing power!). - Remove power (
VCC). - Apply power (
VCC). - The device is now in the new mode (repeat all steps to switch back to previous mode).
Official documentation
Connection to Smartcitizen Kit
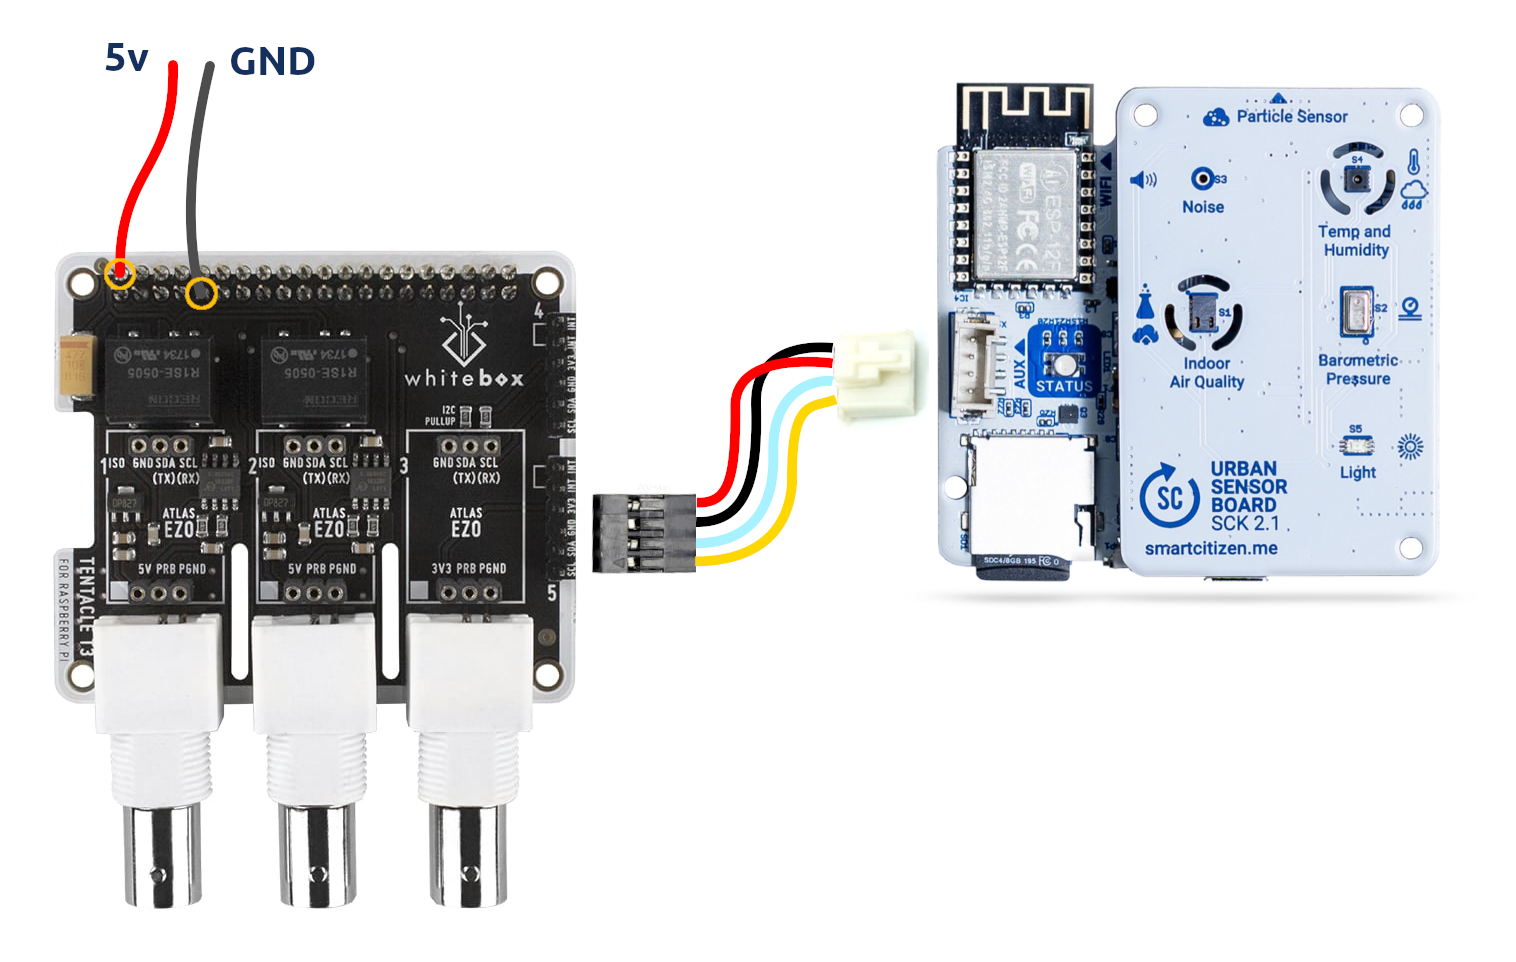
After connecting the Tentacle 3 to the SCK power your kit and if youre connected to the shell the autodetecition message should look similar to this (depending on the connected drivers and probes):
Urban board detected
Enable Atlas Temperature
Enable Atlas PH
Enable Atlas Conductivity
Enable Atlas Specific gravity
...
Sensor calibration
Make sure to follow our sensor calibration guide for the water sensors.
Preparing the probes
Atlas Scientific has great documents on how to use their probes, and maintain them (all the images below are theirs). Many other probes by other manufacturers will have the same issues, as they are based on the similar working principles. Below we compile some guidelines specific to the sensors. Make sure you also follow the instructions on how to calibrate them.
All probes
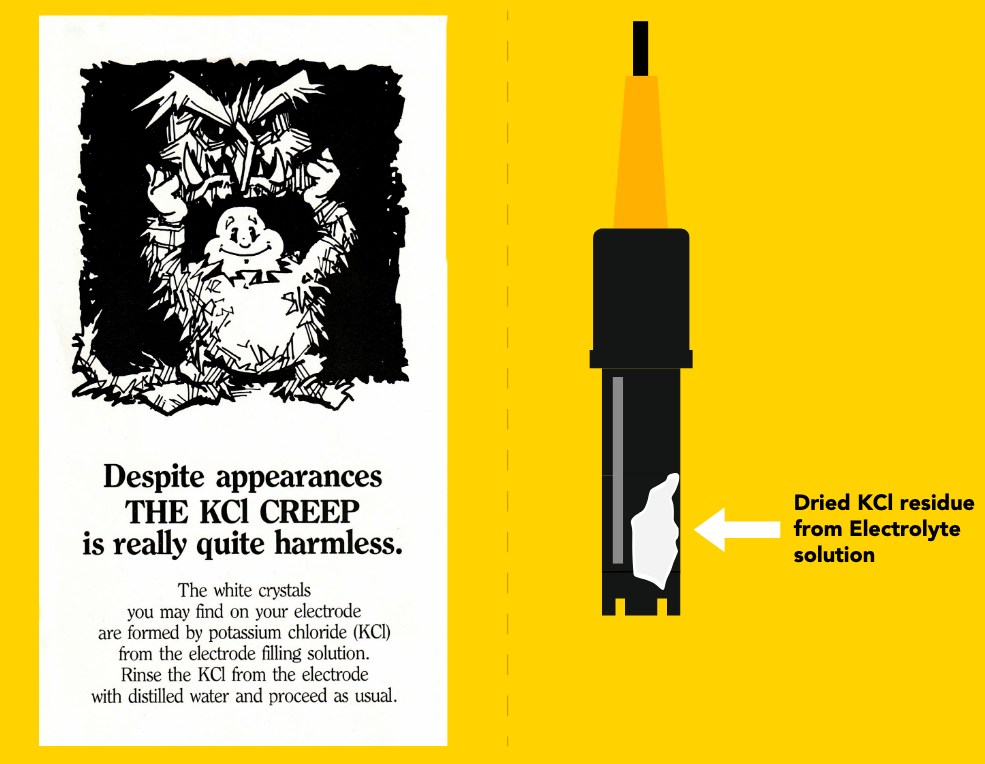
Most of the probes will generate potassium chloride (KCl) crystals that are fully harmless. Make sure you clean them with distilled water before use.
Once you are done using them, the probes that have a protective electrolyte solution (pH and ORP) will need to be put back in.
Dissolved Oxygen
The dissolved oxygen probe needs to be actively maintained. The datasheet has a good information on how to maintain and clean the probe. Here is a small brief:
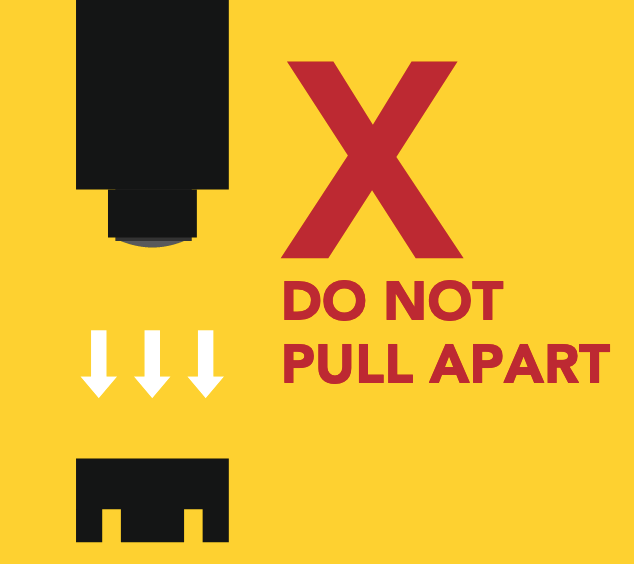
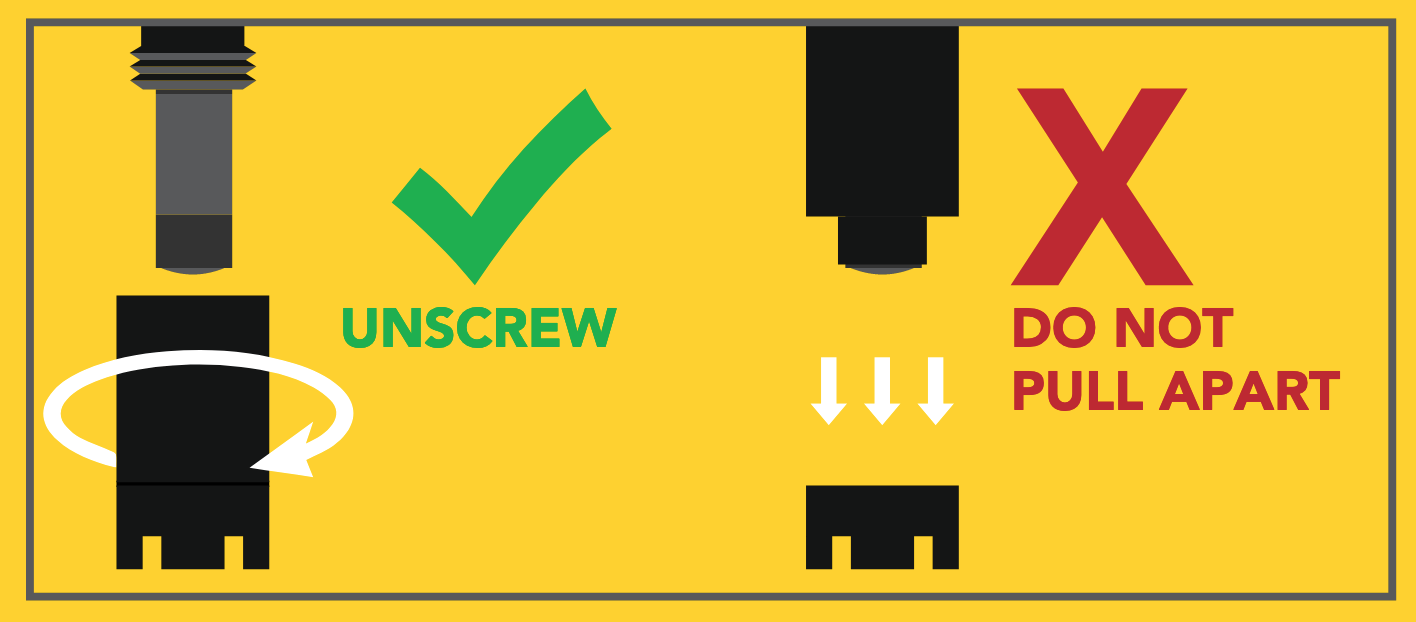
- When you open the probe the first time, make sure you only open the rubber cap, and not any sensor component such as the membrane cap
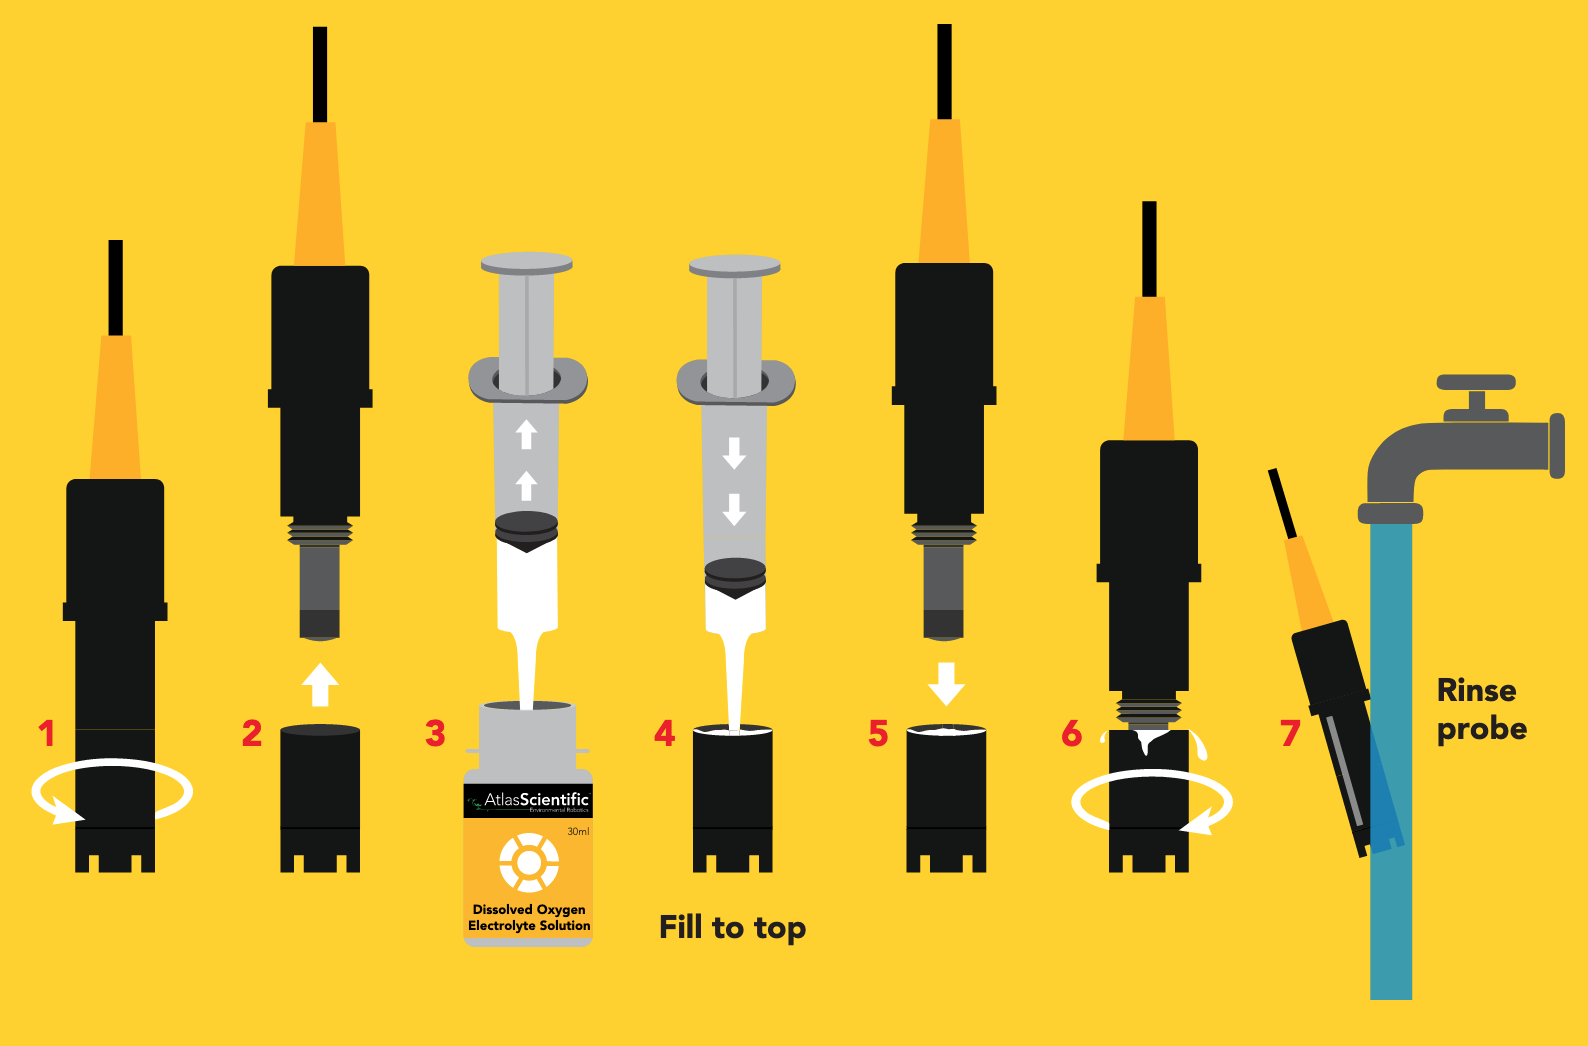
- The sensor has an electrolyte solution inside to support the chemical reaction in the electrodes. This solution depletes over time, as the sensor is used and it will generate a solid residue that needs to be cleaned periodically (roughly every 6 months for the Mini DO probe, but better to check)
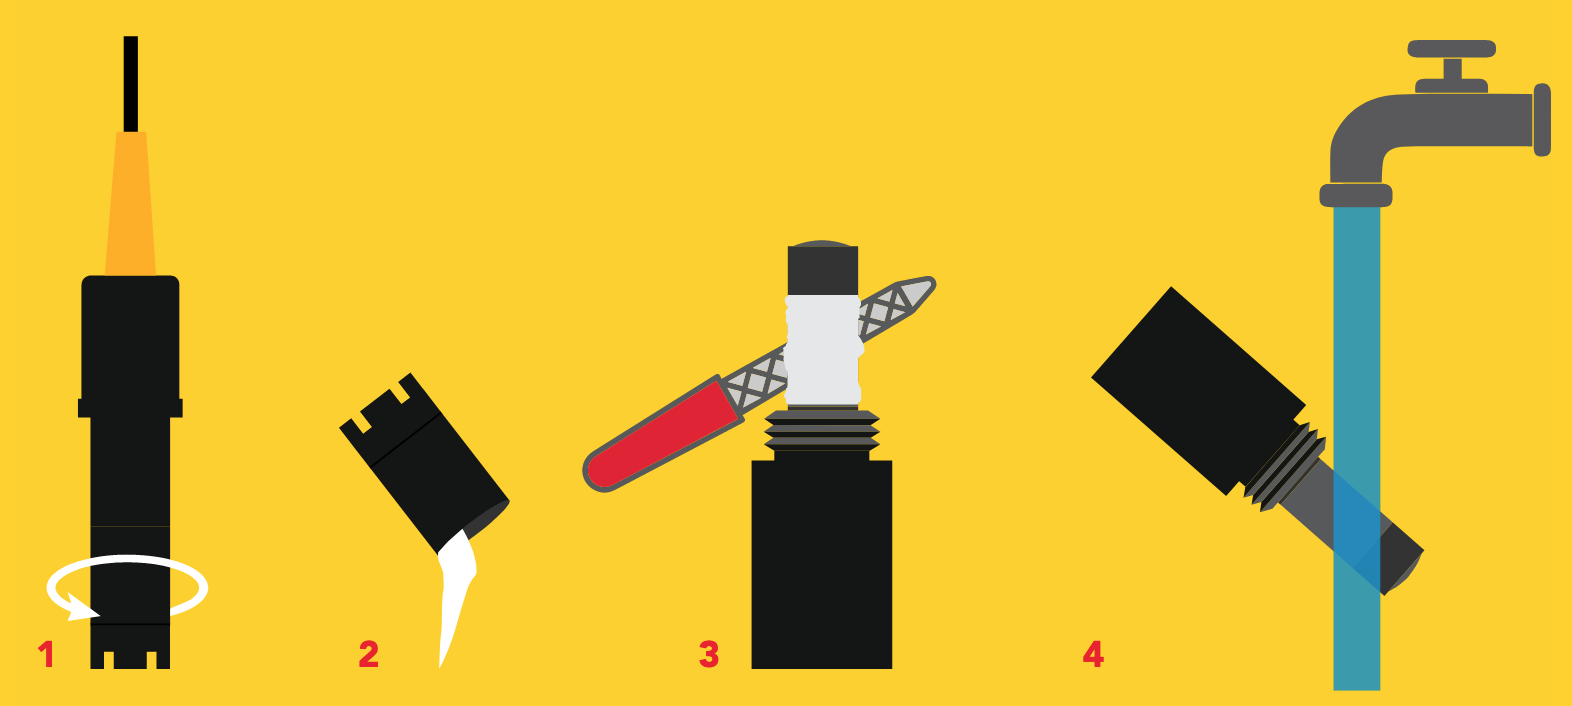
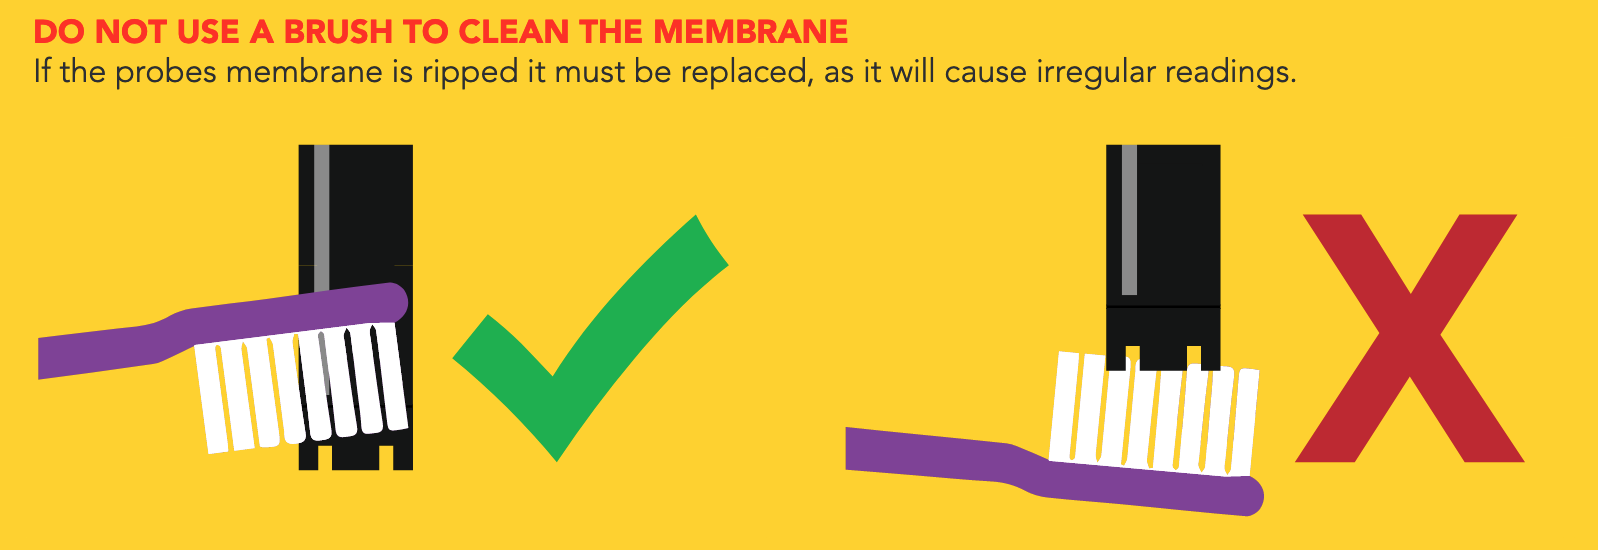
- You can recondition the sensor with a small file and remove all Zinc Oxyde. Make sure that the probe membrane is cleaned with a very soft brush both inside and outside. The membrane can be replaced if damaged. Make sure it is in good conditions because it will otherwise leak the electrolyte solution and the sensor will work erratically.
First time use? Do it
Even it the sensor is brand new, we recommend you follow this process to avoid issues.
pH and ORP
No particular consideration for these probes, other than they are very delicate:
Storage solution
Both probes need storage solution in a small soaker bottle to prevent it from drying out.
If the probe is not being used you need to put the soaker bottle back on.
Maintenance
Make sure that the sensors are cleaned frequently, specially if deployed on the field. In some cases, sensors will be affected by biofouling and they will need more or less often cleanup - in some cases weekly!

Public Domain, Link