Chirp Soil Moisture

Image Credit: WeMakeThings
Soil Moisture
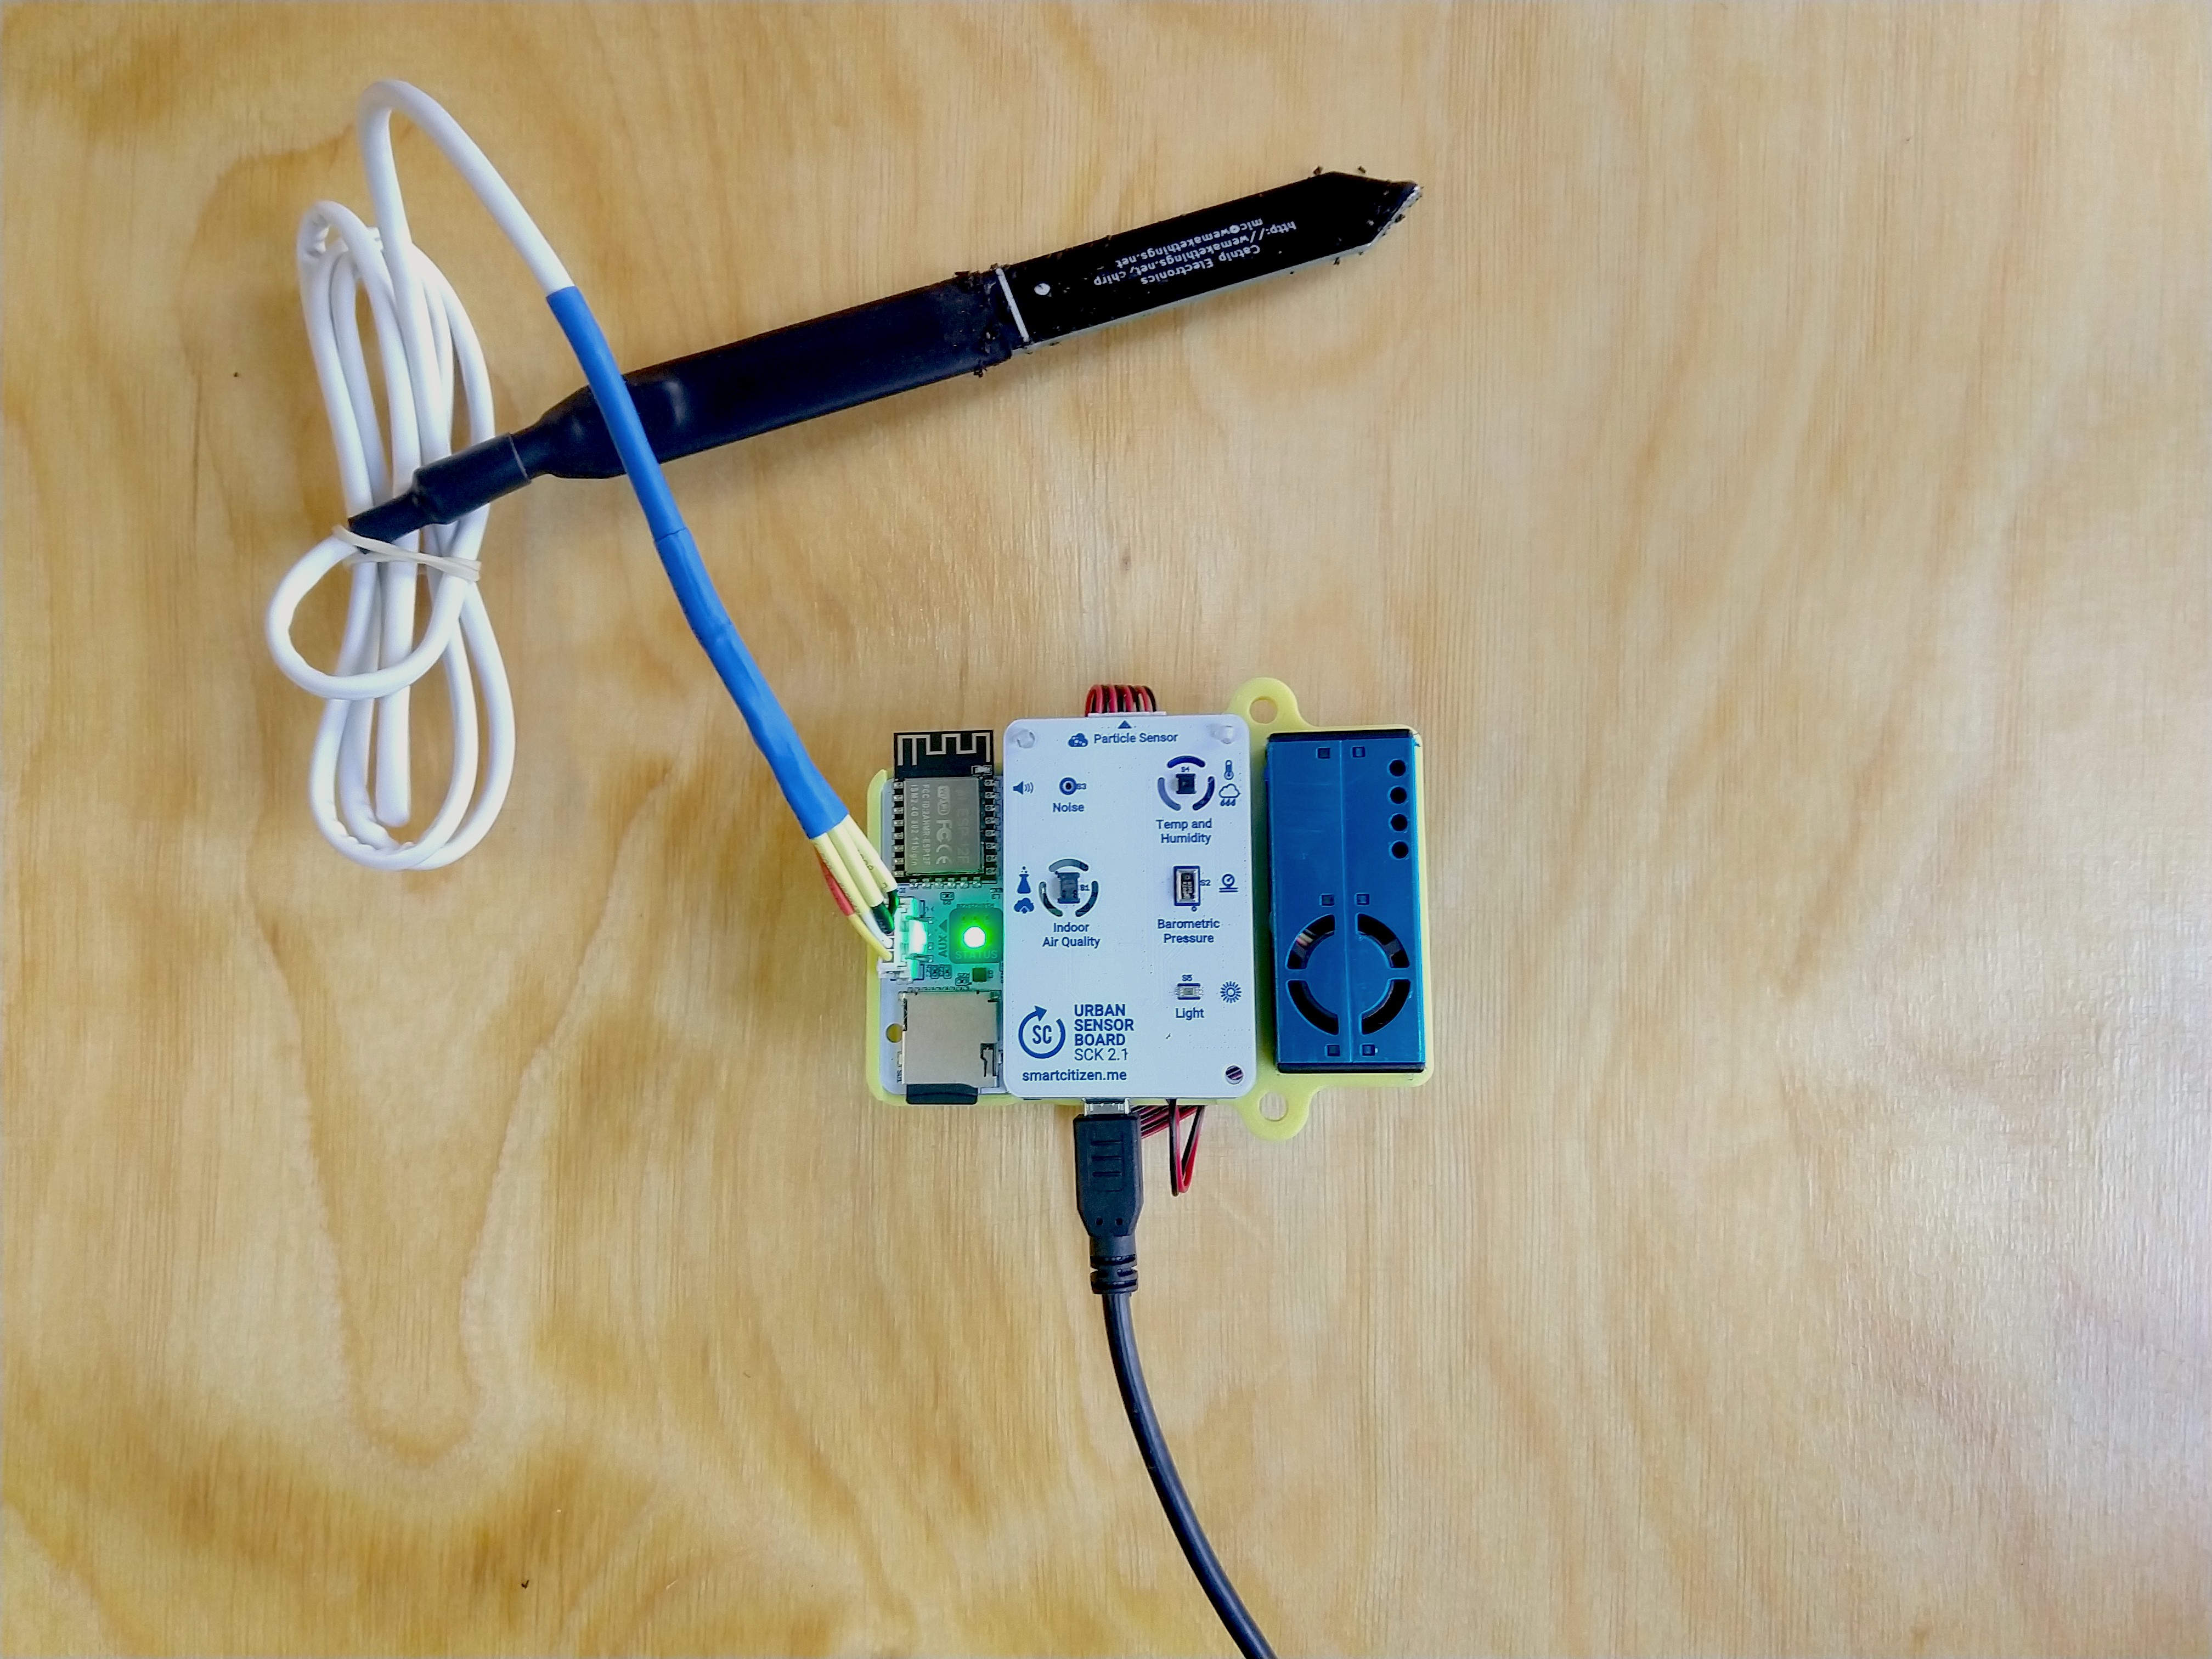
The Chirp! Sensor is a low cost moisture and temperature sensor developed by WeMakeThings: a hackers and engineers collective based in Vilnius, Lithuania. Their hardware and software are fully open-source, and it can be easily integrated but also replicated and customized for new projects.
Working principle
The sensor uses capacitive sensing to measure soil's moisture. A 1MHz square wave is output from the chip through a resistor into a big pad that, together with the surrounding ground plane, it forms a parasitic capacitor. The resistor and the capacitor create a low pass filter which cut-off frequency changes with changing capacitance. The soil around the sensor acts as an electrolyte whose dielectric constant changes depending on the amount of moisture in it, so the capacitance of our makeshift capacitor changes too. The filtered square wave is then fed into a peak detector formed of out a diode and a capacitor. An ADC measures this voltage in the microcontroller. The sensor also includes a temperature sensor with a calculated absolute measurement accuracy around 2%.
Usage and considerations
There are different versions of the Chirp sensor, and they are automatically recognized by the SCK. A Grove 4 pin Female Jumper to Grove will need to be used with the sensor to connect it to the SCK. The original Chirp sensors come coated with PRF202 - a moisture resistant varnish for electronics, but it is not enough for actual deployment. For such, one must add additional protection to the whole sensor. We suggest polyester or epoxy resin. However, you must note that sensitivity of the sensor will decrease depending on how thick the layer you are going to apply and might need to be recalibrated. We also recommend covering the electronics with heat shrink to fully waterproof the sensor. Some versions already include a pre-ruggedized sensor, which is a recommended solution for a faster use.
Calibration
Depending on the application, the sensor would need to be calibrated in with different procedures, but as a general guideline, we need to normalise its readings. Without this process, the raw sensor readings will be meaningless to the user and only some trends could be analysed. This section is a digest of some of these procedures, and more information is given in the notes below.
In case of irrigation scheduling, it is generally sufficient to simply match the raw readings from each sensor at both 0% (held in air) and 100% water levels (submerged in water). This is, of course, an approximation and will need some further analysis from the user to determine when to irrigate. When a more accurate measurement is required, the sensor needs to be calibrated with the actual soil where it's going to be deployed, since different types of soil will have different capacities. A valid approach is to prepare different samples of the soil with different levels of saturation, and adapt the sensor readings for it.

Image Source: Edaphic Scientific
If we are not aiming to get a full-fledged sensor reading, we will only need to measure the sensor in dry air and fully submerged in water. For that, we will use:
- A laptop with a serial interface. For instance, the Arduino IDE
- Our sensor
- A cup filled up with water and a napkin
Step-by-step
The sensor can be calibrated using the shell interface. The process is as follows:
- Connect your kit to a computer and open the terminal for the SCK. If you use the Arduino IDE, go to Tools > Serial Monitor and select
115200 baudat the bottom right corner - If you use the IDE type
sensoron the top and clickSend - Check if the output has something like
Soil Moisture Raw (60 sec)afterEnabled - If it's
Enabled, dry the sensor and type in:read soil moisture raw. Repeat this command 5-10 times until you get an stable output (repeat command with arrow up) - Put the sensor in a cup of water (until the line). Then read the value again
read soil moisture rawseveral times. - Once you have both values, type in:
control moisture cal XXX YYYwhere XXX and YYY are the dry and wet values that you just measured - Check that the reading is OK by:
read soil moisture percent. You should receive an answer in rh%
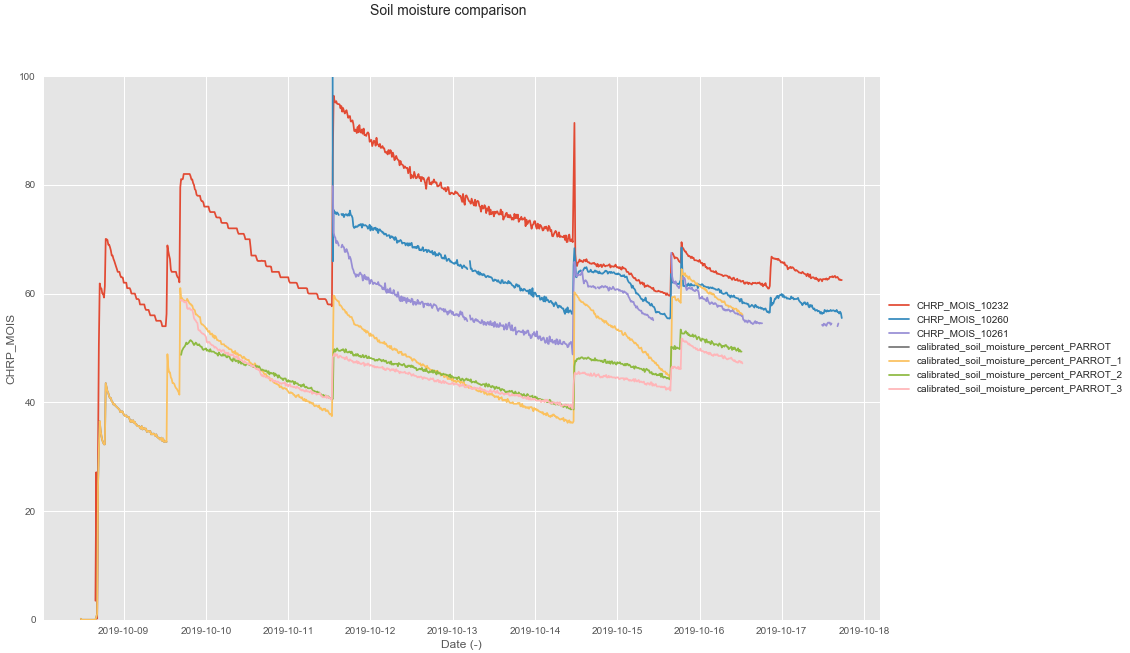
Sensor evaluation
Three Chirp sensors were compared to the Parrot Flower Power (now discontinued). The Flower Power can measure several metrics, such as light, temperature, fertilizer and soil moisture. In this test, we compared the soil moisture readings for three Flower Parrot sensors, compared to three Chirp sensors. Both sensors show a good behaviour and the values can be correlated with good R2 scores. The approach for this low-cost sensors, in general, should be more qualitative than quantitative (analyse the trends rather than the absolute values), since their values appear to differ between sensors, even when normalised. In the particular case of the Chirp sensor, the sensor seems to be fairly normalised with simply a two calibration values (water and air) as a first approach.