Thirdy Party Sensor
This page will explain how to use or implement third party sensors.
What are third party sensors?
By third party sensors, we mean sensors that have been developed by others, with no affiliation to the Smart Citizen Team.
This page is a digest and updated version of the Making Sense D2.3 Smart Citizen Toolkit report and Making Sense D.24 Smart Citizen Toolkit report updates. Both these reports reflect information for the SCK 1.5, which is not a commercially available version of the kit. This guide is an update version for the SCK 2.X series.
Publishing data using custom devices
The Smart Citizen Platform supports data from any sensor that has a numerical digital output.
Other data types
The Smart Citizen API supports other devices to publish data to the platform by previously agreeing with the Smart Citizen terms and conditions.
For each sensor type (for instance, a particular temperature or PM sensor), a sensor object needs to be created on the platform. Only the administrators of the platform can take this action, so reach out via the forum, in case there is no sensor. You can check all sensors available on the sensors API endpoint: https://api.smartcitizen.me/sensors.
This sensor object needs include the hardware details. For instance:
{
    "id":88,
    "uuid":"c2072a22-4d81-4d7c-a38c-af9458b8f309",
    "parent_id":86,
    "name":"Plantower PMS5003 - PM10",
    "description":"Particle Matter PM 10",
    "unit":"ug/m3",
    "tags":[],
    "datasheet":null,
    "unit_definition":null,
    "created_at":"2018-05-22T13:20:34Z",
    "updated_at":"2023-05-23T11:12:06Z",
    "measurement":{
        "id":13,
        "uuid":"30e5b614-ab7e-46bc-b6f7-fa9a30926ce9",
        "name":"PM 10",
        "description":"PM stands for particulate matter: the term for a mixture of solid particles and liquid droplets found in the air. Some particles, such as dust, dirt, soot, or smoke, are large or dark enough to be seen with the naked eye.",
        "definition":null
    }
}
The minimal sensor includes the name, description, unit and measurement. Check the https://developer.smartcitizen.me/#sensors documentation on the definitions.
Too much information?
Drop an email to support@smartcitizen.me and we will try to help!
Use of already supported sensors
The auxiliary port is designed to expand the Data board by adding new sensors via the common I2C standard. However other protocols are supported, such as SPI or UART, although only one is supported, being the most normal being I2C. The pins have the following default configuration:
| PIN | PORT | Function |
|---|---|---|
| 1 | SCL | I2C (by software: 1-WIRE or other) |
| 2 | SDA | I2C (by software: 1-WIRE or other) |
| 3 | VCC | 3.3V |
| 4 | GND | Ground |
By connecting any of the supported sensors to the SCK, it will automatically be detected and data will be logged into the SD-card. You can check the output of the sensor command in the Serial output:
SCK> sensor
Enabled
----------
Temperature (60 sec)
Humidity (60 sec)
Ext Temperature (60 sec)
Ext Humidity (60 sec)
Battery (60 sec)
Light (60 sec)
Noise dBA (60 sec)
Barometric pressure (60 sec)
PM 1.0 (60 sec)
PM 2.5 (60 sec)
PM 10.0 (60 sec)
Implementing other sensors on the firmware
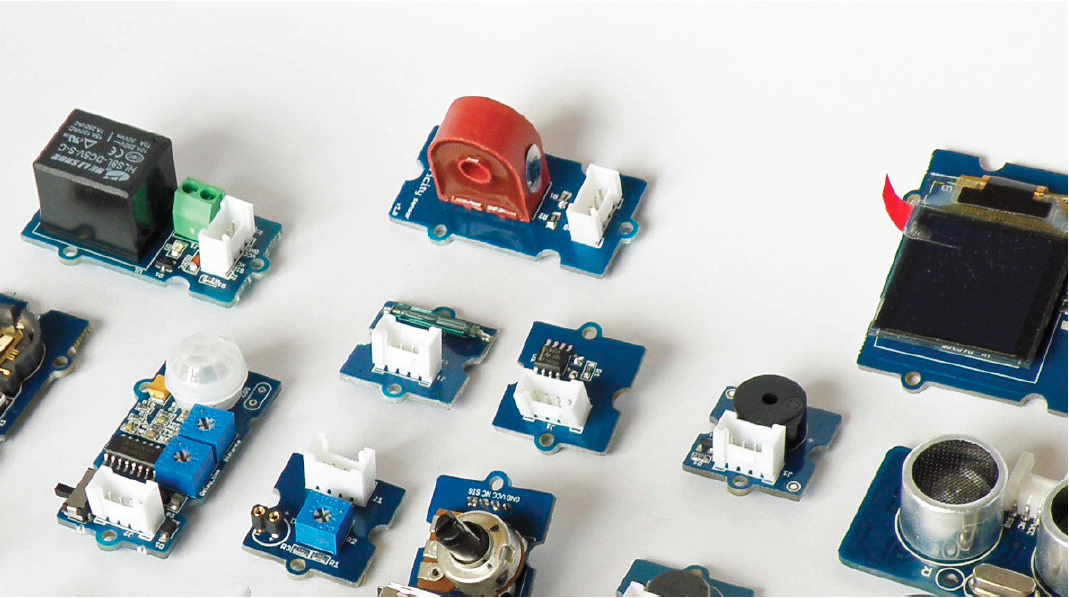
Using SEEED Studio Grove bricks
You can use off-the-shelf sensors from the extensive Grove open hardware sensor library, removing the need to build our own sensor add-ons from scratch.
Implementation of other sensors goes through the modification of the Firmware. This is an advanced user feature, and previous programming experience in C++ is necessary.
The workflow we normally follow for this goes like:
- Find a library from that has methods to implement the hardware in question. Good places to look at are Adafruit's repository, Sparkfun's repository or a global Github search
- Add it to the
platformio.inifile in thesamdirectory of the firmware. - Add a
#defineto include the sensor for your configuration (see the examples). You need an ID for it to be stored on the platform - Mostly all the implementation should happen in
SCKAux.handSCKAux.cpp. Make sure that as you implement this, also add the define from the previous point. This is a workaround to avoid filling up the flash memory of the MCU
Example definitions
You can see example definitions on: https://github.com/fablabbcn/smartcitizen-kit-2x/blob/master/sam/src/SckAux.h
Modifying the SCKAux.h and SCKAux.cpp means:
- Include the library from previous item in
SCKAux.h - Add the object definitions (like this one: in
SCKAux.h) mostly from the library. Specifically, you need wrapping methods to:- Start the sensor in
SCKAux.hand inSCKAux.cpp - Stop it in
SCKAux.hand inSCKAux.cpp - Get reading in
SCKAux.hand inSCKAux.cpp - Write down the addresses in
SCKAux.h
- Start the sensor in
Understanding sensor names
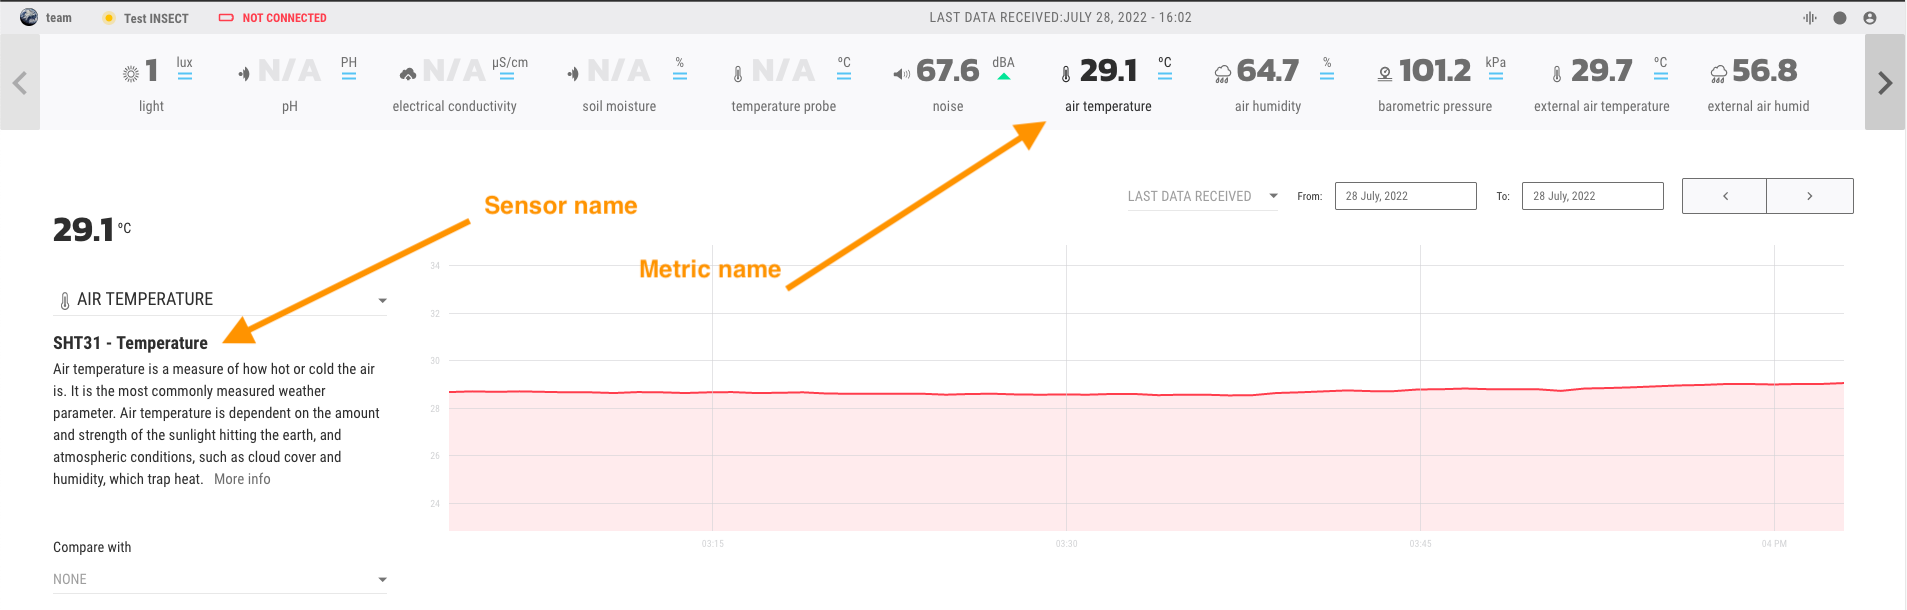
Using additional sensors, can be at times confusing, because we might end up in the same kit with several sensors that measure exactly the same metric (for instance, 5 different temperature sensors!). To be able to differentiate between them, use the actual model of the hardware. An example is shown below for different temperature sensors in the same device:
-
This is an air temperature sensor (a Sensirion SHT31), which you can find in the Urban Board 2.1:
-
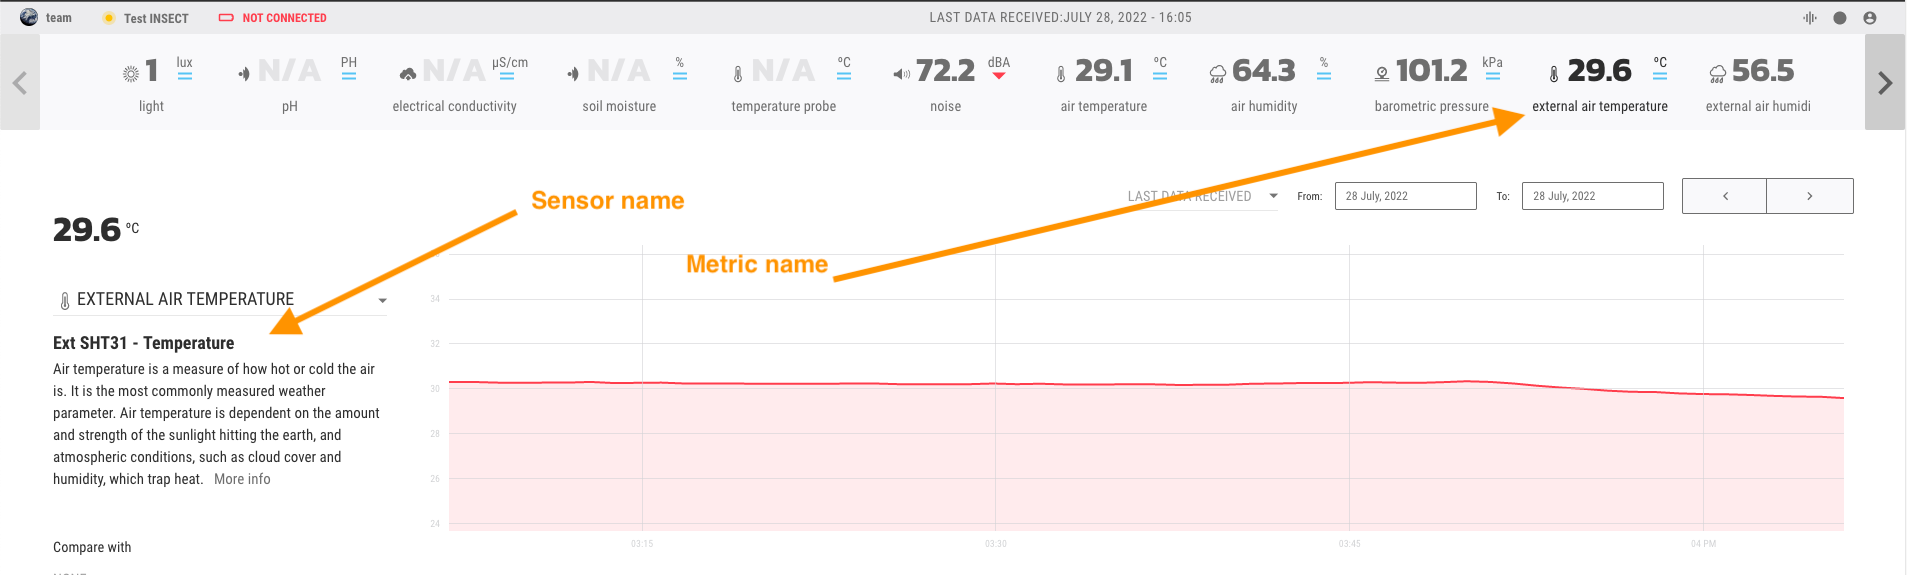
This is an external air temperature sensor (also a Sensirion SHT31), which is an external probe. You can differentiate it because is an external sensor:
-
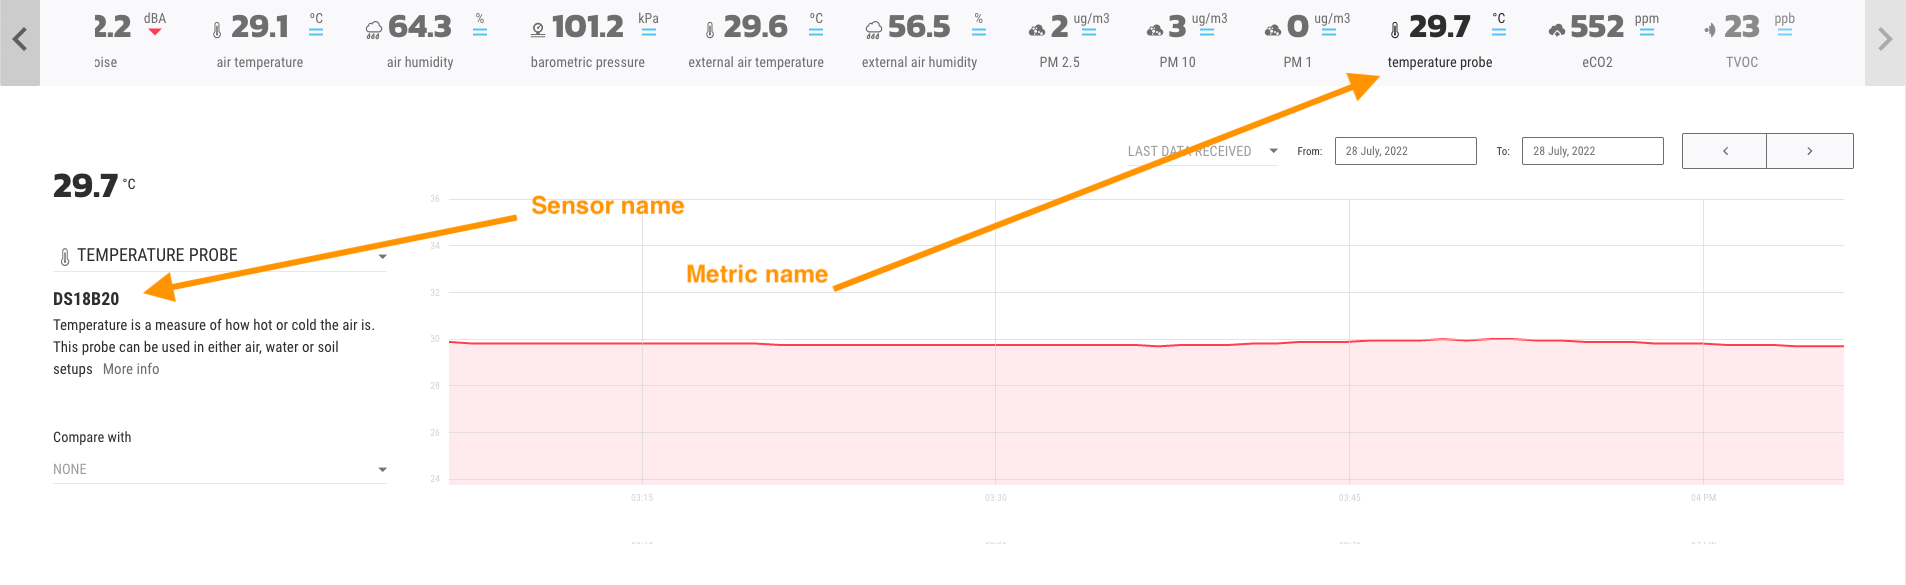
This is an external temperature sensor (this time a MAXIM DS18B20), which is an external probe, and waterproof - not only meant for air measurements (but also water or soil):
-
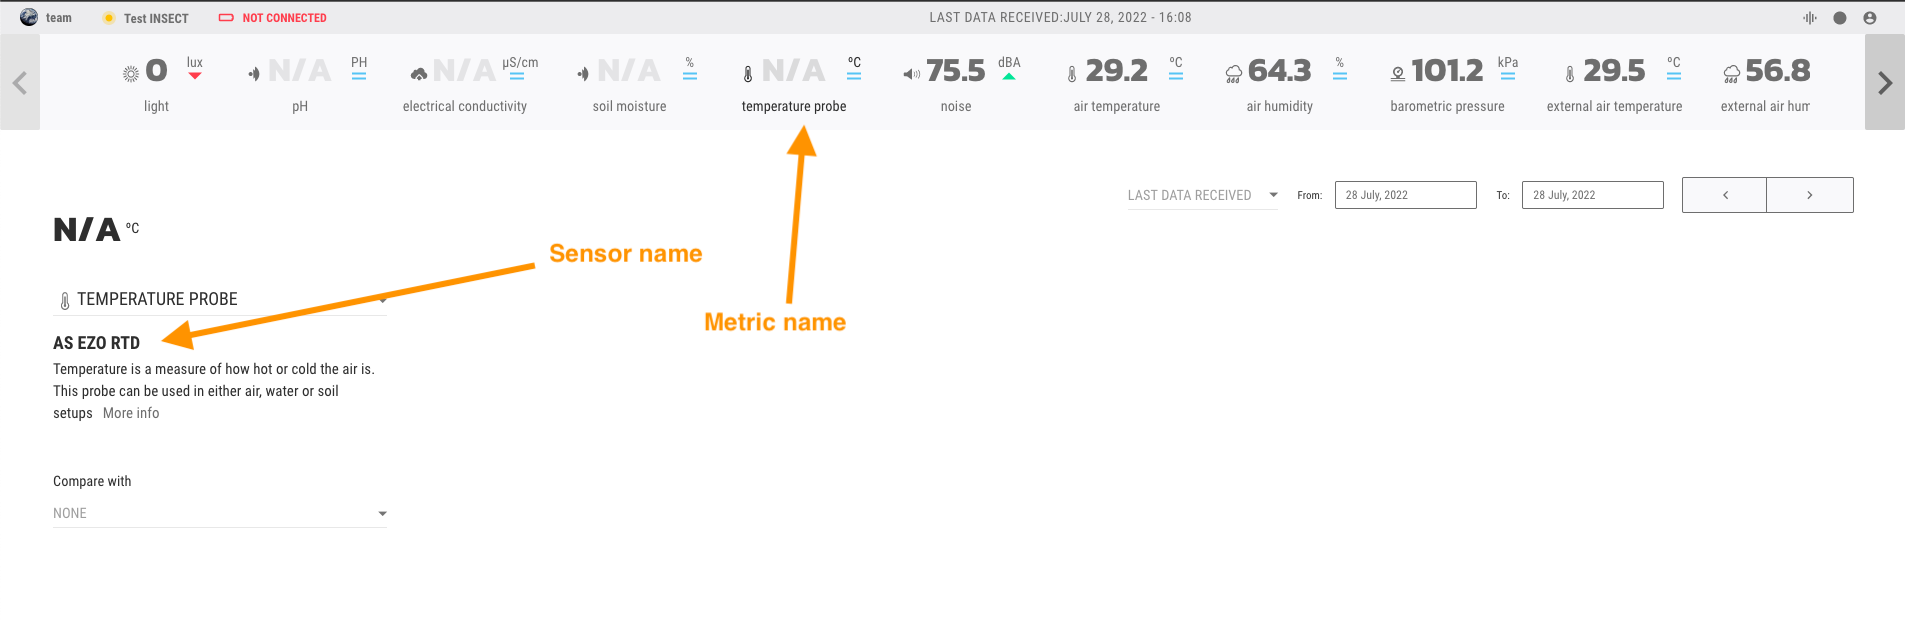
This is also external temperature sensor (this time a Atlas EZO RTD - a PT1000 probe), which is an external probe, and waterproof - not only meant for air measurements (but also water or soil):
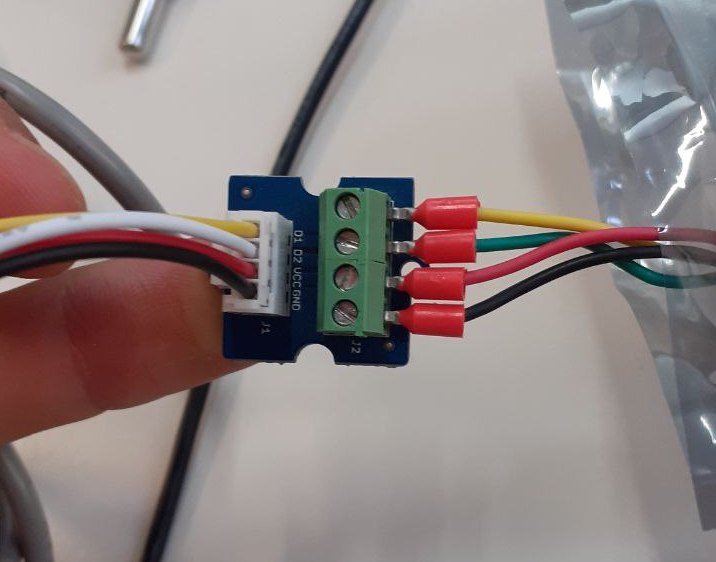
Sensors with open leads
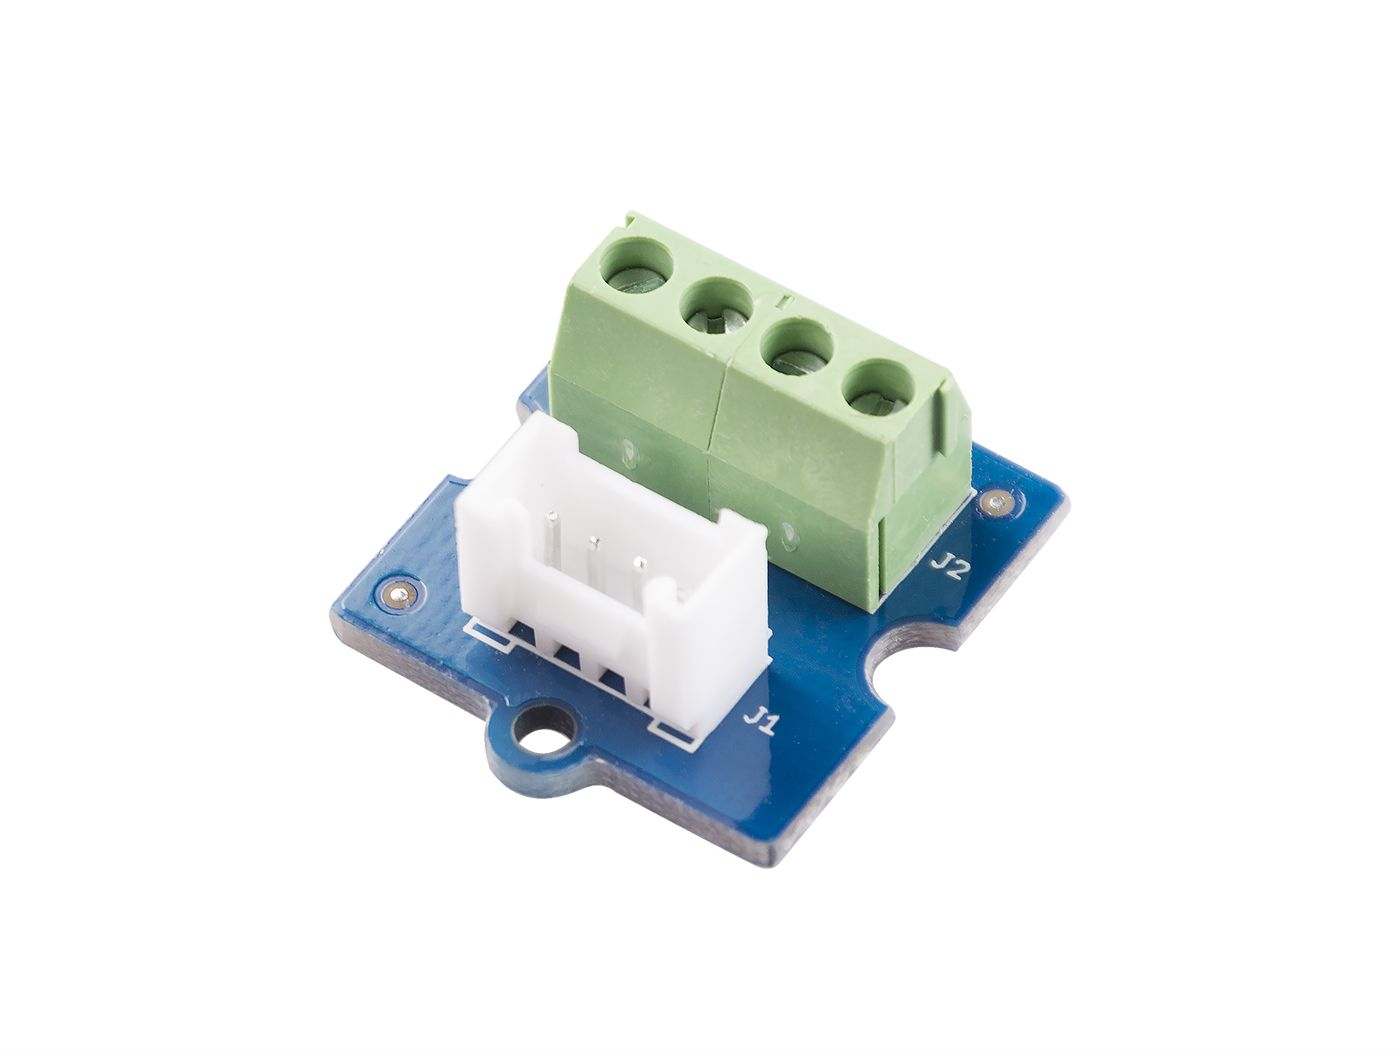
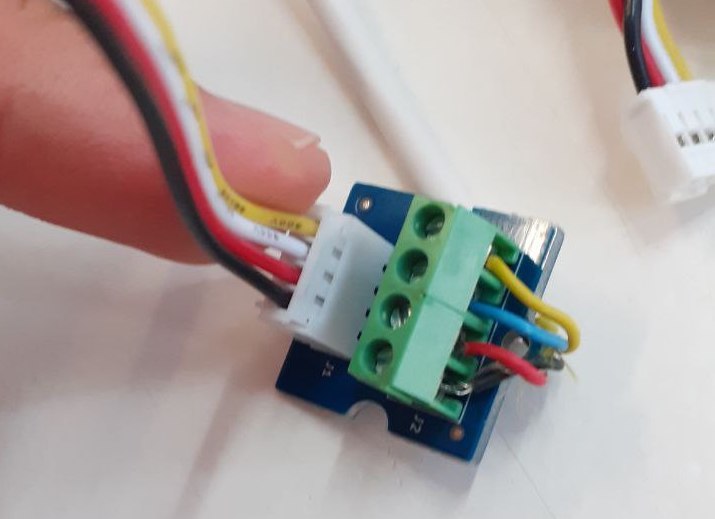
If you are using sensors with open leads (not terminated cables), you can use this grove to screw connector. However, you need to know how to connect the cables to it:
Examples for specific sensors
If you are using a Catnip Chirp Soil Moisture sensor:
 Or if you are using a DF-Robot Weather proof temperature sensor: